#1: The bumper guide to budget modding! Author: Dabamash, Location: The car in frontPosted: Thu Apr 07, 2011 1:05 pm ---- So, the economy sucks, David Cameron is bleeding your wallet dry to pay for his multiple houses and cars and petrol prices are soaring.
On the other hand, your car looks like crap.
So here's the bumper guide to modifying your 206 on a budget!
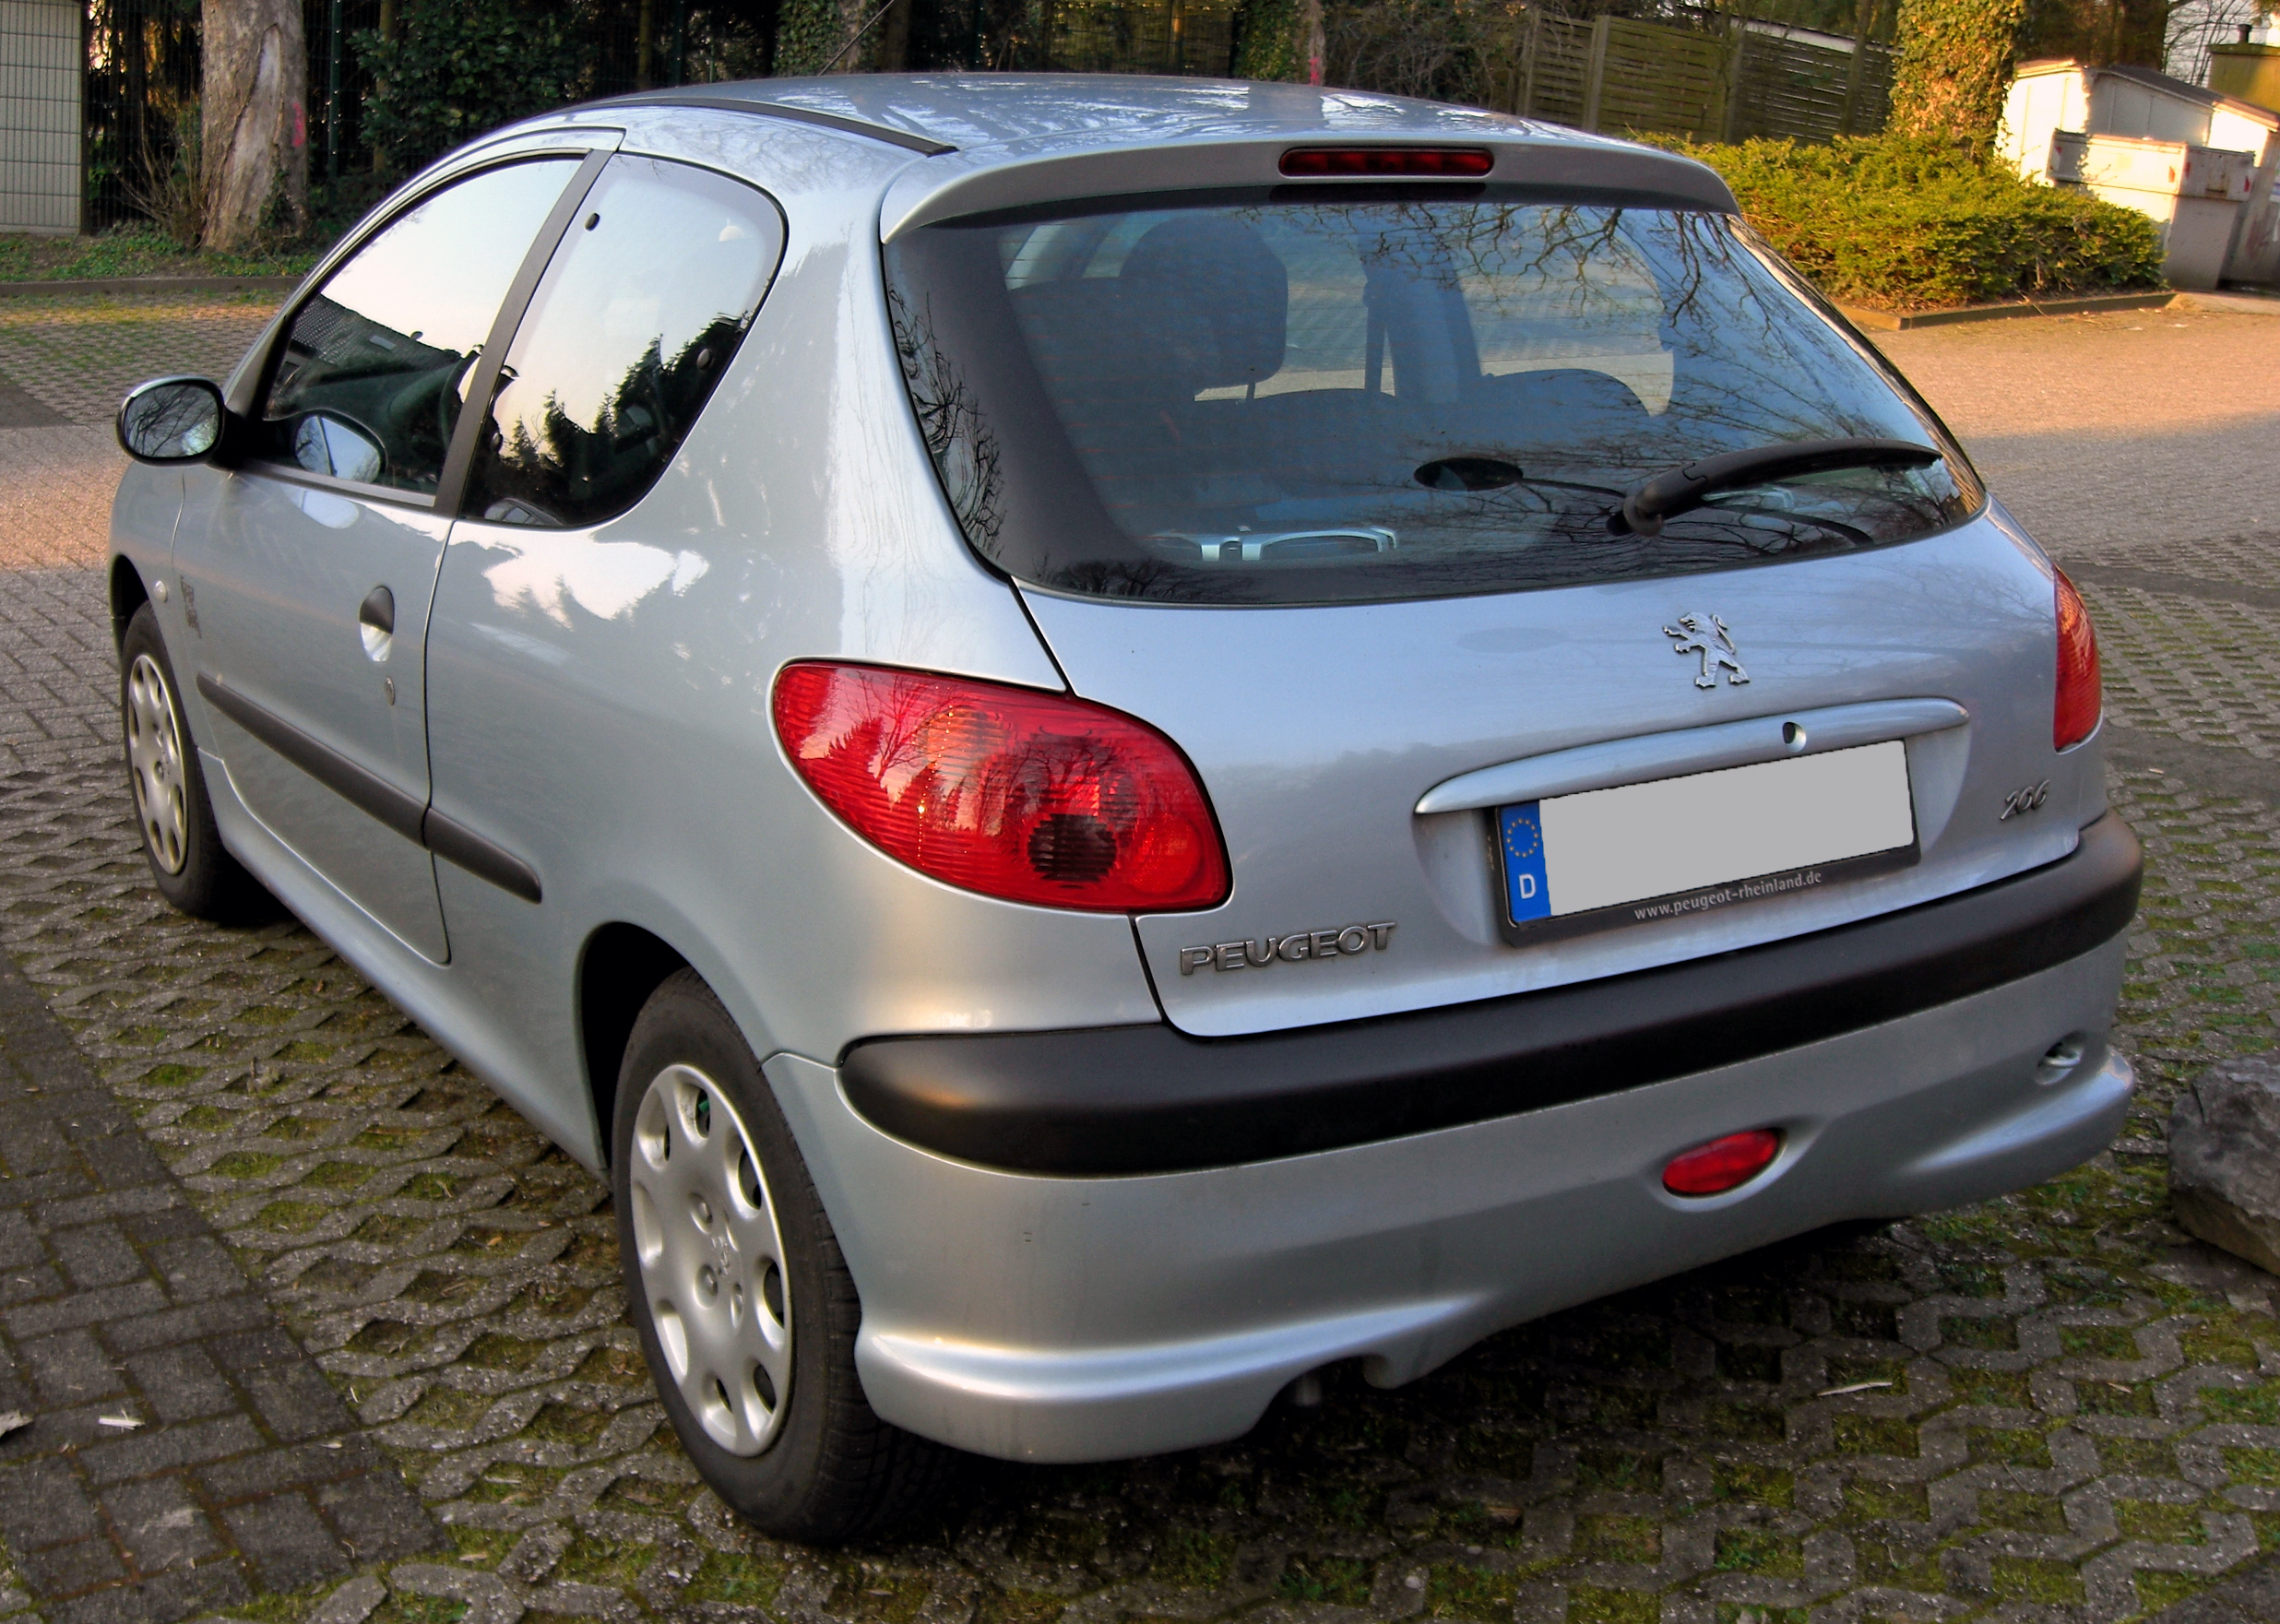
1. Debadge the rear.
It's an old one and a good 'un and can make your car look much sleeker for a budget of exactly £0.
Obviously, there's the added cost of cleaning materials and T-Cut and stuff, but if you're lucky, you won't need it
2. Pull off your B pillar vinyl
Yeah, there's much debate as to whether this looks good or not, but I did it and I think it looks better.
Simply get a hairdryer and wave it over the black vinyl on your b pillar for a while, then pull it off. Do a small part on the inside of the door first to make sure that your car is painted underneath.
A small mod and slightly more costly than the last two. Replacing your standard wipers with aero style wipers can greatly modernise the front of your car, along with the added visibility in the rain. Many people suggest Bosch Aerotwins as being the best quality for your money.
4. Colour Coding
Colour coding is standard on higher end/newer models of 206. Reason? it looks great! This can be done very cheaply and will improve the look of
your car enormously.
Since you've just colour coded you car, why not paint your front badge as well? Or you could paint it black, or any colour you want to be honest
Here's a picture of Crossie's car to demonstrate (sorry Crossie lol)
6. Light Masking
This is a forum favourite. Originally done by Valeo, the Phase 2 crystal headlights with black innards have become very popular in the modding scene. As such, when Valeo stopped making them, people started making their own!
You can do your foglights to match if you are so inclined, and there is another how-to HERE to cover that.
7. Stickers
Again, stickers are like marmite, you either love them or hate them. I, personally, have a 206info sticker over my front headlight.
Stickers are cheap and easy to do, so they're worth considering
8. Door card trim
Get your hands on some cloth and retrim your interior. It can make an old, faded interior look much more luxurious and can be done on a fairly low budget.
Leather, suede, leopard print, pink and furry, your choice
Everyone knows that sporty cars have big red brembo brakes. So you might as well make your crappy 1.1 look sporty and give the old calipers a lick of paint
I believe Hammerite is generally considered a good choice of brand.
You might as well experiment with colours. The info community loves a bit of originality
10. Change your interior lights colours
Changing your dial lights from orange to something a bit more jazzy can improve the look of your car at night and make you feel like you're drive a Ferrari, rather than a piece of French s**t.
Mr Helsop has done a great how-to to guide you through it HERE.
It's worth noting that if you have a pre-plex pug, you can simply buy a lockwood dial and not bother faffing about with LED's from HERE
While you're at it, you can also change the main interior convenience light with something a bit brighter like an SMD tower to replace the standard bulb.
11. De-wiper your rear
This is another simple mod that looks great when done in conjunction with a debadge.
This is simply a bit of plastic, but it can make the back of your car look a lot more tidy if you have a Phase 1. Have a look at the next picture in the thread to see what one looks like. You can get these fairly cheaply from scrapyards, or occasional sellers on the forum. You'll need a bit of luck to find these at a scrapyard though.
13. Phase 2 Rear Lights
Again, this is an upgrade from phase 1 to phase 2. Keep an eye out for phase 2 lights in the For Sale section, as the often come up below £40. They are also really simple to fit, which is a bonus.
Obviously, unless you can find these at a scrap yard, this is a cheap, but probably not a bargain basement mod.
14. Interior Spraying
Spraying interior components, such as the door handles, central console, vents etc is often a popular mod. If you have some paint spare from colour coding, you could colour code the interior or engine cover as well.
15. Wraps
The cost of this is debatable and variable, but wrapping parts of the interior or exterior, such as wing mirror caps with carbon 3M DiNoc can be a great way of adding that sporty flair.
16. Sidelights
Smd Sidelights are a great way of adding that modern twist to the front of your car as they remove the yellow light and replace it with a bluer/whiter light. There are also much brighter than standard halogens, so there is an added safety aspect.
You can get a huge range of SMD sidelights. You'll need 501 lights to replace your old sidelights.
They come in single SMD, square SMD, SMD towers, multiple flat SMDs etc. However, the best replacement for your old sidelights are 9 SMD towers. These can usually be found on eBay for less than a tenner.
This is due to the fact that they are small enough to fit in the sidelight hole, but give full 360 degree light output without any loss of brightness
I recommend these
17. PH2 washers
If you have a phase 1 206, your window washer jets only spray out a single jet of water. Phase 2 jets mist your whole window with water instead. They look a lot cooler when spraying and also wash your window more efficiently. The best bit: You can pick them up for free from a scrapyard.
They are also cheap to buy and really easy to fit.
Well, that'll do for now. If you can think of anything obvious that I've missed, whack it in the comments and I'll add it to this post.
Hope that helped Last edited by Dabamash on Sat May 07, 2011 2:51 pm; edited 22 times in total
#2: Re: The bumper guide to modding on a budget Author: tomd0801754, Location: MoscowPosted: Thu Apr 07, 2011 1:06 pm ---- OI! My guide for removing rear wiper!
#3: Re: The bumper guide to modding on a budget Author: Dabamash, Location: The car in frontPosted: Thu Apr 07, 2011 1:07 pm ----
tomd0801754 wrote:
OI! My guide for removing rear wiper!
I'll add it
#4: Re: The bumper guide to modding on a budget Author: tomd0801754, Location: MoscowPosted: Thu Apr 07, 2011 1:10 pm ----
Dabamash wrote:
tomd0801754 wrote:
OI! My guide for removing rear wiper!
I'll add it
Good dog!
Haha, now what can I do for £0.20p threads will be no more! BOOMM!!!
(Seriously, good post)
#5: Re: The bumper guide to modding on a budget Author: Ali_H, Location: Chichester, SussexPosted: Thu Apr 07, 2011 1:12 pm ----
tomd0801754 wrote:
Dabamash wrote:
tomd0801754 wrote:
OI! My guide for removing rear wiper!
I'll add it
Good dog!
Haha, now what can I do for £0.20p threads will be no more! BOOMM!!!
(Seriously, good post)
You don't believe that any more than the rest of us...lol
#6: Re: The bumper guide to modding on a budget Author: Dabamash, Location: The car in frontPosted: Thu Apr 07, 2011 1:13 pm ----
tomd0801754 wrote:
Dabamash wrote:
tomd0801754 wrote:
OI! My guide for removing rear wiper!
I'll add it
Good dog!
Haha, now what can I do for £0.20p threads will be no more! BOOMM!!!
(Seriously, good post)
Lol, no they won't. People don't read
#7: Re: The bumper guide to modding on a budget Author: tomd0801754, Location: MoscowPosted: Thu Apr 07, 2011 1:17 pm ----
Ali_H wrote:
tomd0801754 wrote:
Dabamash wrote:
tomd0801754 wrote:
OI! My guide for removing rear wiper!
I'll add it
Good dog!
Haha, now what can I do for £0.20p threads will be no more! BOOMM!!!
(Seriously, good post)
You don't believe that any more than the rest of us...lol
I can but dream! One day Info will be erradicated of stupid questions and silly people...
#8: Re: The bumper guide to modding on a budget Author: Dabamash, Location: The car in frontPosted: Thu Apr 07, 2011 1:19 pm ----
tomd0801754 wrote:
Ali_H wrote:
tomd0801754 wrote:
Dabamash wrote:
tomd0801754 wrote:
OI! My guide for removing rear wiper!
I'll add it
Good dog!
Haha, now what can I do for £0.20p threads will be no more! BOOMM!!!
(Seriously, good post)
You don't believe that any more than the rest of us...lol
I can but dream! One day Info will be erradicated of stupid questions and silly people...
When it shuts down
#9: Re: The bumper guide to modding on a budget Author: Lee, Location: EnglandPosted: Thu Apr 07, 2011 1:29 pm ---- www.boyracerguide.co.uk/guide.php
#10: Re: The bumper guide to modding on a budget Author: Jay794, Location: Sheffield/Chesterfield/DronfieldPosted: Thu Apr 07, 2011 1:33 pm ---- This is a great guide Daba, should stop a few "modding on a budget" threads. What about a phase 2 boot strip and phase 2 rear lights? They're relativity cheap from a scrapper?
#11: Re: The bumper guide to modding on a budget Author: Dabamash, Location: The car in frontPosted: Thu Apr 07, 2011 1:34 pm ----
Jay794 wrote:
This is a great guide Daba, should stop a few "modding on a budget" threads. What about a phase 2 boot strip and phase 2 rear lights? They're relativity cheap from a scrapper?
Yeah, I suppose they are fairly cheap. I'll stick them in
#12: Re: The bumper guide to modding on a budget Author: tomd0801754, Location: MoscowPosted: Thu Apr 07, 2011 1:35 pm ---- Depends your classification of cheap... £30 for each 2nd hand of here, and you have to be pretty lucky to find them in a scrapyard...
#13: Re: The bumper guide to modding on a budget Author: j3xoc, Location: bedfordshirePosted: Thu Apr 07, 2011 1:40 pm ---- pull off your b pillar vinyl
does this actually look good? and does it leave much glue ect. after pulling off? on your it looks great because the blue really stands out but mines gold and not sure if it will or even what's behind that horrid black stuff lol
#14: Re: The bumper guide to modding on a budget Author: Dabamash, Location: The car in frontPosted: Thu Apr 07, 2011 1:42 pm ----
j3xoc wrote:
pull off your b pillar vinyl
does this actually look good? and does it leave much glue ect. after pulling off? on your it looks great because the blue really stands out but mines gold and not sure if it will or even what's behind that horrid black stuff lol
The glue is a bit of a b***h to get off, but I managed it without even using a hair dryer. I imagine heating it first would get it off without any residue.
If you don't like it, you can probably re-wrap it with gloss black vinyl or something
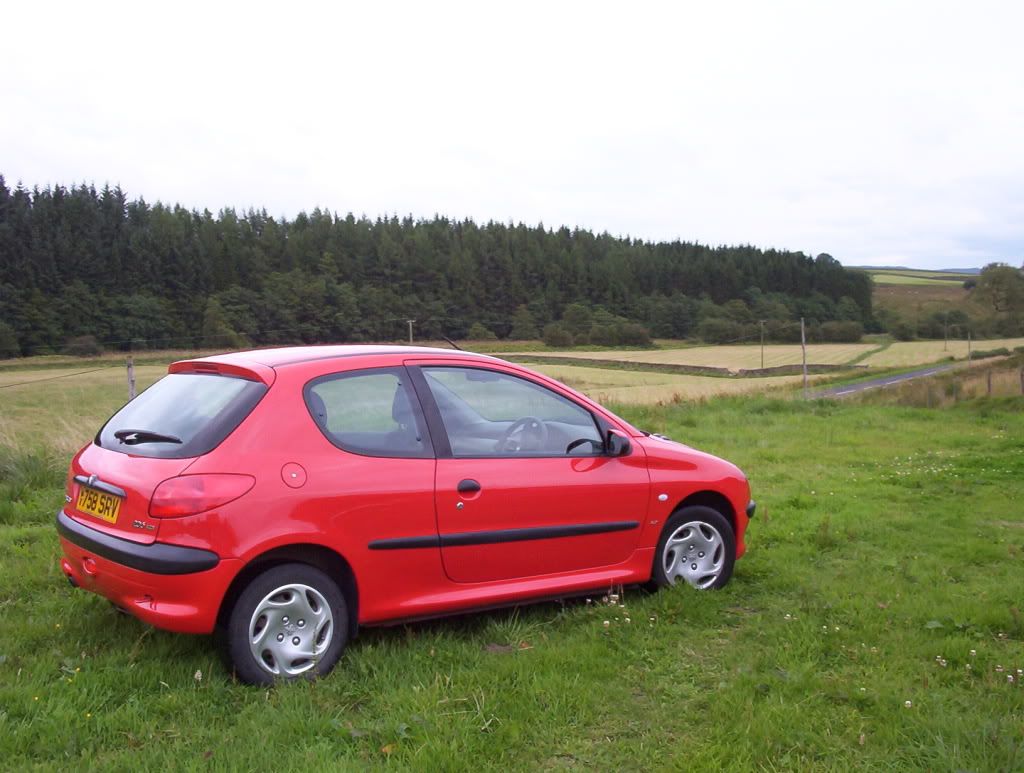
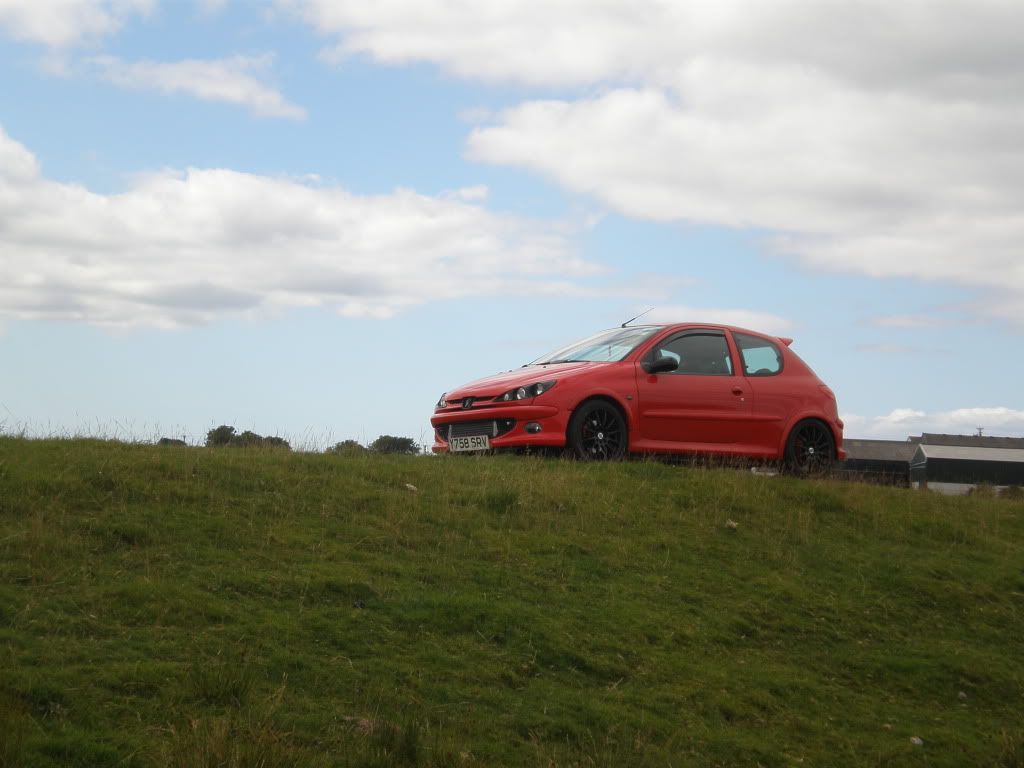
#15: Re: The bumper guide to modding on a budget Author: tomd0801754, Location: MoscowPosted: Thu Apr 07, 2011 1:43 pm ---- No glue residue.. Well, not after a quick wash.
Before:
After (Ignore every other single mod) :
#16: Re: The bumper guide to modding on a budget Author: j3xoc, Location: bedfordshirePosted: Thu Apr 07, 2011 1:51 pm ----
Dabamash wrote:
j3xoc wrote:
pull off your b pillar vinyl
does this actually look good? and does it leave much glue ect. after pulling off? on your it looks great because the blue really stands out but mines gold and not sure if it will or even what's behind that horrid black stuff lol
The glue is a bit of a b***h to get off, but I managed it without even using a hair dryer. I imagine heating it first would get it off without any residue.
If you don't like it, you can probably re-wrap it with gloss black vinyl or something
yer i suppose if i don't like it i could always put some more back on looks ace tho mate really makes a difference i think you know what iam guna do it tomorrow ill post a picture to show how it looks
#17: Re: The bumper guide to modding on a budget Author: Dabamash, Location: The car in frontPosted: Thu Apr 07, 2011 1:52 pm ----
j3xoc wrote:
Dabamash wrote:
j3xoc wrote:
pull off your b pillar vinyl
does this actually look good? and does it leave much glue ect. after pulling off? on your it looks great because the blue really stands out but mines gold and not sure if it will or even what's behind that horrid black stuff lol
The glue is a bit of a b***h to get off, but I managed it without even using a hair dryer. I imagine heating it first would get it off without any residue.
If you don't like it, you can probably re-wrap it with gloss black vinyl or something
yer i suppose if i don't like it i could always put some more back on looks ace tho mate really makes a difference i think you know what iam guna do it tomorrow ill post a picture to show how it looks
Nice one
Take your time with it and make sure your car is painted underneath before going wild on it lol
#18: Re: The bumper guide to modding on a budget Author: j3xoc, Location: bedfordshirePosted: Thu Apr 07, 2011 1:54 pm ---- that looks ace in red as-well thumbs up hopefully mine will look good like that as-well
#19: Re: The bumper guide to modding on a budget Author: j3xoc, Location: bedfordshirePosted: Thu Apr 07, 2011 1:56 pm ---- oh knowing my luck it will be some dull plastic under the vinyl and ive already pulled half off before thinking bugger lol
#20: Re: The bumper guide to modding on a budget Author: Dabamash, Location: The car in frontPosted: Thu Apr 07, 2011 1:58 pm ----
#21: Re: The bumper guide to modding on a budget Author: j3xoc, Location: bedfordshirePosted: Thu Apr 07, 2011 2:00 pm ---- aww cheers dude not bad a think will look quite good i might also have to touch up my back bumber as i have small scuff on corner and sticks out like sor thumb in my colour lol cheers for that mate
#22: Re: The bumper guide to modding on a budget Author: alexthekid, Location: Dewsbury Nr leedsPosted: Thu Apr 07, 2011 2:21 pm ---- I don't know if anyone else thinks this is a good idea but what about sprayig internal pieces on the car stiff like air vents door handle surrounds dash surround and ashtray lid . Cheapish and pretty easy
#23: Re: The bumper guide to modding on a budget Author: Jay794, Location: Sheffield/Chesterfield/DronfieldPosted: Thu Apr 07, 2011 2:23 pm ---- I suppose that comes under the CC'in Alex
#24: Re: The bumper guide to modding on a budget Author: Dabamash, Location: The car in frontPosted: Thu Apr 07, 2011 2:23 pm ----
alexthekid wrote:
I don't know if anyone else thinks this is a good idea but what about sprayig internal pieces on the car stiff like air vents door handle surrounds dash surround and ashtray lid . Cheapish and pretty easy
Yeah, a lot of people do that. I'll add it to the OP
#25: Re: The bumper guide to modding on a budget Author: j3xoc, Location: bedfordshirePosted: Thu Apr 07, 2011 2:25 pm ---- yer have done that, thats quite an easy quite cheap mod looks good as-well and its always the simplest things that stand out the most
#26: Re: The bumper guide to modding on a budget Author: alexthekid, Location: Dewsbury Nr leedsPosted: Thu Apr 07, 2011 2:26 pm ---- You got a how to I'd do one but last time I did I got ripped to shreds lol
#27: Re: The bumper guide to modding on a budget Author: Dabamash, Location: The car in frontPosted: Thu Apr 07, 2011 2:27 pm ----
alexthekid wrote:
You got a how to I'd do one but last time I did I got ripped to shreds lol
haha, don't let that put you off. Haters gonna hate and all that
#28: Re: The bumper guide to modding on a budget Author: alexthekid, Location: Dewsbury Nr leedsPosted: Thu Apr 07, 2011 2:27 pm ---- Not really ccin . Also "the simplest things stand out the most" lol can thing of a few people like that
#29: Re: The bumper guide to modding on a budget Author: j3xoc, Location: bedfordshirePosted: Thu Apr 07, 2011 2:37 pm ----
alexthekid wrote:
Not really ccin . Also "the simplest things stand out the most" lol can thing of a few people like that
#30: Re: The bumper guide to modding on a budget Author: MrZiggerz, Location: Milton KeynesPosted: Thu Apr 07, 2011 2:51 pm ---- STICKER BOMB!
#31: Re: The bumper guide to modding on a budget Author: shaker, Location: AustriaPosted: Fri Apr 08, 2011 9:45 am ---- good post Daba!
#32: Re: The bumper guide to modding on a budget Author: Mike_XS, Location: SouthamptonPosted: Fri Apr 08, 2011 9:54 am ---- Good post! I'm gonna give taking off the wrapping on the door a go! Cheers.
#33: Re: The bumper guide to modding on a budget Author: spud_gti, Location: NottinghamPosted: Thu Apr 14, 2011 6:42 am ---- ph2 washer jets? valve caps?? maybe a guide on the two bucket wash method and possibly good polish and waxs???
made a list from the first page and will be doing a few of them to the pug when i get bored lol.
good thread
#34: Re: The bumper guide to modding on a budget Author: Danw_VVT, Location: Herts/LondonPosted: Thu Apr 14, 2011 7:02 am ---- masking crystals....still wanna do it lol
#35: Re: The bumper guide to modding on a budget Author: davek, Location: SouthamptonPosted: Thu Apr 14, 2011 7:33 am ---- Good post - perhaps a liitle more info about the smd lights - where can you get them, what advantages they have, etc
#36: Re: The bumper guide to modding on a budget Author: Cai-206, Location: Tenby, PembrokeshirePosted: Mon Apr 25, 2011 4:11 pm ---- Really helpful thread, I'm wanting to get most of these mods done in the next few weeks
1. Debadge the rear. DONE ..I took off the "peugeot" and "206" badges, but left the lion badge on.
2. Pull off your B pillar vinylDONE ..think this looks great!
3. Aero WipersDONE ..looks fresh and I think gives a clearer windscreen.
4. Colour CodingDONE ..this looks lots better.
5. Front badge painting ..still not sure what colour to spray it seeing as my cars silver, maybe red?
6. Light Masking ..worried I'll bugger up my crystals doing this
7. Stickers ..I'm not keen on stickers.
8. Door card trim ..I'm thinking black leather, and on the glove box too.
10. Change your interior lights colours ..red, blue or white? hhhmmm.
11. De-wiper your rear ..want to this straight away, where can you get the grommits to fit the rear window from?
12. Phase 2 boot stripDONE
13. Phase 2 Rear LightsDONE
14. Interior Spraying ..am going to do the clock/radio/aircon surround red, might do the door handles and outer air vents too.
15. Wraps ..not sure what to wrap, maybe the wing mirror caps with carbon wrap?
16. SidelightsDONE ..I've also put 55w xenon H7 bulbs in for my dipped and fullbeam lights, and 55w H1 bulbs in my sport fog lights.
I've also put the GTi spoiler on the rear (I hope the Tiger Seal doesn't let me down), I've put a honeycome grill on the front and painted the silver/chrome edges red, I've put a L.E.D bonnet vent on (in my opinion they look good on a silver 206, I haven't wired it into my lights yet - not sure if I want to), got a gloss black stubby aerial, I've put SP chrome sliders on my dashboard vents, and I've put some red dustcaps on
..I think my 206 is coming on nicely!
#37: Re: The bumper guide to modding on a budget Author: Dabamash, Location: The car in frontPosted: Mon Apr 25, 2011 4:25 pm ----
Cai-206 wrote:
Really helpful thread, I'm wanting to get most of these mods done in the next few weeks
1. Debadge the rear. DONE ..I took off the "peugeot" and "206" badges, but left the lion badge on.
2. Pull off your B pillar vinylDONE ..think this looks great!
3. Aero WipersDONE ..looks fresh and I think gives a clearer windscreen.
4. Colour CodingDONE ..this looks lots better.
5. Front badge painting ..still not sure what colour to spray it seeing as my cars silver, maybe red?
6. Light Masking ..worried I'll bugger up my crystals doing this
7. Stickers ..I'm not keen on stickers.
8. Door card trim ..I'm thinking black leather, and on the glove box too.
10. Change your interior lights colours ..red, blue or white? hhhmmm.
11. De-wiper your rear ..want to this straight away, where can you get the grommits to fit the rear window from?
12. Phase 2 boot stripDONE
13. Phase 2 Rear LightsDONE
14. Interior Spraying ..am going to do the clock/radio/aircon surround red, might do the door handles and outer air vents too.
15. Wraps ..not sure what to wrap, maybe the wing mirror caps with carbon wrap?
16. SidelightsDONE ..I've also put 55w xenon H7 bulbs in for my dipped and fullbeam lights, and 55w H1 bulbs in my sport fog lights.
I've also put the GTi spoiler on the rear (I hope the Tiger Seal doesn't let me down), I've put a honeycome grill on the front and painted the silver/chrome edges red, I've put a L.E.D bonnet vent on (in my opinion they look good on a silver 206, I haven't wired it into my lights yet - not sure if I want to), got a gloss black stubby aerial, I've put SP chrome sliders on my dashboard vents, and I've put some red dustcaps on
..I think my 206 is coming on nicely!
Don't do the badge red, it'll look dodgy. However, the outer chrome might work in red. Put a pic up in the virtual modding area and somebody will photoshop it for you.
Wrapped mirrors are cool, do it
#38: Re: The bumper guide to modding on a budget Author: The_Stig, Location: StirlingPosted: Mon Apr 25, 2011 5:03 pm ---- EGR removal for the oil burners on the forum???
#39: Re: The bumper guide to modding on a budget Author: Dabamash, Location: The car in frontPosted: Mon Apr 25, 2011 5:07 pm ---- No idea, have a search. Are you looking for a how-to?
#40: Re: The bumper guide to modding on a budget Author: tomd0801754, Location: MoscowPosted: Mon Apr 25, 2011 5:10 pm ----
Dabamash wrote:
No idea, have a search. Are you looking for a how-to?
He meant adding Kersh's EGR removal guide... However this is for styling not performance.
#41: Re: The bumper guide to modding on a budget Author: The_Stig, Location: StirlingPosted: Mon Apr 25, 2011 5:12 pm ---- nope, my pugs well past needing that......but its a free mod and thought you may like to add it..........
#42: Re: The bumper guide to modding on a budget Author: Dabamash, Location: The car in frontPosted: Mon Apr 25, 2011 5:12 pm ----
tomd0801754 wrote:
Dabamash wrote:
No idea, have a search. Are you looking for a how-to?
He meant adding Kersh's EGR removal guide... However this is for styling not performance.
yeah, I thought as much. I guess someone could do a performance on a budget thread, however, I personally don't feel I know enough. (Can't be f****d)
#43: Re: The bumper guide to modding on a budget Author: Dabamash, Location: The car in frontPosted: Fri May 06, 2011 7:47 am ---- Couple of OP additions and extra info.
#44: Re: The bumper guide to budget modding! Author: Danny., Location: PeterboroughPosted: Thu Jun 16, 2011 4:41 am ---- Great post. When peeling the black tape of teh B pillars it decided it dodnt want paint on the car no more :L
So teh gorgeous ste wrapped it in carbon fibre for me
#45: Re: The bumper guide to budget modding! Author: kobrakai1986, Location: Caerphilly/Hengoed/Ystrad MynachPosted: Thu Jun 16, 2011 11:06 am ---- Are the phase 2 rear lights a straight swap? Also are
the front lights still MOT friendly after they are masked?
#46: Re: The bumper guide to budget modding! Author: kobrakai1986, Location: Caerphilly/Hengoed/Ystrad MynachPosted: Thu Jun 16, 2011 1:01 pm ---- Also how easy is it to change the boot strip? Sorry I'm asking all the questions not had my 206 long
#47: Re: The bumper guide to budget modding! Author: Lee, Location: EnglandPosted: Thu Jun 16, 2011 1:03 pm ---- Pull
#48: Re: The bumper guide to budget modding! Author: -Dave-, Location: North ManchesterPosted: Thu Jun 16, 2011 3:09 pm ----
kobrakai1986 wrote:
Are the phase 2 rear lights a straight swap? Also are
the front lights still MOT friendly after they are masked?
Yes for the rear light's
Yes for the masked front's as you don't paint over the reflector's so the light output is still the same.
#49: Re: The bumper guide to budget modding! Author: xspongerx, Location: Newquay, CornwallPosted: Thu Jun 16, 2011 3:17 pm ----
Lee wrote:
Pull
LOL
#50: Re: The bumper guide to budget modding! Author: kobrakai1986, Location: Caerphilly/Hengoed/Ystrad MynachPosted: Thu Jun 16, 2011 3:54 pm ----
Suicidalsoldi3r wrote:
kobrakai1986 wrote:
Are the phase 2 rear lights a straight swap? Also are
the front lights still MOT friendly after they are masked?
Yes for the rear light's
Yes for the masked front's as you don't paint over the reflector's so the light output is still the same.
damn it! When I bought the car it had lexus lights, which I weren't to keen on so I changed them for phase one lights due to the age of my car and that everyone listed them for different 206's so I was under the impression that they fitted one or the other! GUTTED!!
Which parts are the reflectors out of curiosity? Are they the parts still attached to the main frame/where the bulbs are once
you take the other part to spray?
What about the boot strip, do you know if they are easyto change?
Sorry if I'm being a pain asking loads
#51: Re: The bumper guide to budget modding! Author: Ghosty, Location: WiltshirePosted: Mon Sep 26, 2011 8:59 pm ---- Boot strip has 2 or 4 (can't remember now) 8mm nuts, undo and it will fall off literally
#52: Re: The bumper guide to budget modding! Author: tomd0801754, Location: MoscowPosted: Tue Sep 27, 2011 3:45 am ---- 2 nuts and 2 clips.
#53: Re: The bumper guide to budget modding! Author: Yoshii, Location: West BromwichPosted: Tue Jan 31, 2012 7:32 pm ---- Brill Post !
#54: Re: The bumper guide to budget modding! Author: philitalia, Location: arese , italyPosted: Wed Feb 01, 2012 4:04 am ---- awsome guide guys !!!!
#55: Re: The bumper guide to budget modding! Author: bezford, Location: darlingtonPosted: Sat May 05, 2012 12:48 pm ---- ive taken one of those flashy tribal window stickers that match each side like a butterfly does and cut it in half as best is possible and used it as body art-best seems like putting each side just behind each front wheel giving the illusion of a tribal flame or wheel splash with some nice results-pics not available but does look good sometimes,buy the bigger designs for around £15,usualy in black,silver,white....
#56: Re: The bumper guide to budget modding! Author: bezford, Location: darlingtonPosted: Sat May 05, 2012 12:48 pm ---- ive taken one of those flashy tribal window stickers that match each side like a butterfly does and cut it in half as best is possible and used it as body art-best seems like putting each side just behind each front wheel giving the illusion of a tribal flame or wheel splash with some nice results-pics not available but does look good sometimes,buy the bigger designs for around £15,usualy in black,silver,white....
#57: Re: The bumper guide to budget modding! Author: Andy_, Location: Isle of ManPosted: Tue May 22, 2012 4:35 pm ---- What type of lights are on the back of the blue pug on first page?
#58: Re: The bumper guide to budget modding! Author: Dabamash, Location: The car in frontPosted: Tue May 22, 2012 4:39 pm ----
Andy_ wrote:
What type of lights are on the back of the blue pug on first page?
#59: Re: The bumper guide to budget modding! Author: Andy_, Location: Isle of ManPosted: Thu May 31, 2012 1:06 am ---- ^ thanks!
#60: Re: The bumper guide to budget modding! Author: nemesislee, Location: stokePosted: Mon Jun 11, 2012 7:14 am ---- with the rear boot handle (the part with the number plate lights in) can you swap them? i have a 2000 peugeot and want to get a cover/trim off a newer version which doesnt have the pug lion on.
#61: Re: The bumper guide to budget modding! Author: iainlovatt, Posted: Mon Jun 11, 2012 7:30 am ----
nemesislee wrote:
with the rear boot handle (the part with the number plate lights in) can you swap them? i have a 2000 peugeot and want to get a cover/trim off a newer version which doesnt have the pug lion on.
Yep 2 minute job!! dead easy!!!
#62: Re: The bumper guide to budget modding! Author: lee-b, Location: ScotlandPosted: Thu Aug 02, 2012 2:53 am ---- Great post cant wait to get started on some of these mods
#63: Re: The bumper guide to budget modding! Author: macspeedy, Location: west cumbriaPosted: Sun Sep 09, 2012 7:45 pm ---- Great guide
#64: Re: The bumper guide to budget modding! Author: ch4c4, Posted: Sat Aug 03, 2013 9:46 am ---- Amazing guide starting to do some of them will post some pics when finished.
#65: Re: The bumper guide to budget modding! Author: stonster, Location: LondonPosted: Wed Nov 27, 2013 2:10 pm ---- love the B pillar vinyl tip - are they all painted underneath?
#66: Re: The bumper guide to budget modding! Author: wolfbane468, Posted: Mon Aug 18, 2014 3:23 pm ---- number 6 pics have been removed anychance of someone refreshing
#67: Re: The bumper guide to budget modding! Author: keko11757, Posted: Thu Oct 23, 2014 10:24 am ---- This is great has helped me so much thankyou
We are not responsible for comments posted by our users, as they are the property of the poster
Interactive software released under GNU GPL,
Code Credits,
Privacy Policy