|
 General Info Goodies Search Web Stats Members General Info Goodies Search Web Stats Members
 Donations Donations
|
|
|
|
|
 |
|
Forums › Tuning, Modification & Legal › Project Cars › *Pic Heavy* 206 Project OEM Dave *Long read* |
|
 |
 |
 |
 |
|
Author
|
Message |
|
|
 Posted: Wed May 25, 2011 11:47 am Posted: Wed May 25, 2011 11:47 am |

|
|
|
|
Joined: Mar 15, 2010
Posts: 384
Trade Rating: +9
Location: Kent,
|
 |
Finally decided to do a project thread seeing as I have done quite a lot to the car over the past year or so. Hope you have got ten minutes to spare. I know its a 10 year old 1.4, thats why ive done no performance mods. there's no reason it cant look nicer though.
Quick thanks to every member on here who has helped me this year
Lee
Vanman
Uz
Ste206
Everyone else .
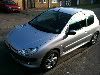
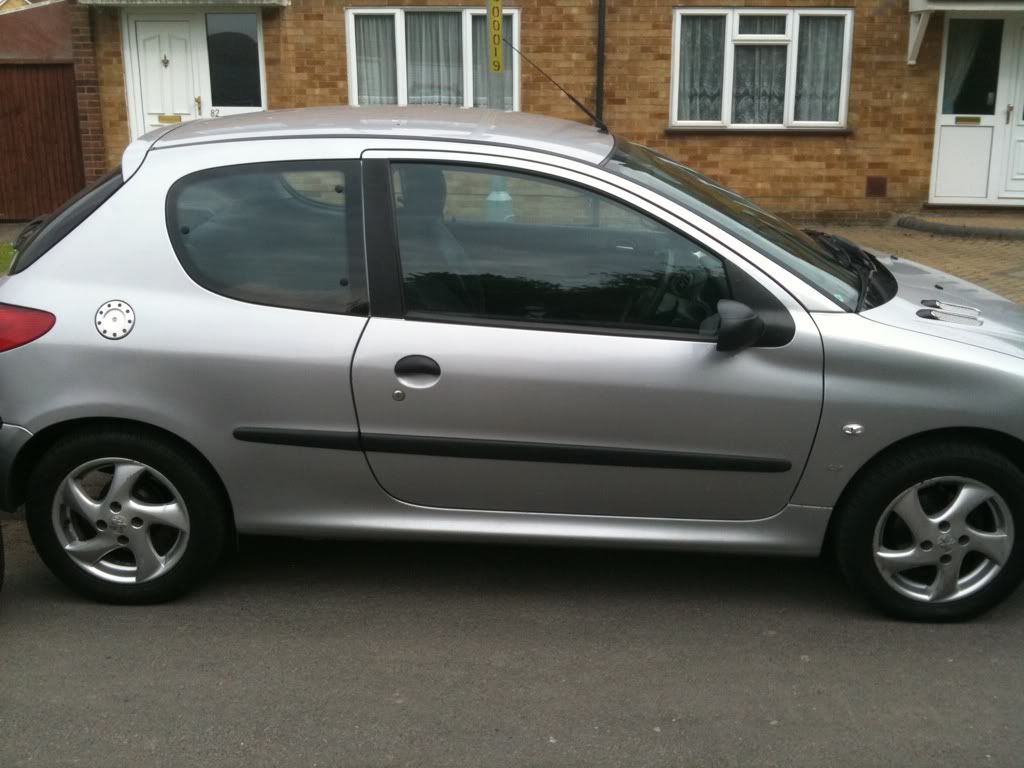
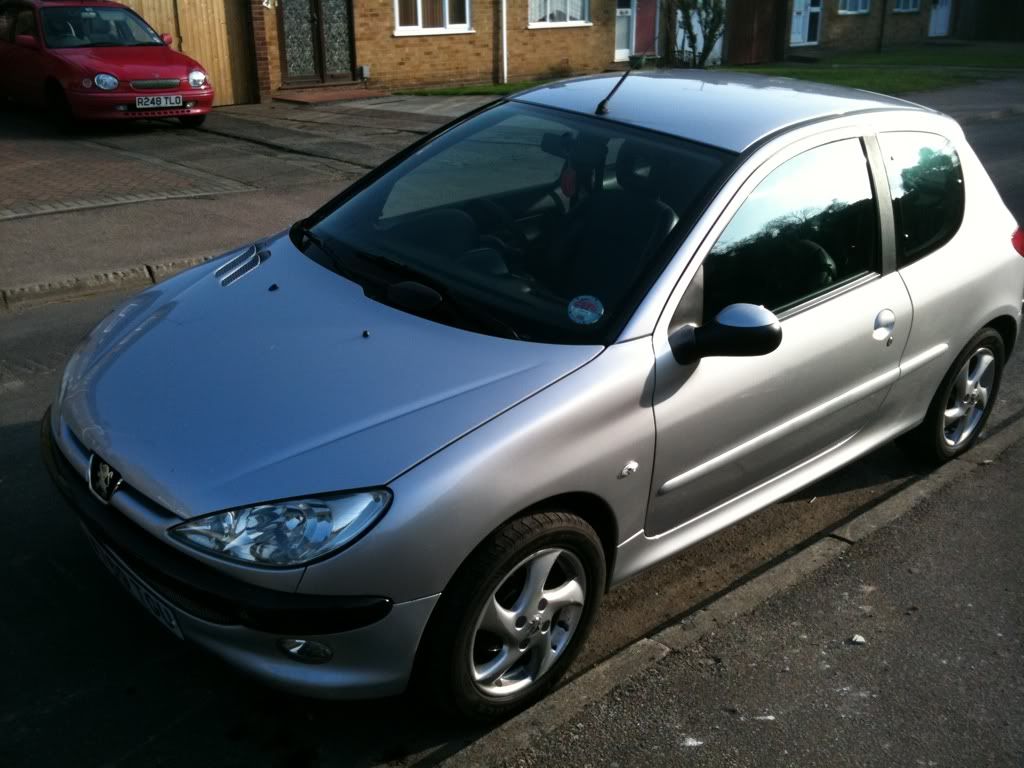
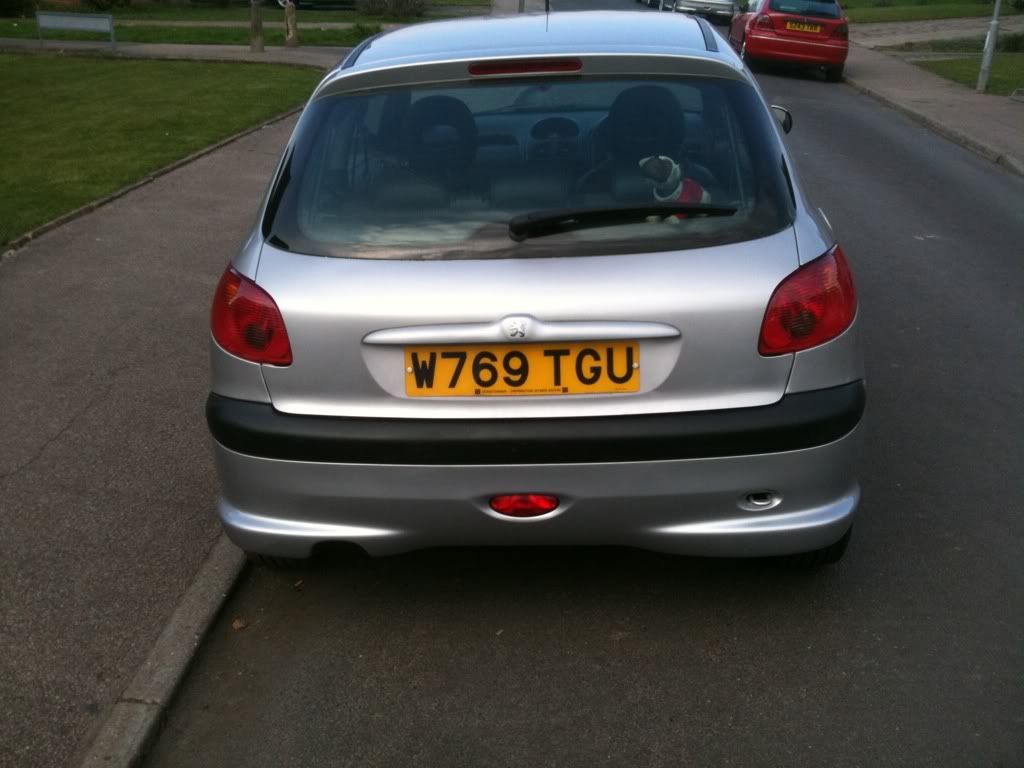
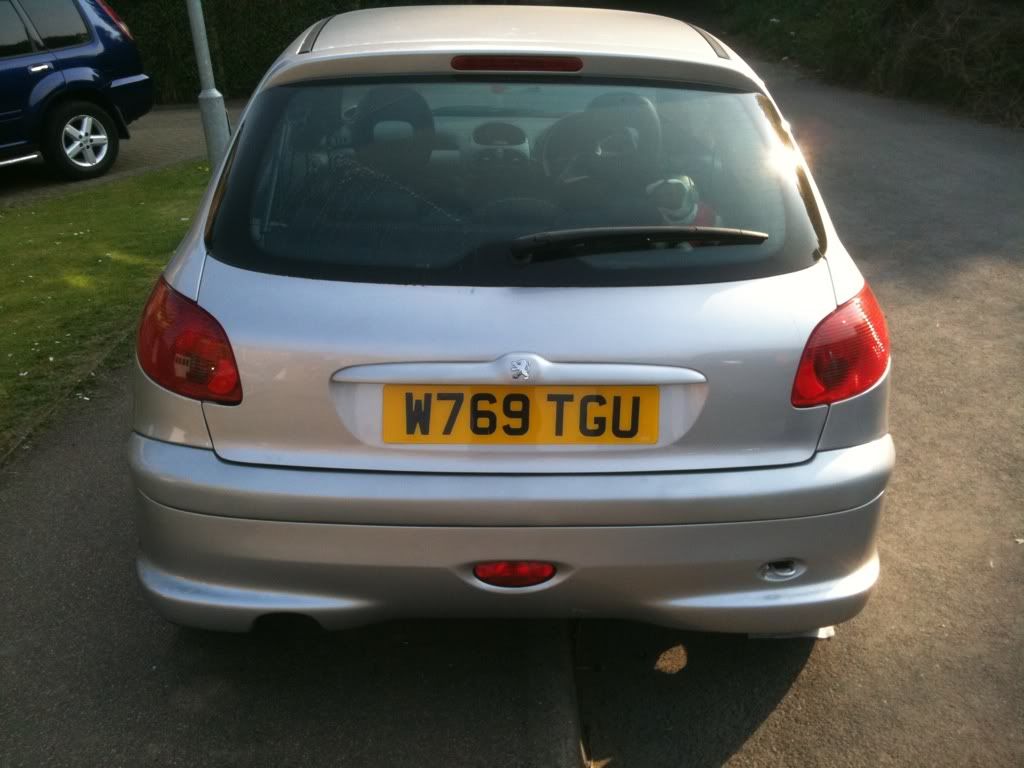
This is how I picked it up; one standard, platinum silver Pre-plex 2000 LX model.

I didn’t get any photos of the original interior, it was just horrible, bright blue and it made me feel sick looking at it lol. You can see most of it in this video:
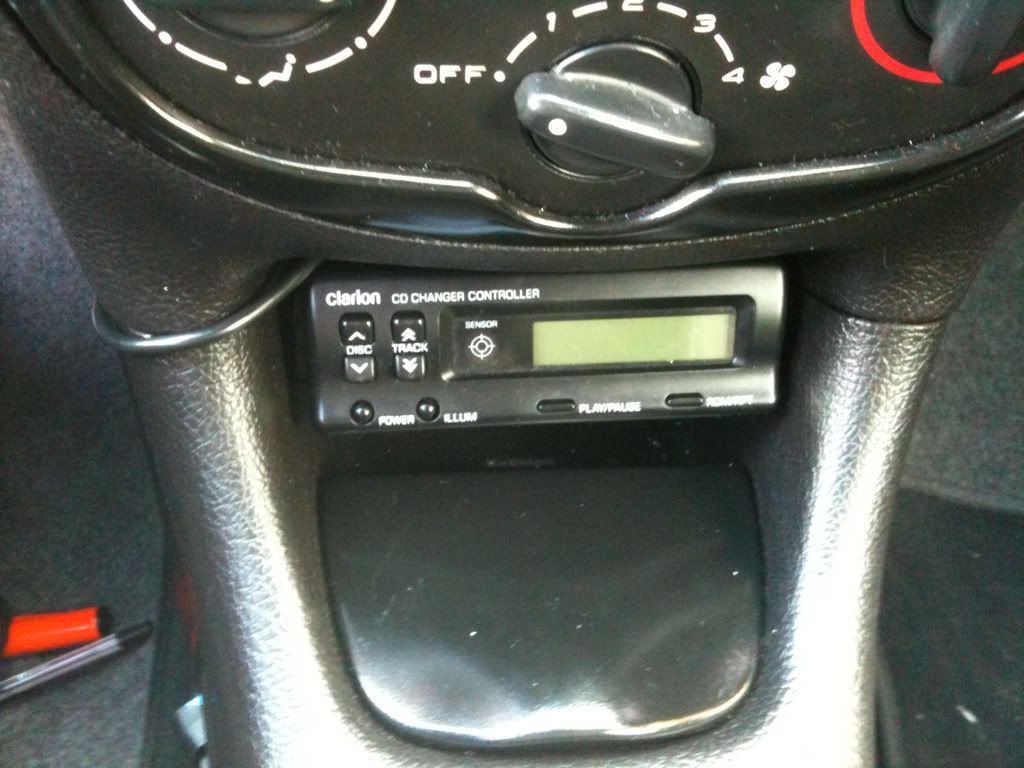
Stereo
Obviously the first thing that needed sorting out was the stereo system; I couldn’t believe the inbuilt multi cd changer had to be tuned into a radio station like a cheap iPod receiver to hear it. It had a remote control for Christ’s sake and it couldn’t be wired in ???(Still in the car by the way lol). Just went for a Sony HU with an iPod connection, standard fare really.

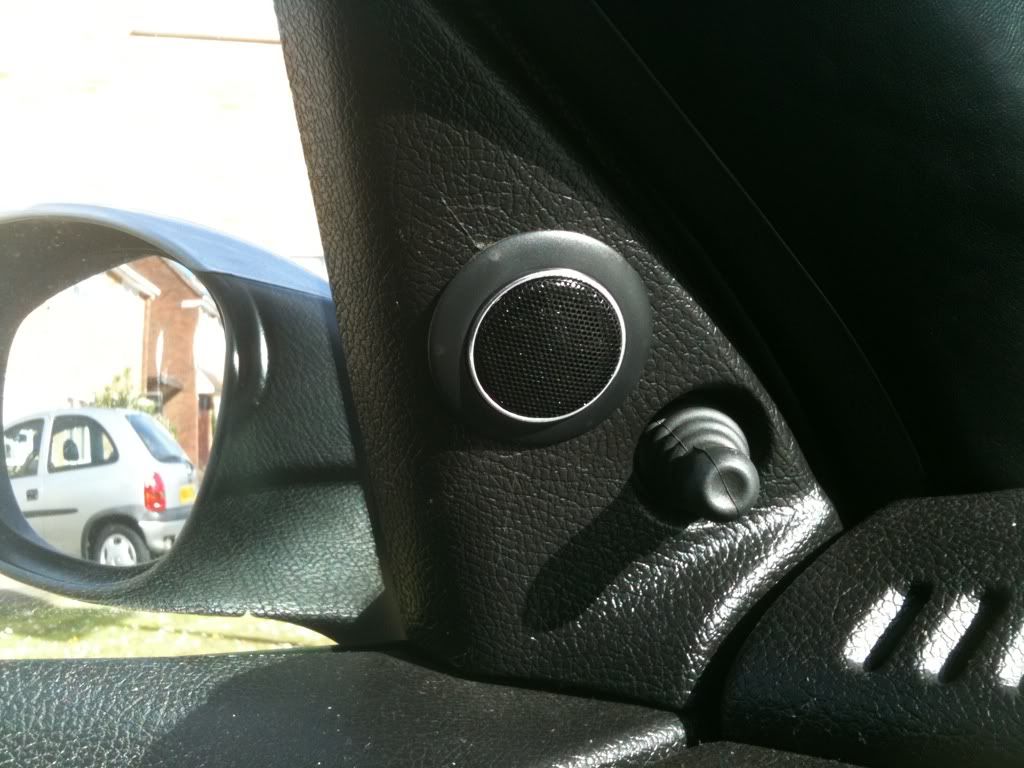
I also got some pretty good sounding Edge speakers for which I had to mount the tweeters. The speakers were slightly too big so I had to do some cutting of the plastic behind where they are mounted, no big deal.
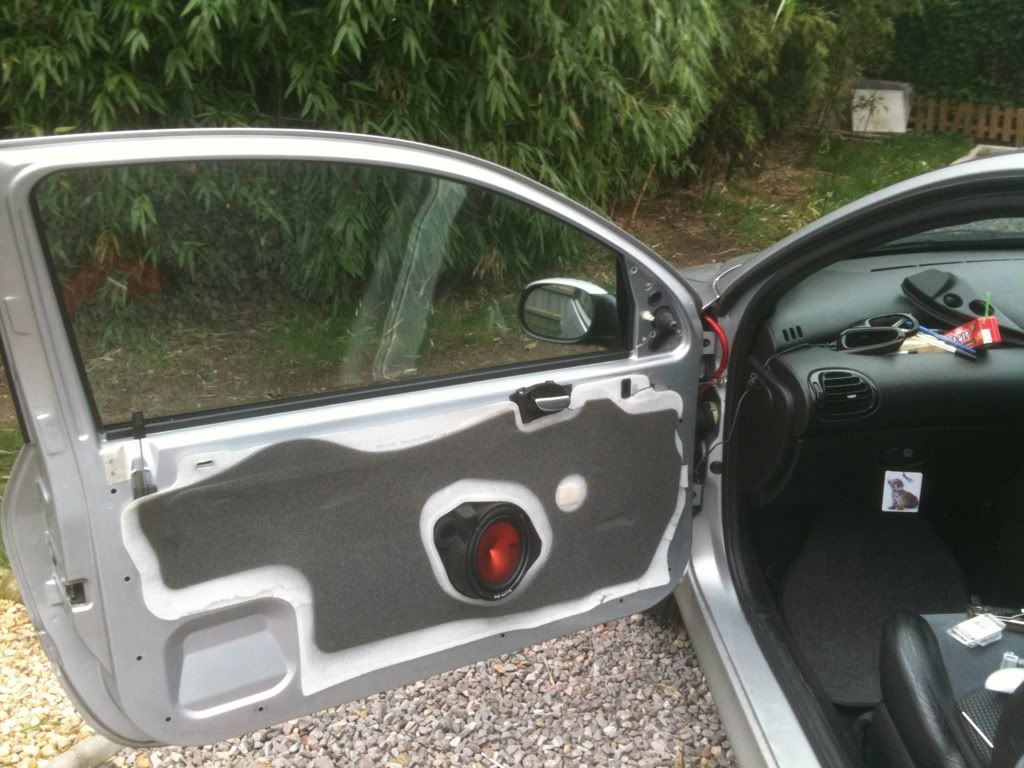
Then came my first purchase from 206info and the brilliant dude Vanman, I purchased a pioneer sub and amp from him for 50 quid, and when I went to Wales pick it up, Van and another member actually helped me install the full wiring kit for around two hours. An hour of which was trying to get the glove box out to feed the cable through the bulkhead properly, as opposed to the door method we went for in the end

Initially I was only going to focus on the inside of the car as I didn’t have the confidence to try anything on the outside, I was a literal noob to anything bodywork related, initially... ... ...
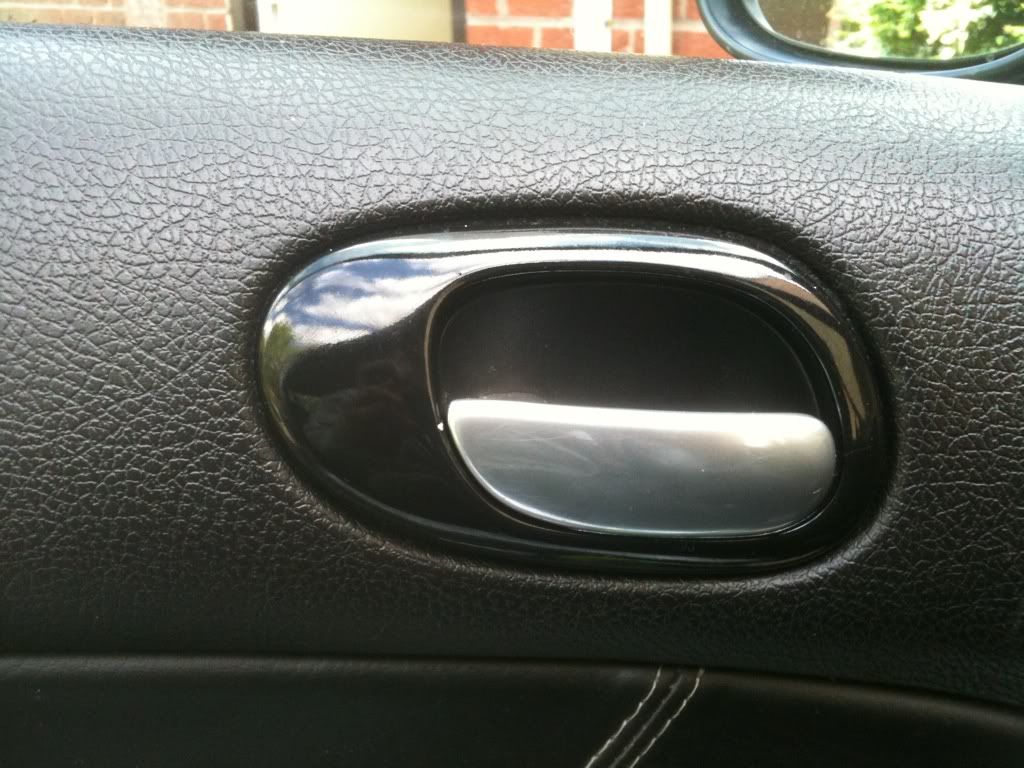
Door Cards + Interior sp Handles
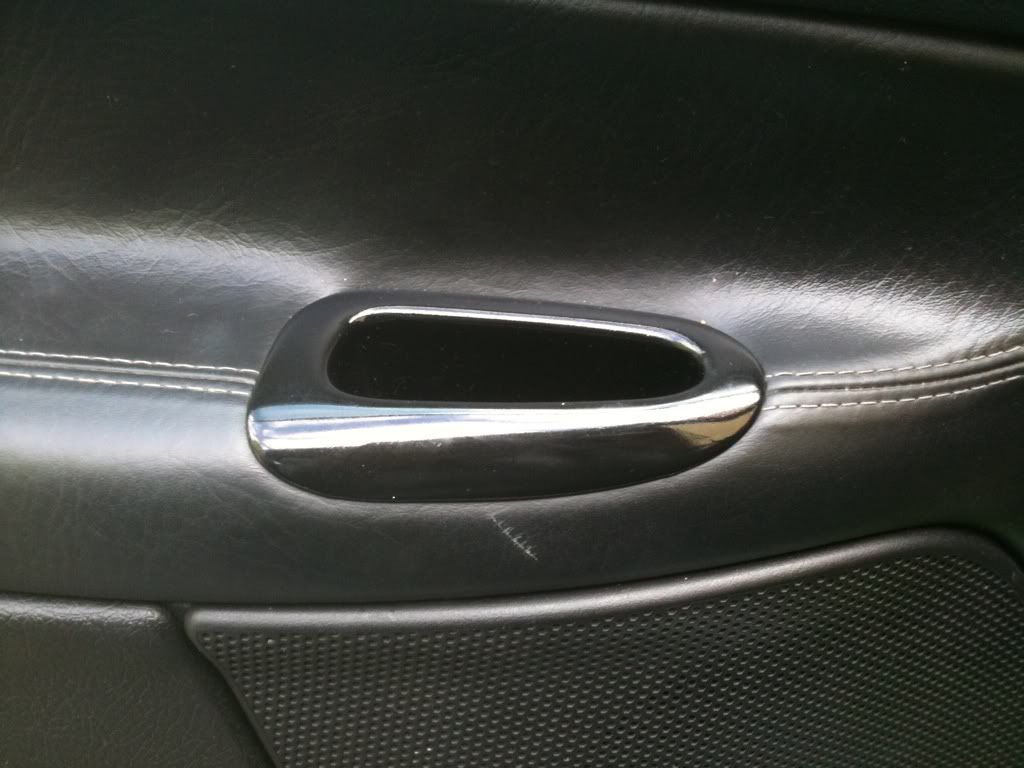
My next upgrade was just a really lucky find in the end; I managed to log on to the site the second a set of black leather front door cards when up for sale for 15 pounds!!! Can’t remember the user but he was only an hour or so away so I Instantly snapped them up and collected them the next day. One of my best finds on here for sure. Around this time I got myself a set of sp interior door handles, about £10 for the pair I think.
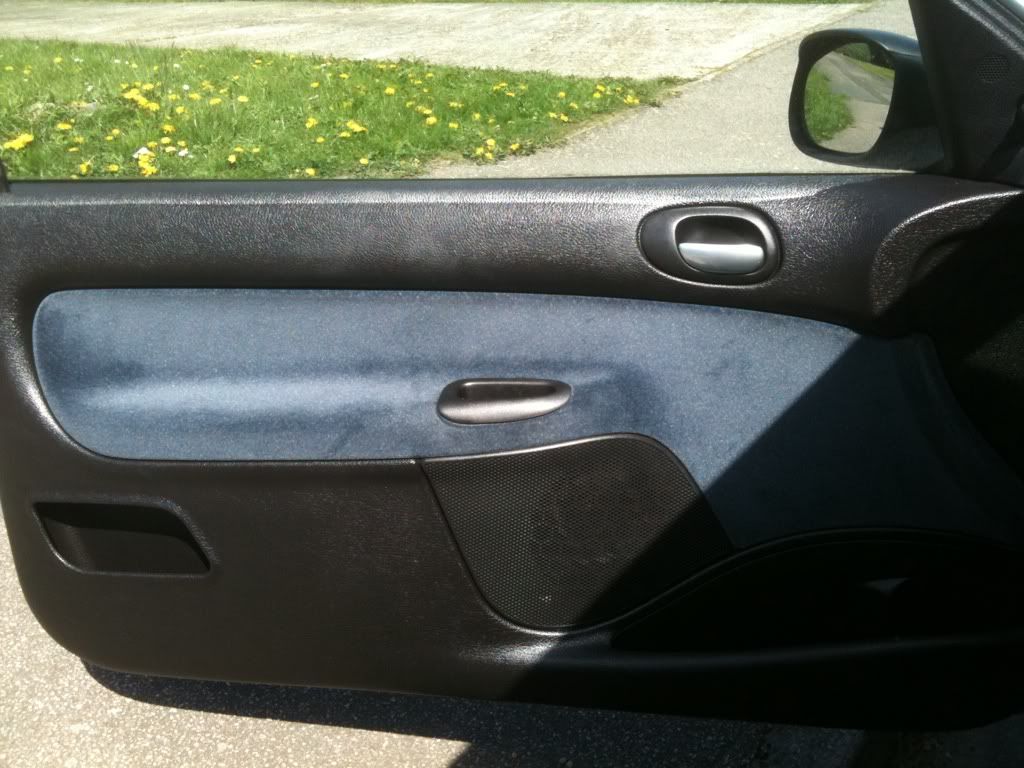
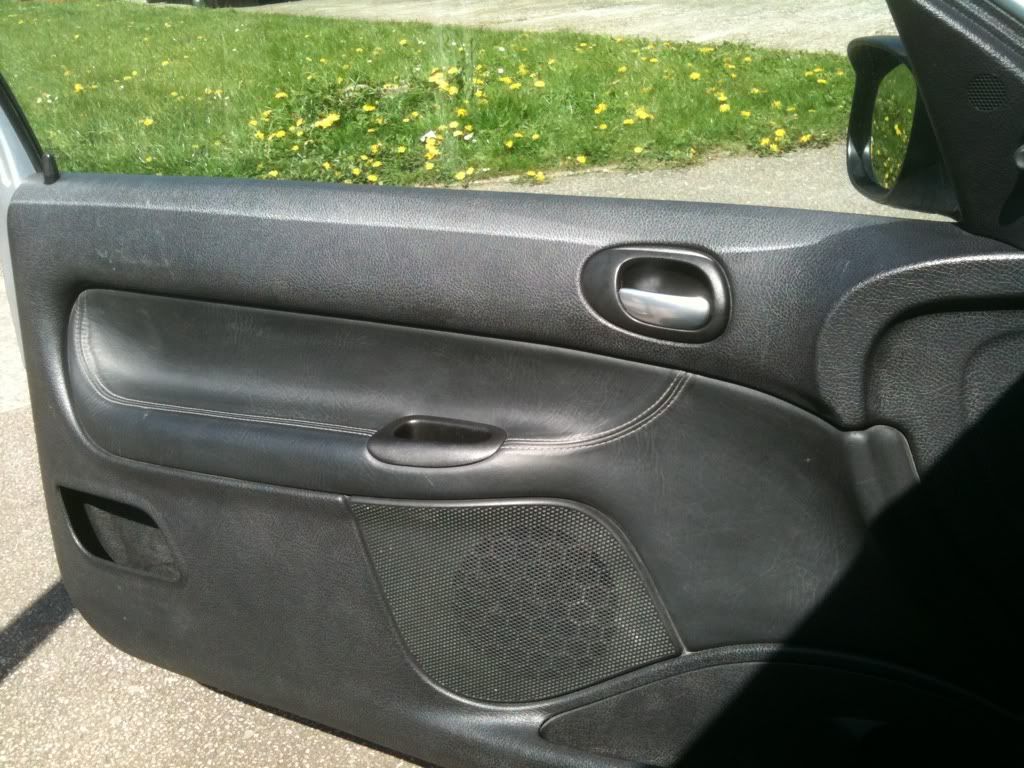
The before and after pics speak for themselves really, vast improvement over the originals, I’ve seen a few different types of door cards but I think these are the best, could well be from a 206cc I’m not really sure. The leather glove box cover came free with the door cards too; it’s a locking one from a GTI I think
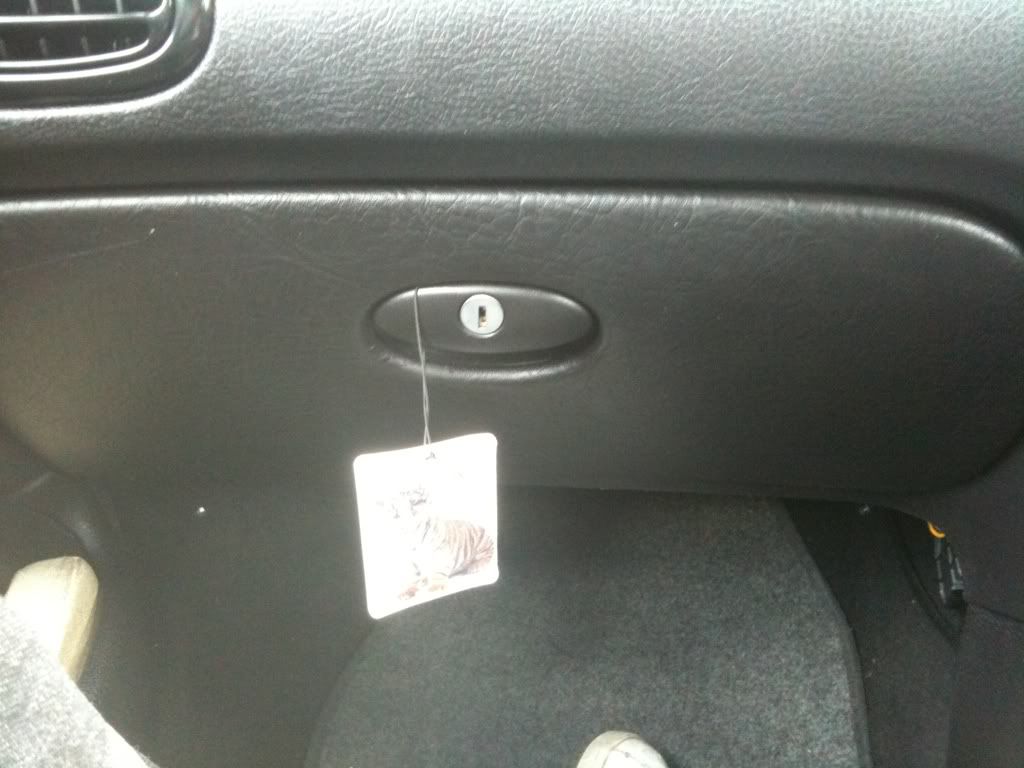
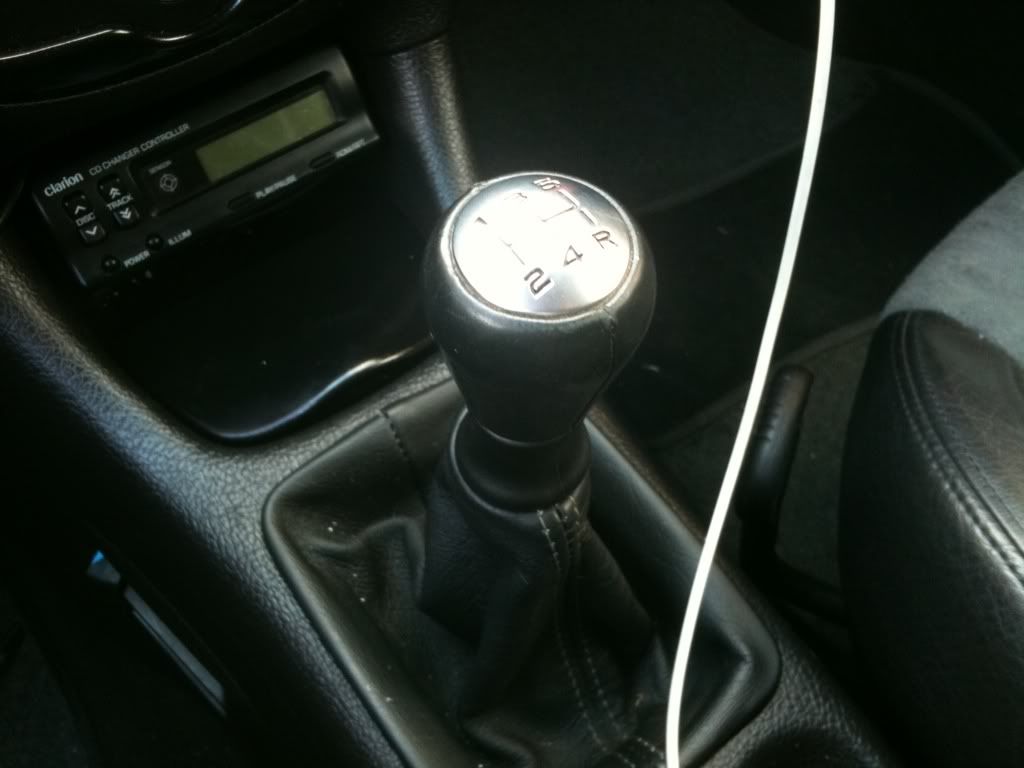
Handbrake + Gear Knob + sp Sliders
Following this I grabbed an SP handbrake and gear knob for around 30 quid, another pretty good bargain I recon, and picked up some vent sliders at the scrappy with a five finger discount (the b*****d in there the week before charged me £20 for the cap for my washer jet tank, when I paid that I knew I was coming back for sure to balance the universe out lol).
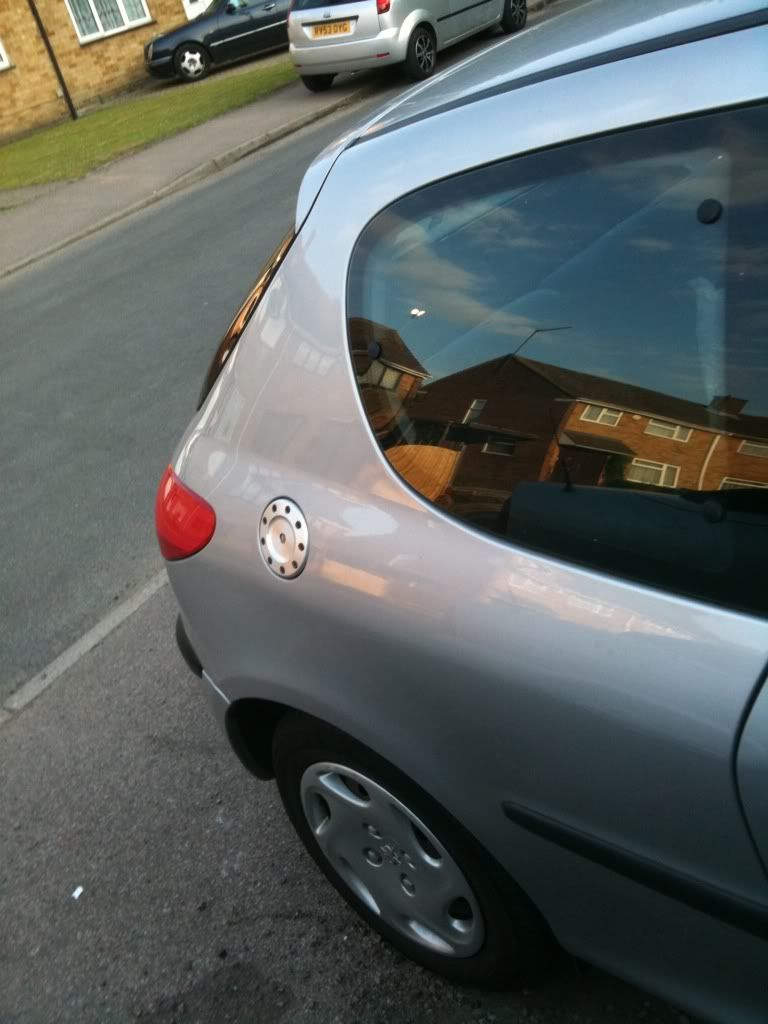
Fuel Cap + Wheels
Next was the Silver with black bolts fuel cap which is another pretty cool looking mod I guess.
The wheels were starting to embarrass me a little (as you can see above) so eventually I managed to find a set of 15 inch sciroccos on here being sold for £100 so I went for them. They were quite heavily kerbed from previous parking disasters (one previous owner, unfortunately female), I got the local garage to fit and balance them for me for £20 so I was pretty happy. I think they are the best looking wheels (not the size lol) out of the OEM selection, my opinion obviously.
Grills + Side Repeaters + Washer Jets
I found a thread on here discussing how great the phase two washer jets were so off to the dealership I went. As I was enquiring at the parts department about washer jets and phase two side repeaters The fella asked, “Don’t supposed you’d be interested in some fancy bits for your 206 do ya?” I was intrigued and he goes out the back and comes out with two big old white boxes.
Seeing as the 206 is about ten years old at this point he said they were trying to clear a load of old stock and seeing as no one had come in for any 206 parts for about a week he thought I might be interested in some grills.
So for £100 pounds I managed to get: the bonnet grill, the non sports bumper grill, phase two washer jets and side repeaters ; at the time brand new it was well over £140 for both grills themselves so I was quite happy with my purchase.
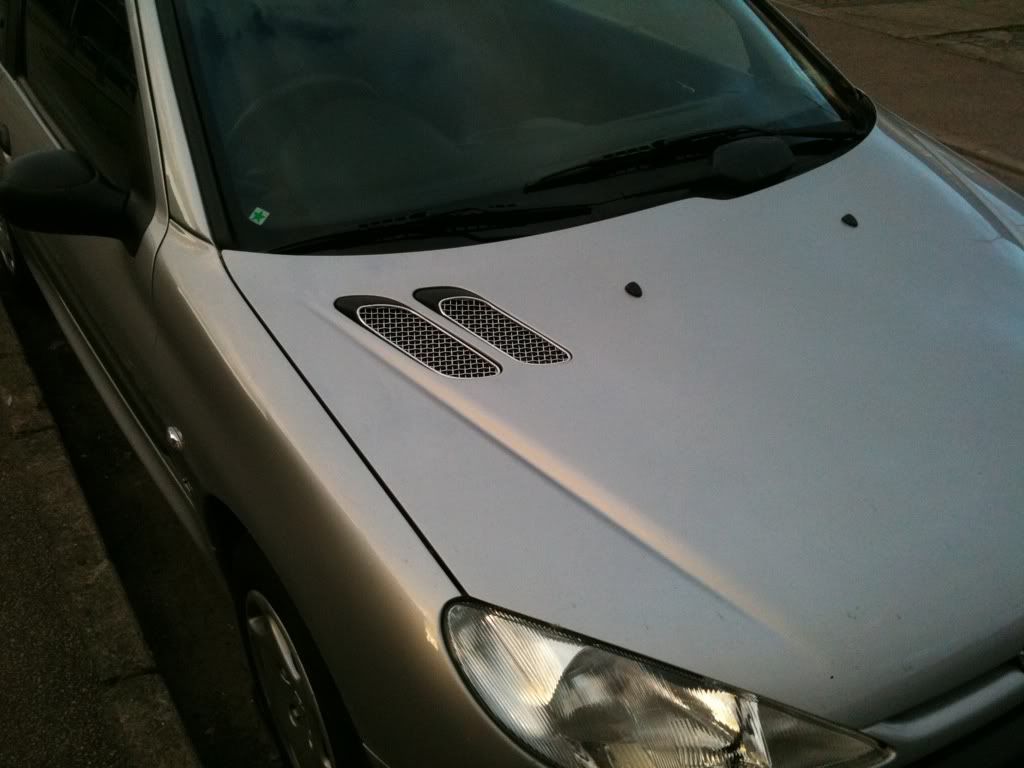
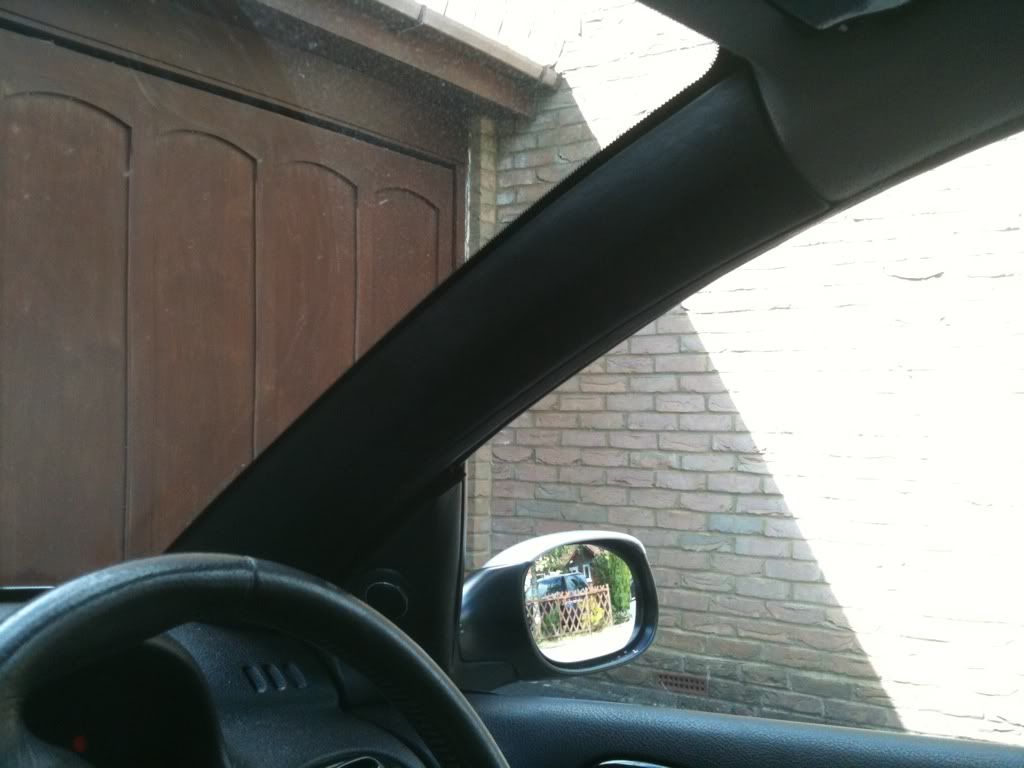
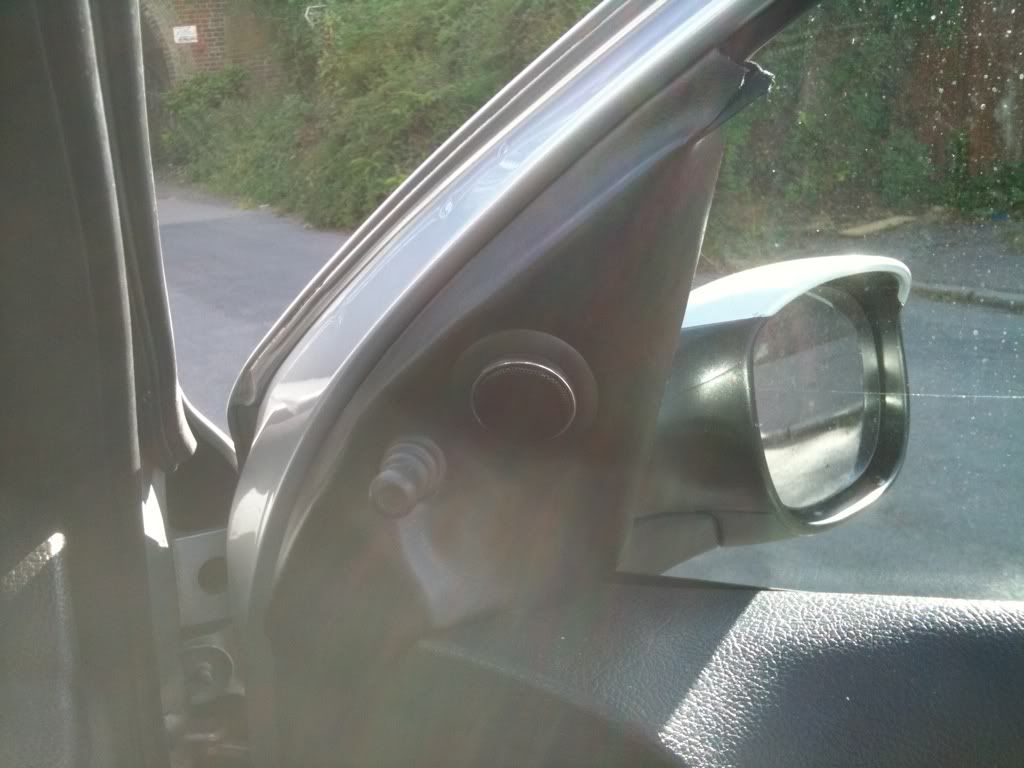
A-Pillars + Light Surround + Tweeter Cover
I also retrimmed my A-pillars and a few other surfaces with some leatherette from craft world or one of those places, came out pretty sweet I think.
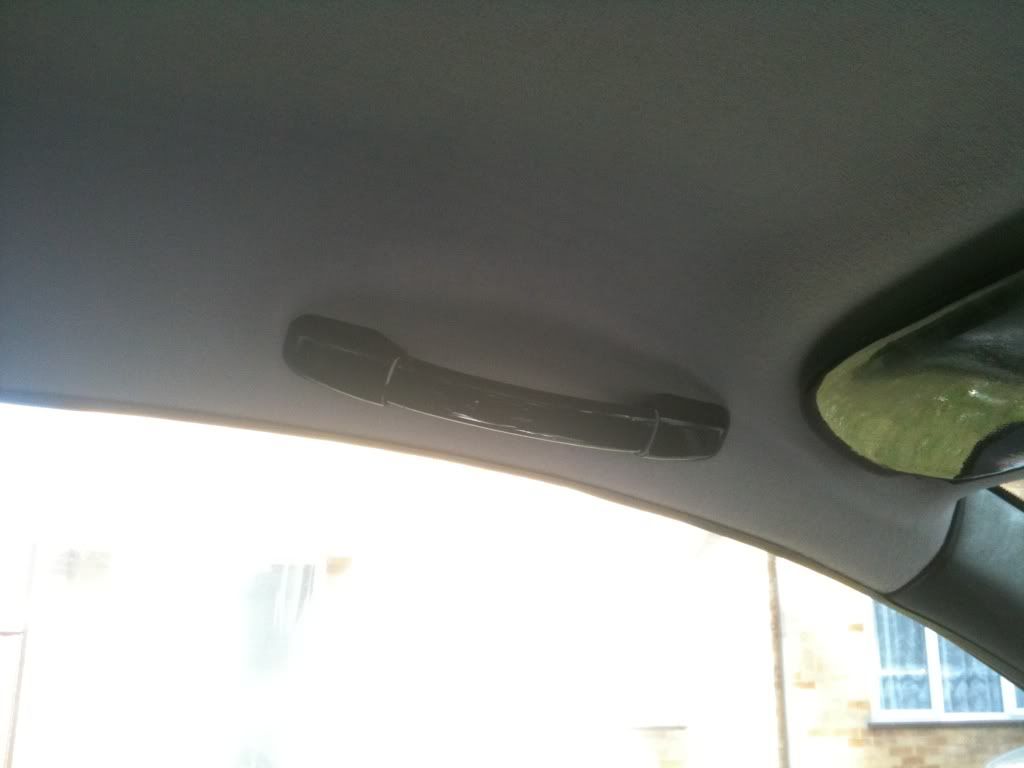
Interior Painting
After looking through some project threads on here I decided I would try my hand at painting some of the interior plastics around the car. I had read all the how to’s but was a complete virgin to using a spray can or any type of painting so what would have took me a few days to do now, took me well over month, but during this time I got a basic knowledge of the processes involved: learning all about correct use of wet and dry paper, drying times, layers, primer (lol) .
During that month I managed to spray paint loads of the interior plastics in the car,

So in total I sanded, primed, sanded, primed, sanded, painted, sanded, painted, sanded, painted, sanded, glossed, sanded glossed, sanded glossed in Halfords gloss black:
-centre console (top and main)
-air vent surrounds x4
-air vents (every god damn slit) x4
-air vent rollers x3
-interior door handle surrounds x2
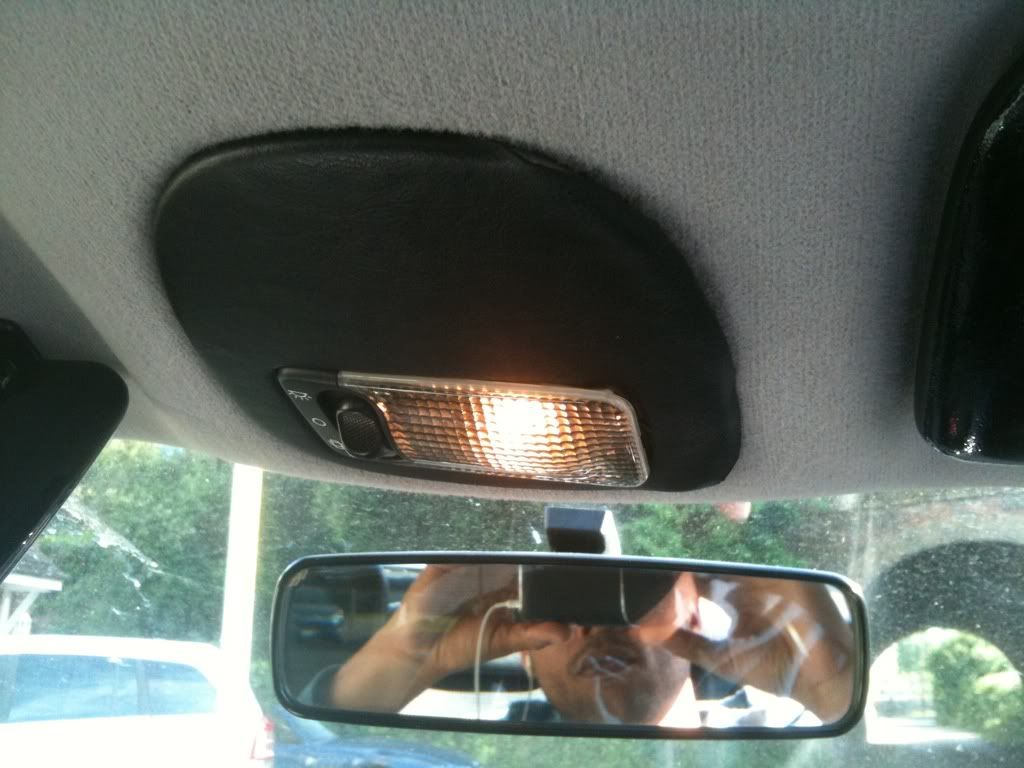
-roof handles x 3
-Door coin holder/ lighter holders/grab handle x 2
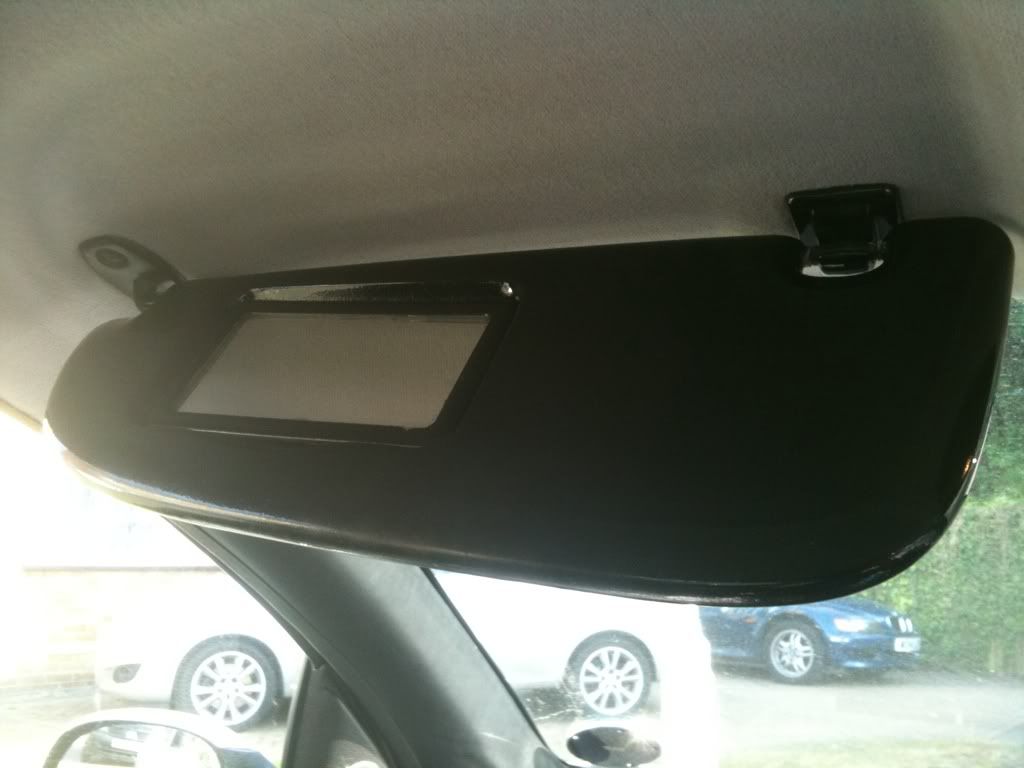
And finally one I was initially unsure of, the sun visors. The fact they seemed to be made of some futuristic hard/soft, plastic/ fabric hybrid means they never seemed to have fully dried and are still a little tacky to this day (a year on lol) but I think they look pretty cool to be honest and haven’t seen too many like these. I’ll probably redo the roof handles and sun visors at some point but a nice subtle mod if I do say so myself.
Bumper w. Fogs + Gloss Bump Strips
Fog lights were the next upgrade I was after, and seeing as I already had the non sports sp grill I was after finding a non sports bumper with headlight holes. I managed to get one in primer for £25 which I didn’t think was too bad.
So this was to be my first attempt at spraying an exterior part of the car, the interior plastics looked ok so I just went for it. Decided to do the bumper strips in gloss black as well to match my shiny new phase 2 boot strip.
Primed
Painted and grill fitted
Fog lights and wiring kit (thanks lee lol)
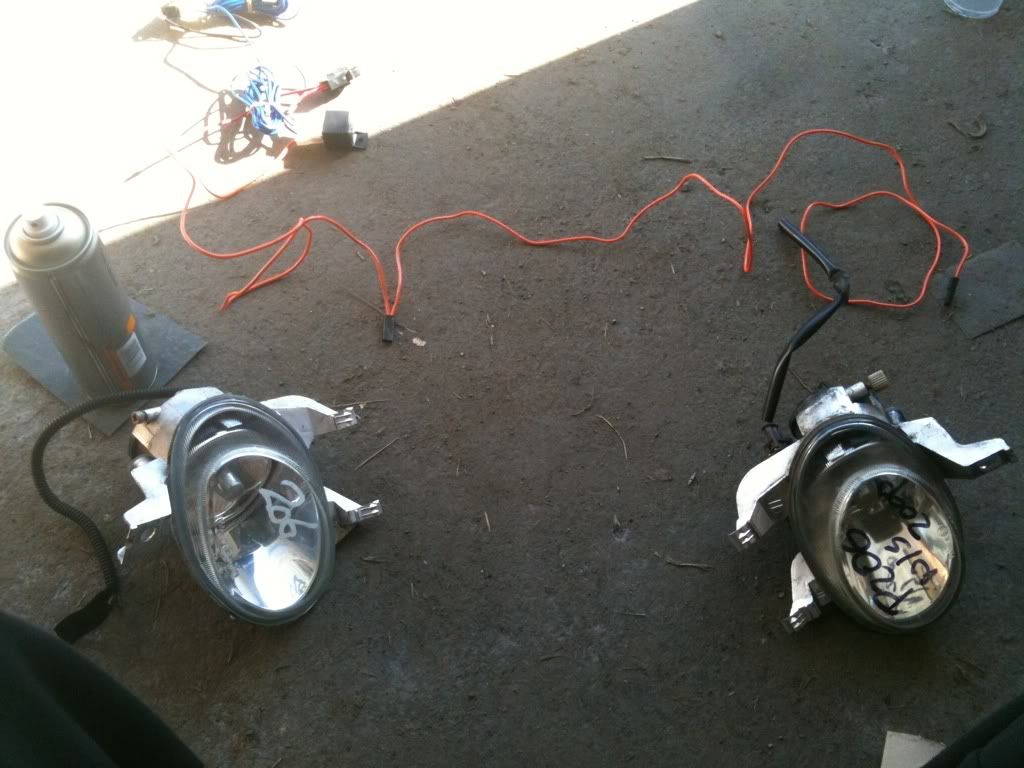
Fitted
Working !!!
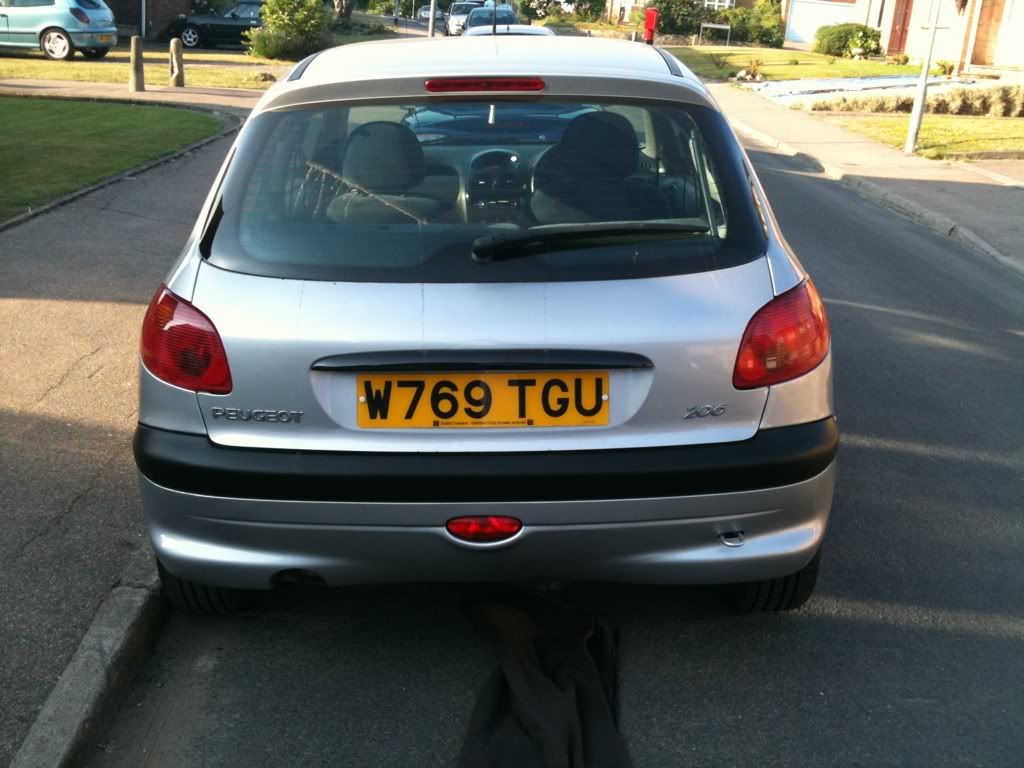
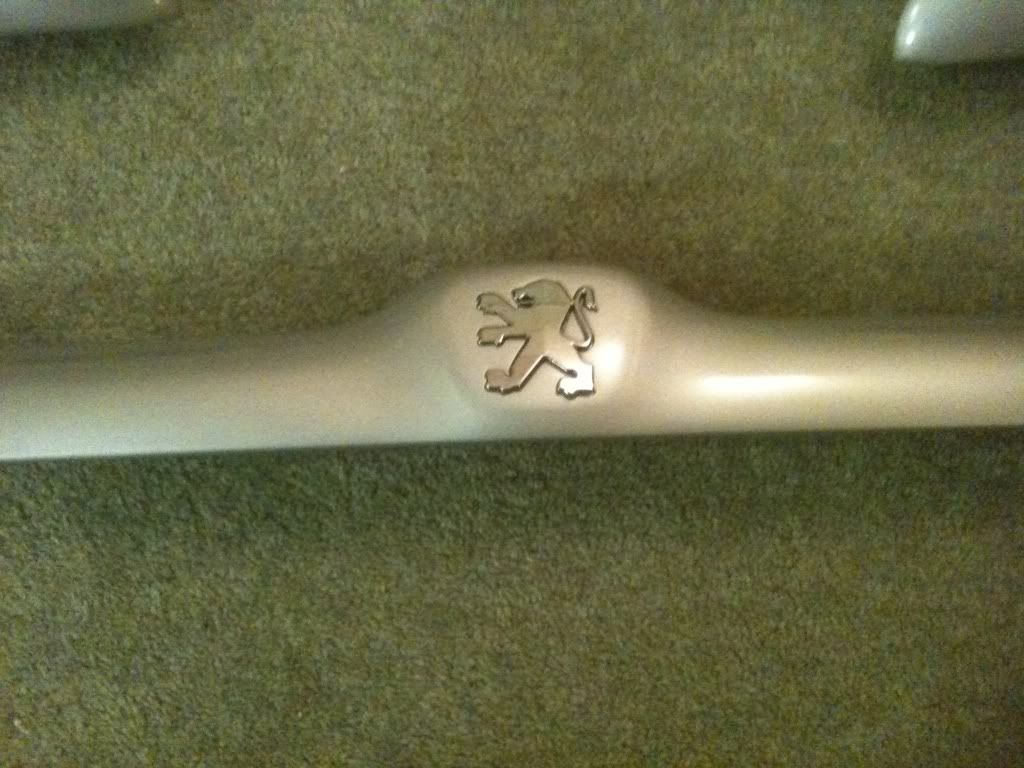
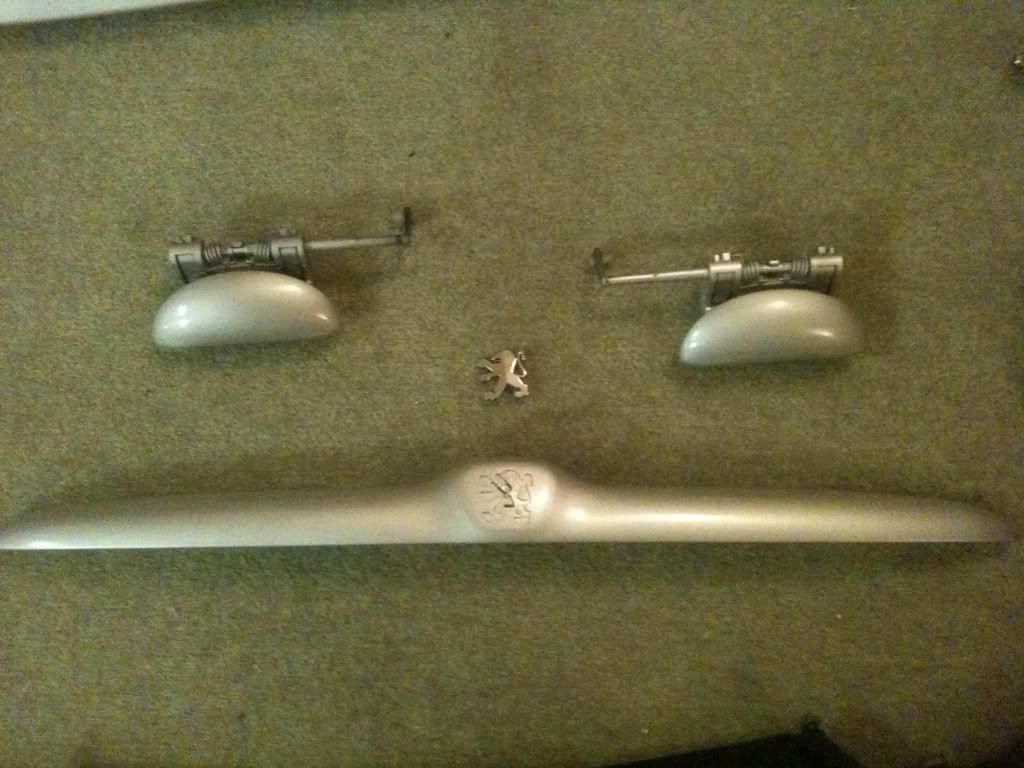
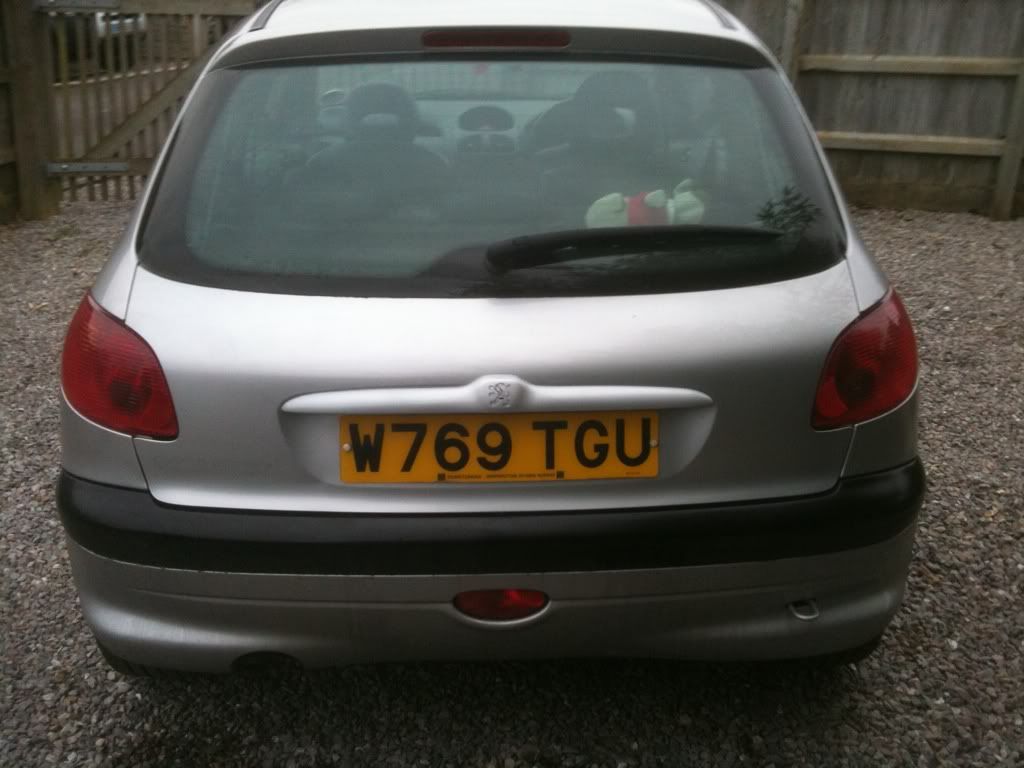
Rear Bootstrip and Gloss black bumper
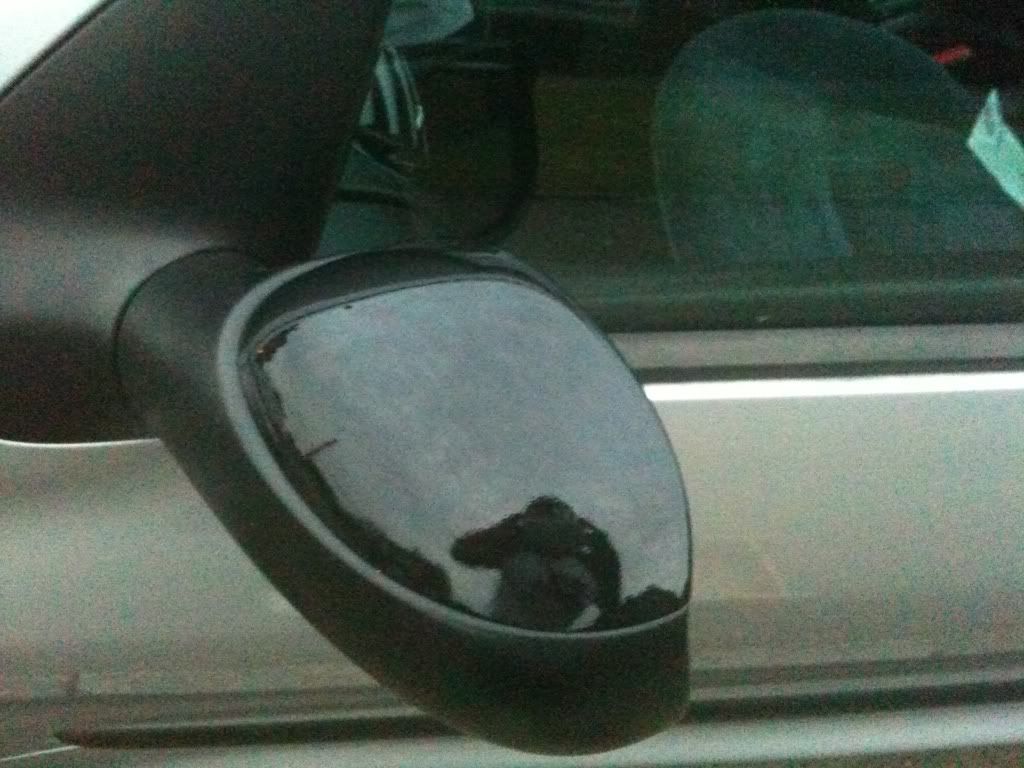
Did the mirror caps too
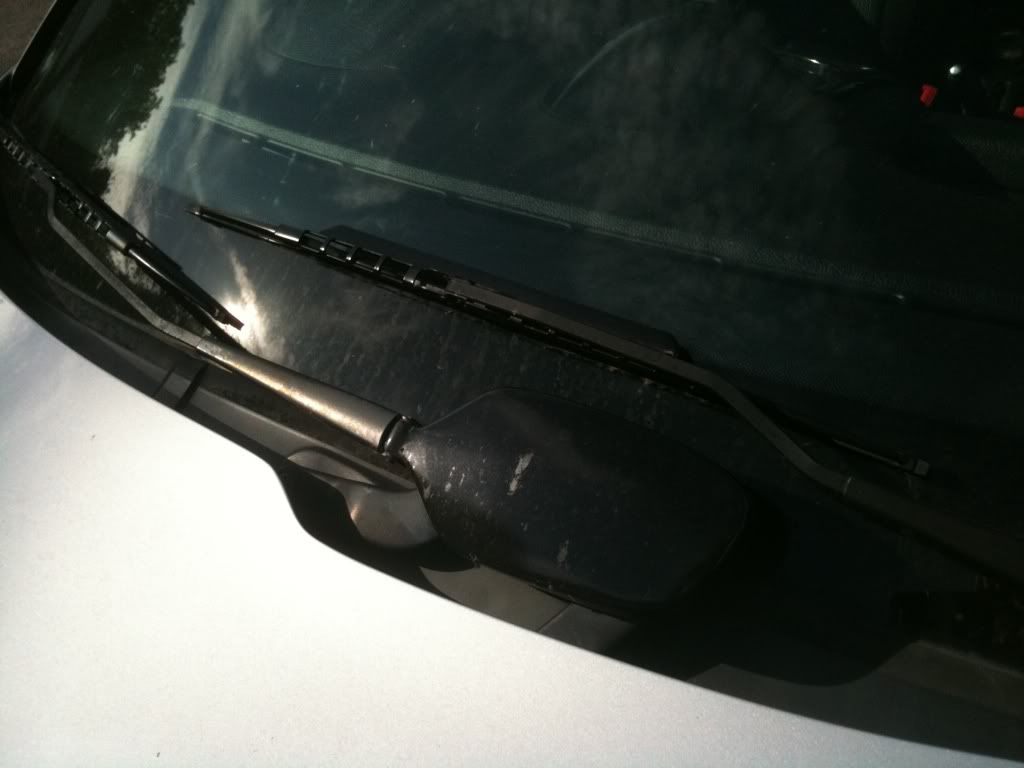
And the window wiper cover box thing
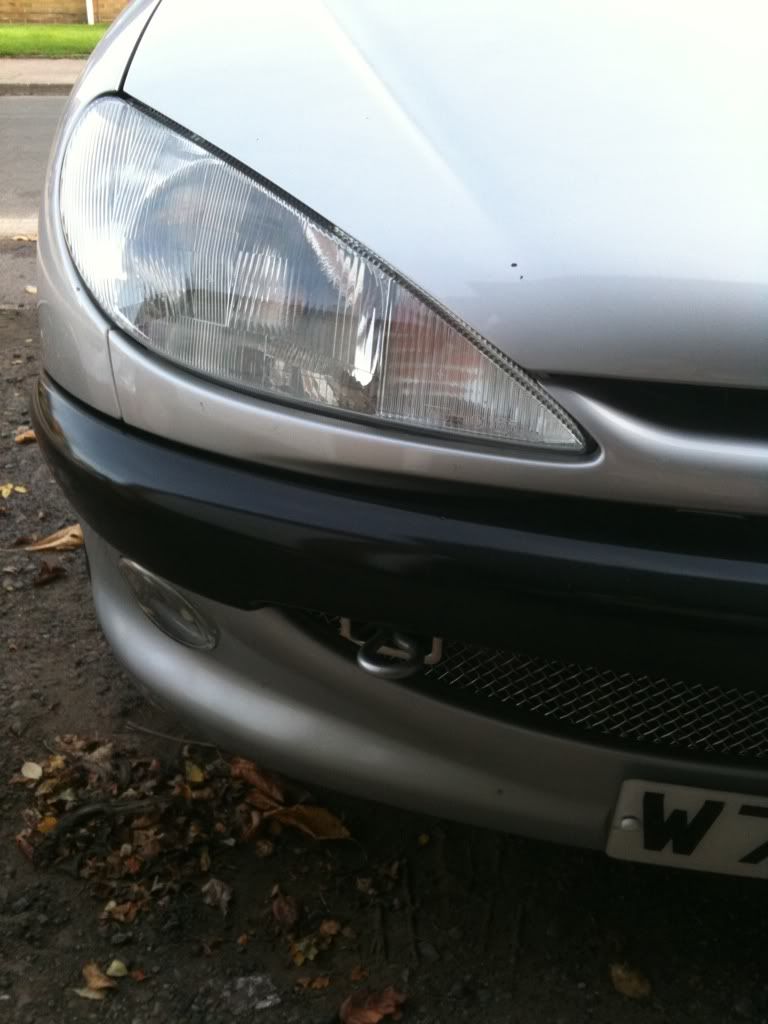
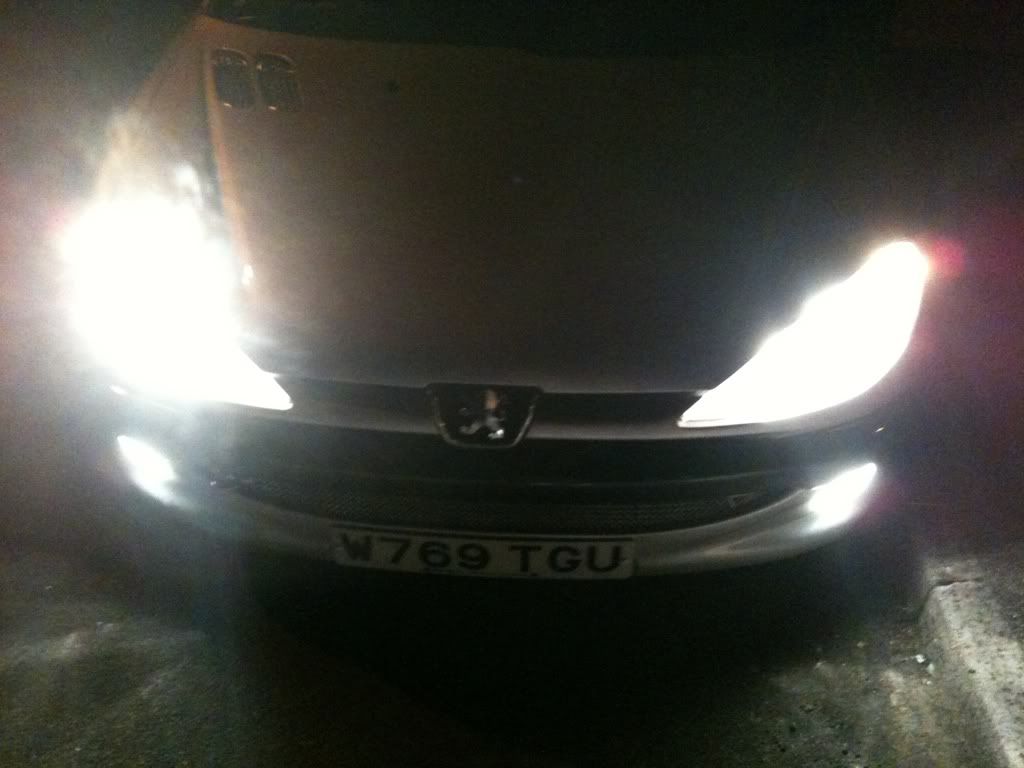
Also did the side strips but I haven’t got any pictures of those. Next was some crystal headlights and some phase 2 rears, makes such a difference I think. Crappy thing with these is one of the screw brackets on each head light has broken off so it’s a nightmare to get them to sit correctly with the gap equal all the way around the light.
Interior
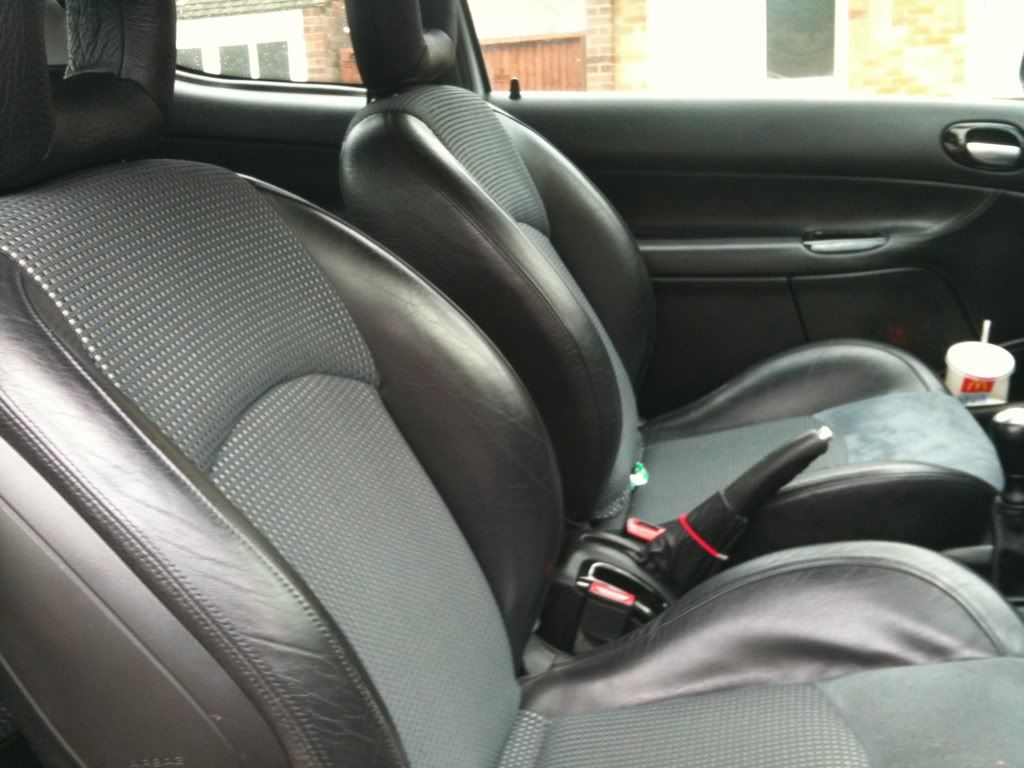
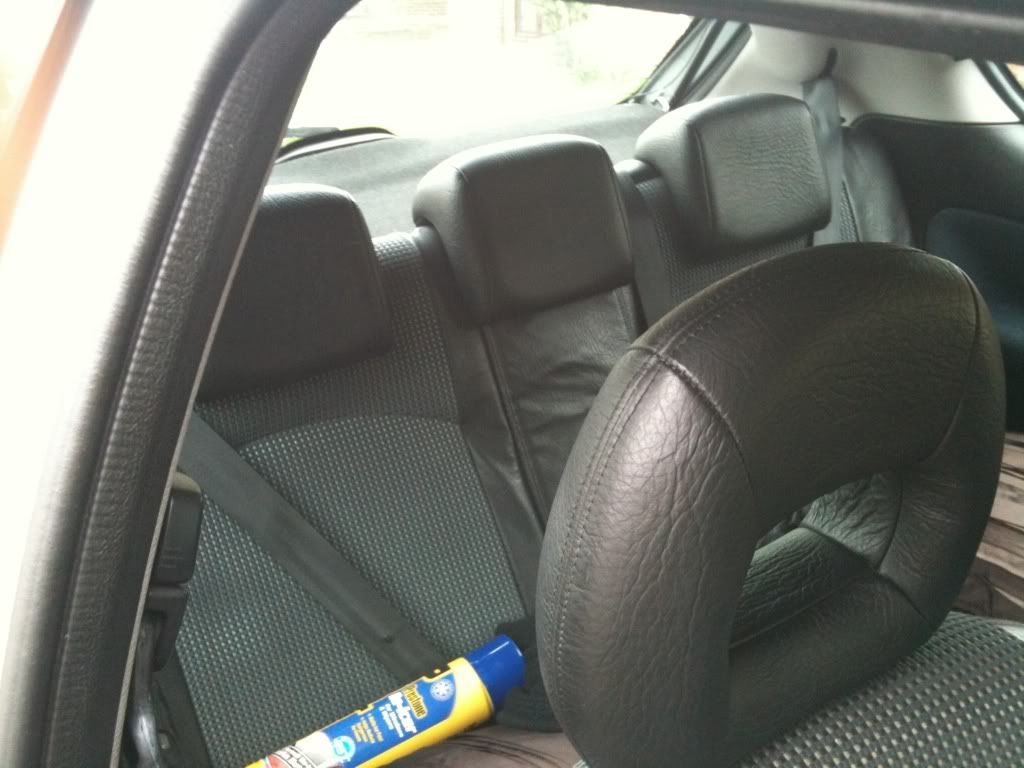
I finally managed to find a pretty good standard half leather GTI interior from a member on here and I was super impressed in the condition for £90.
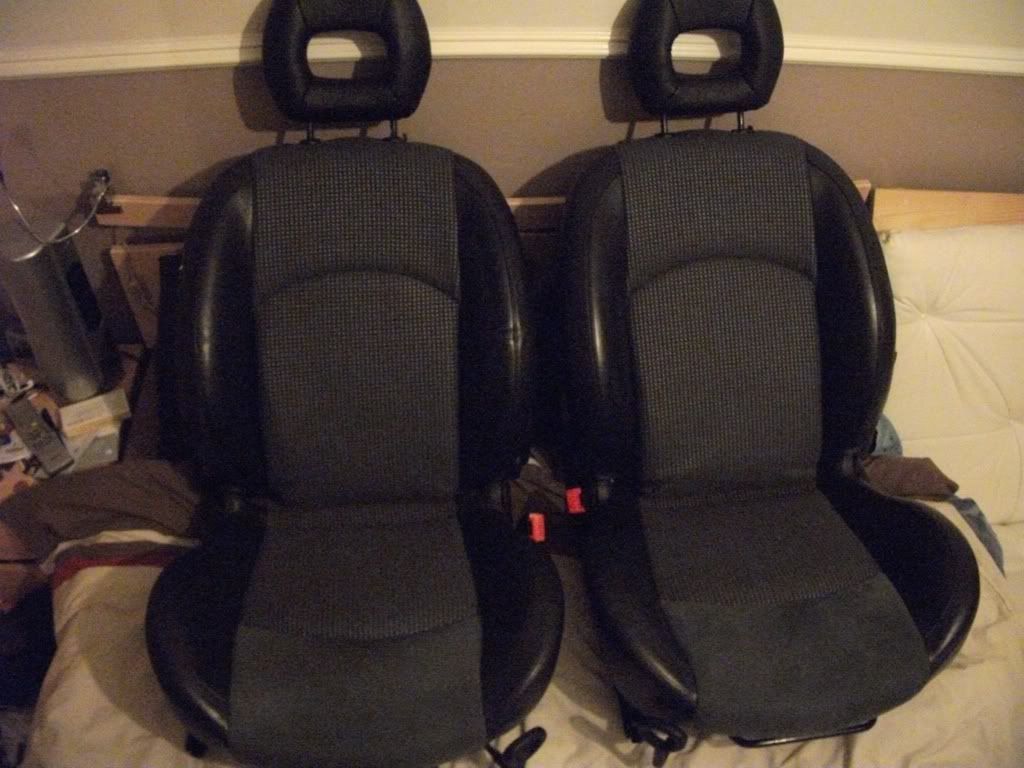
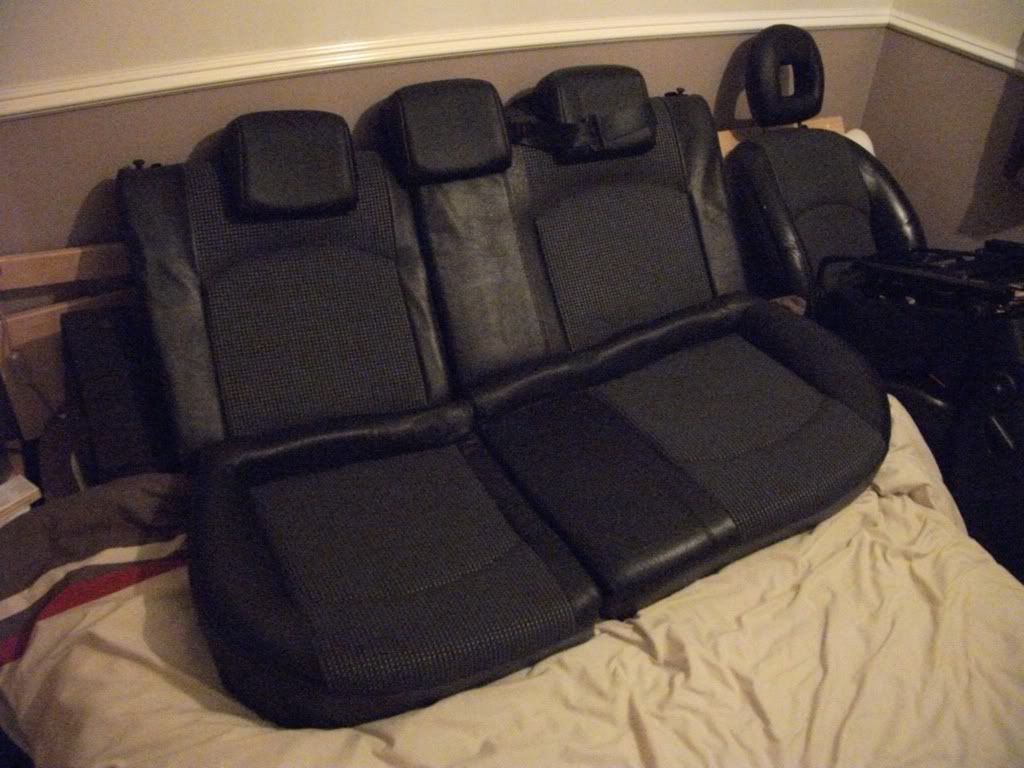
Fitted and cleaned
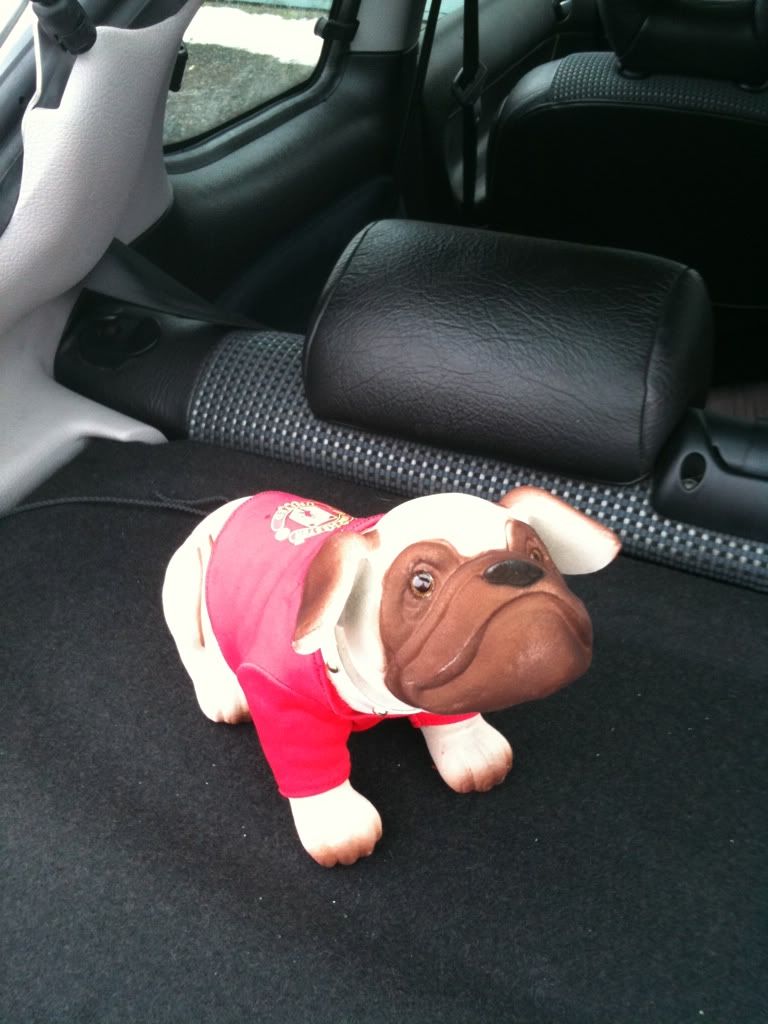
Mascot
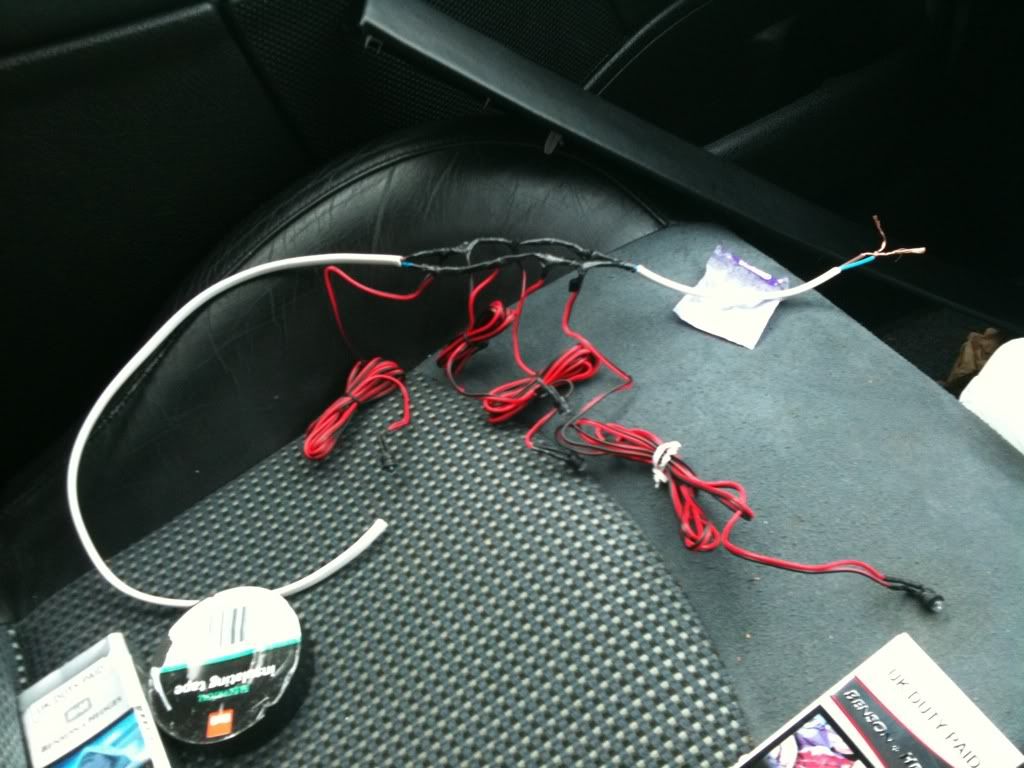
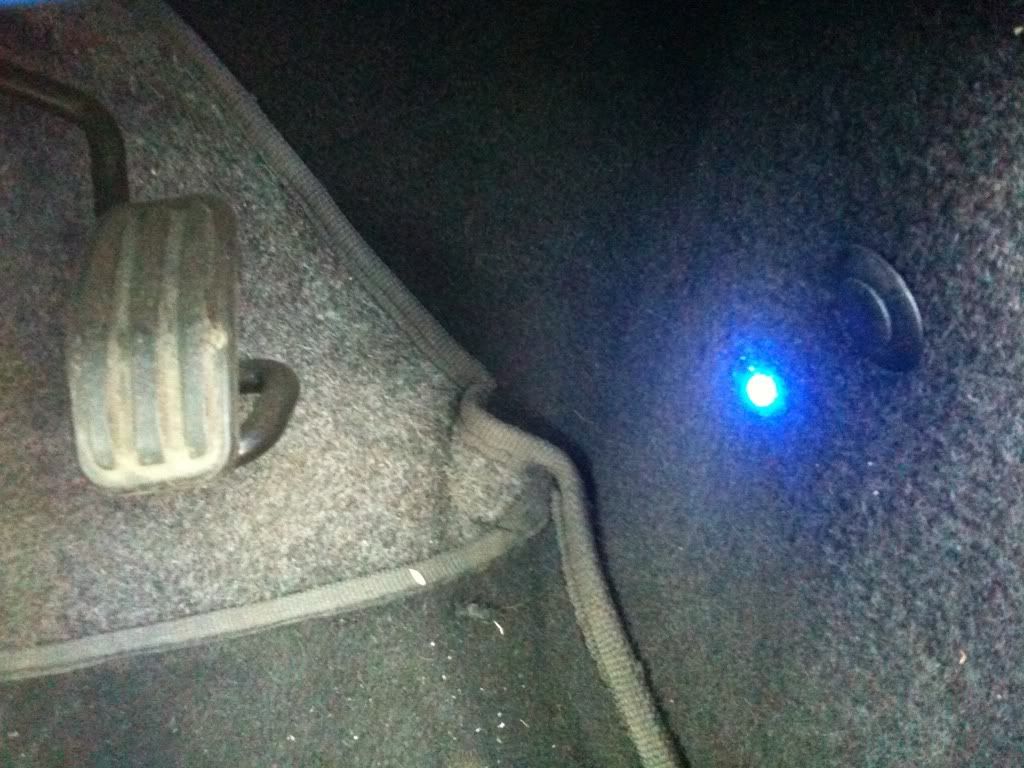
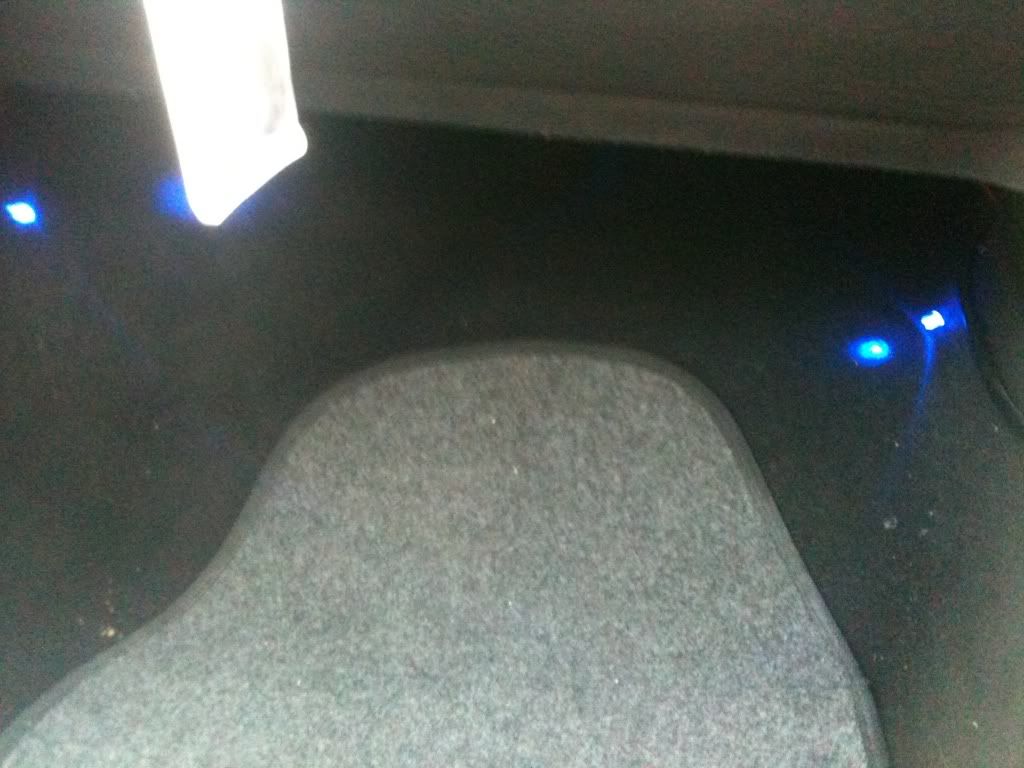
Foot well Lights
I brought one of those 4 LED light packs they do in Halfords for a tenner and had a go at wiring some foot well lights together, two on each side.
My wiring experience at this point was only doing my fog lights and changing my headlights from H4 to H7.
So firstly I got some standard 2-core home wiring from Wilkinson’s and connected the 4 LED's to the feed from my interior light so they turn on when the doors are opened or when the key comes out the ignition. I cut some holes in the carpet and fed the bulb and mounted its little bracket holder in the space. I thought they might look a bit boy racer ish but they don’t look bad at all really.
All LED's wired together
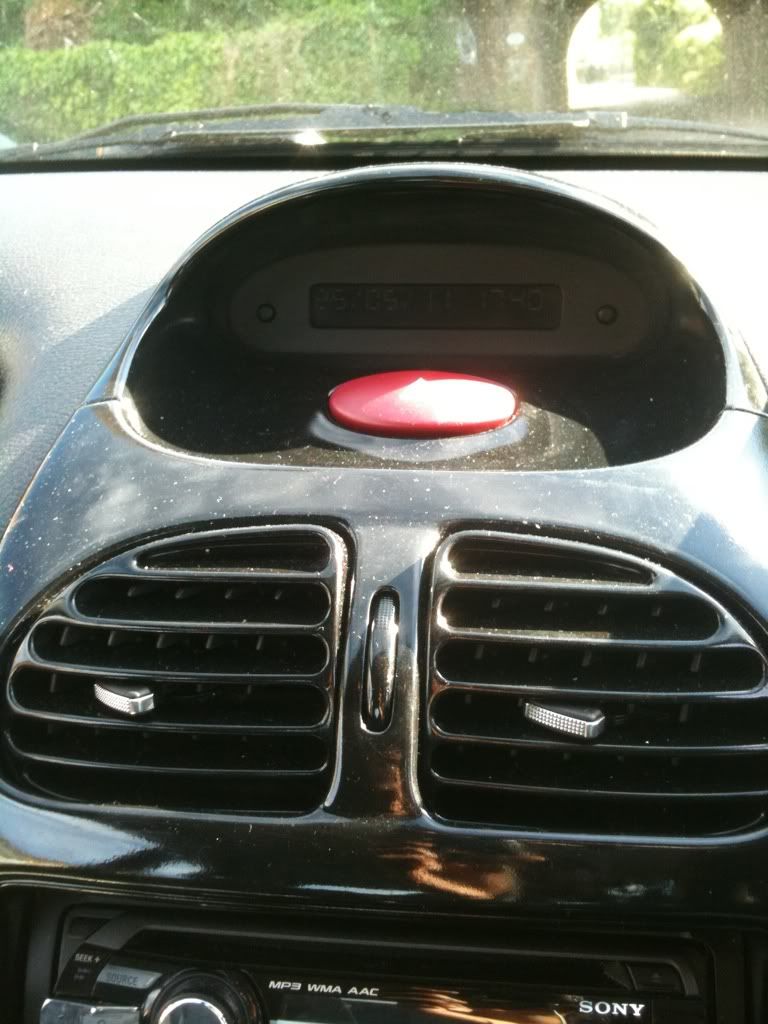
Dials
I wanted to change my dials over to a set that would glow blue to match my stereo and foot well lights, this turned into an absolute nightmare that still goes on to this day.
So first I purchased a cluster from eBay that had the Lockwood dial kit fitted to it. I wanted to keep my mileage so I didn’t want to just straight swap them over so I decided to swap the Lockwood insert over for my standard black one.
My dials
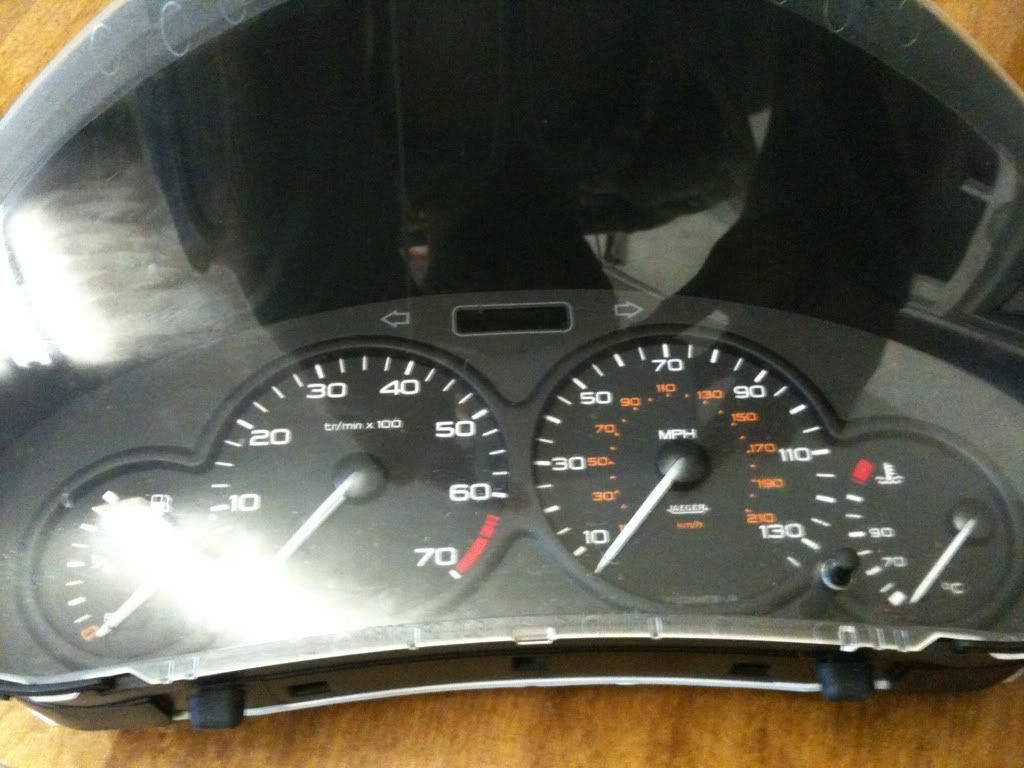
My spare cluster

My cluster after swapping over Lockwood sheet
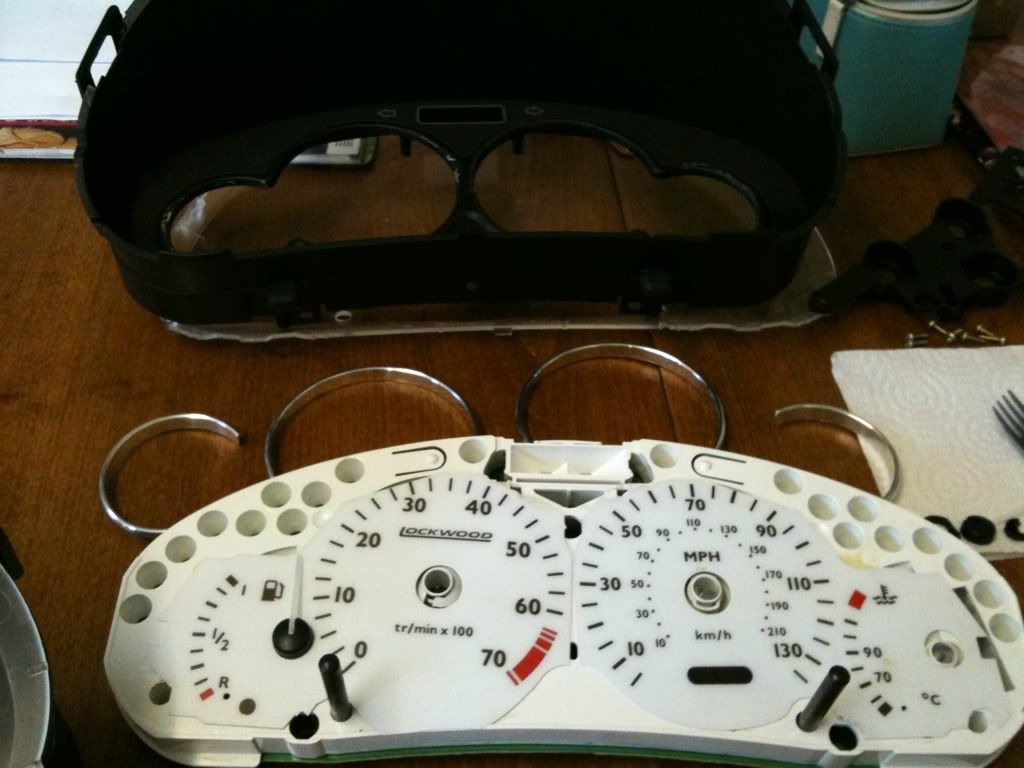
Then came the realisation while I was experimenting with some blue and white LED's that the Lockwood dial I had acquired with that cluster was intended for orange illumination not the blue I was after.

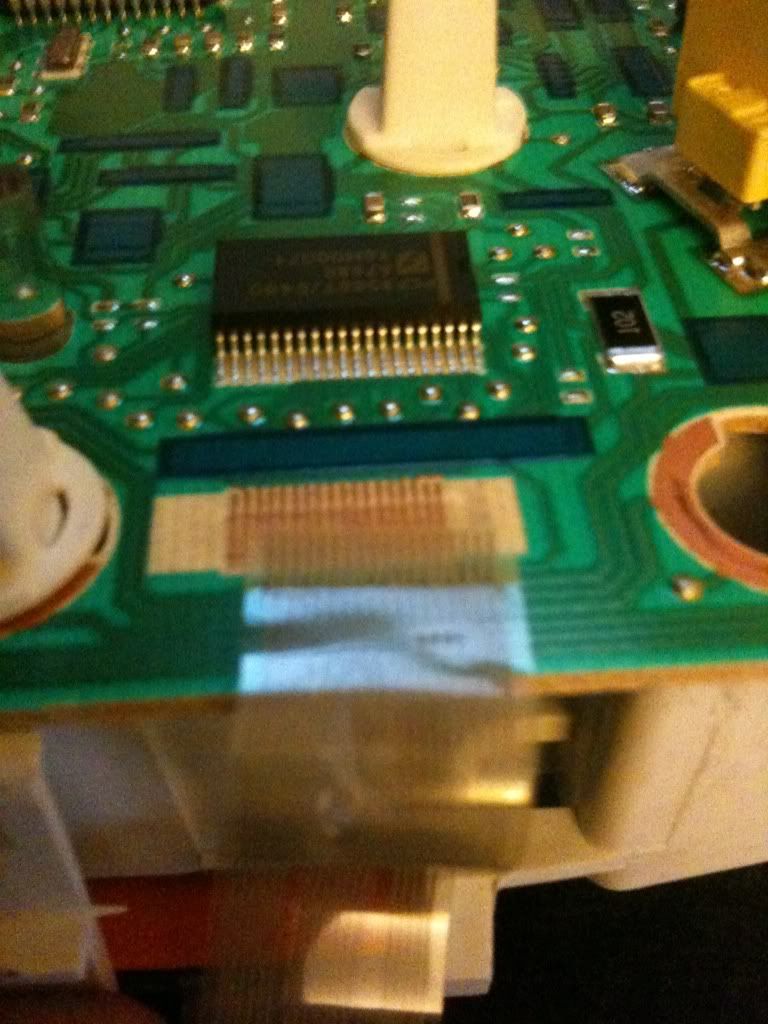
I managed to get the needles to light up blue but to do this nothing else could be illuminated properly

While doing all of this I also managed to pull the ribbon that powers the LCD milometer screen away from the circuit board, now meaning that I have no display at all on the screen. Something that I still don’t know how to fix today (need to hold the ribbon to the PCB somehow, clamps? Glue? I just don’t know lol.
So this was the finished piece (minus a working milometer)
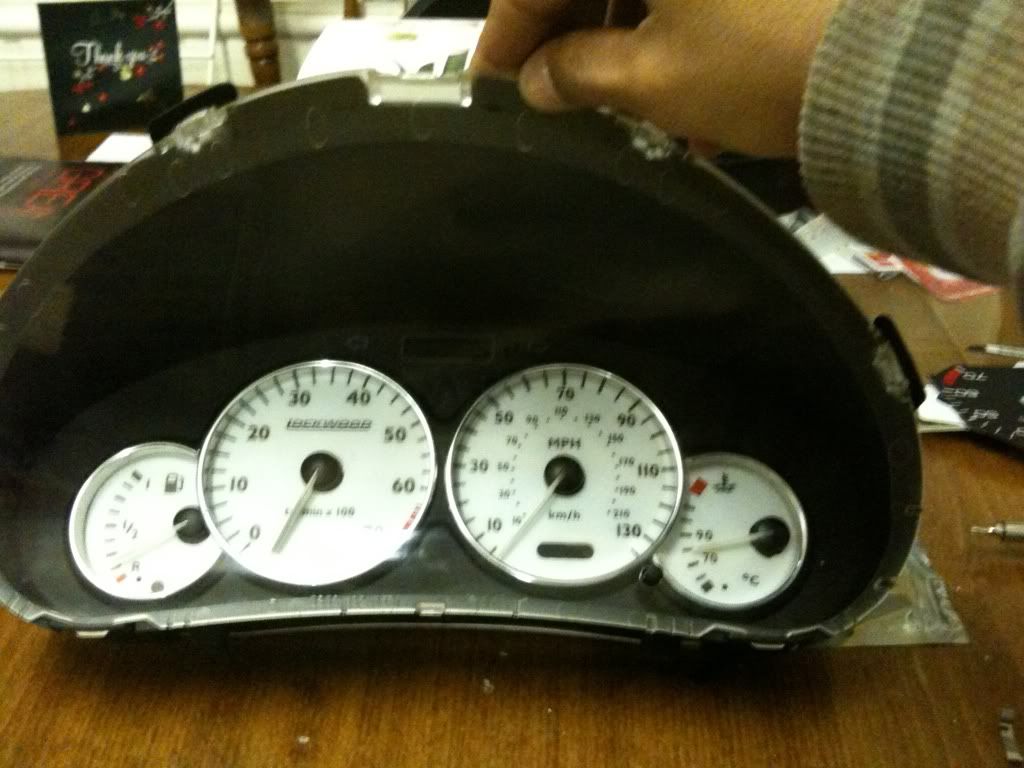
Illuminated

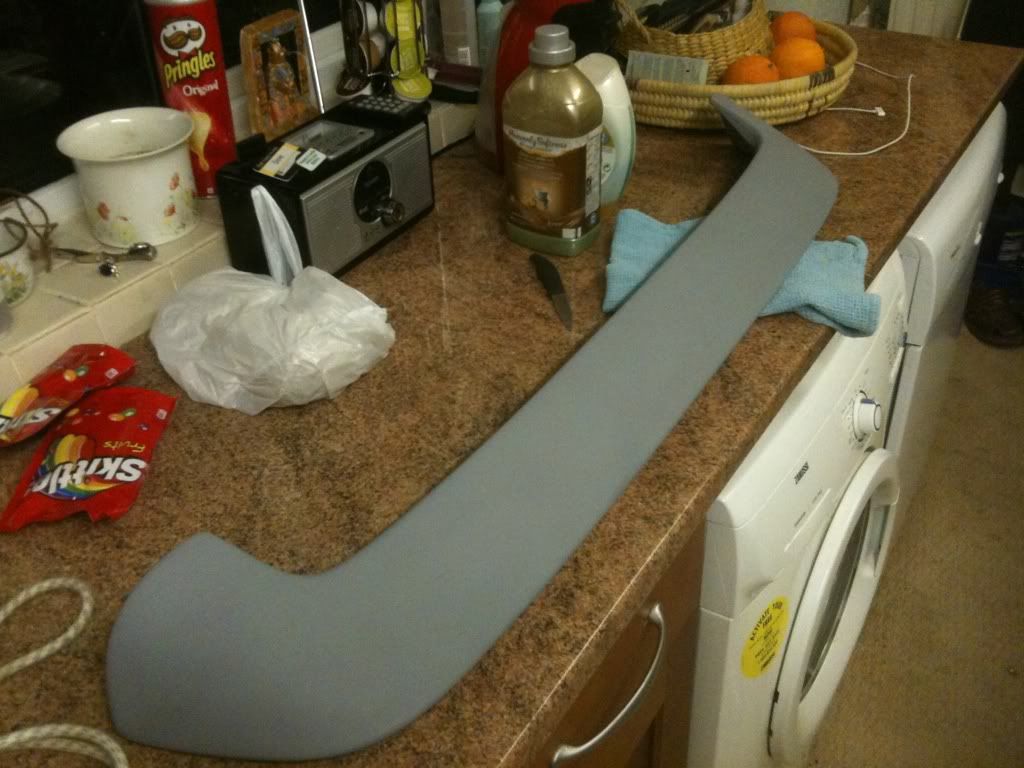
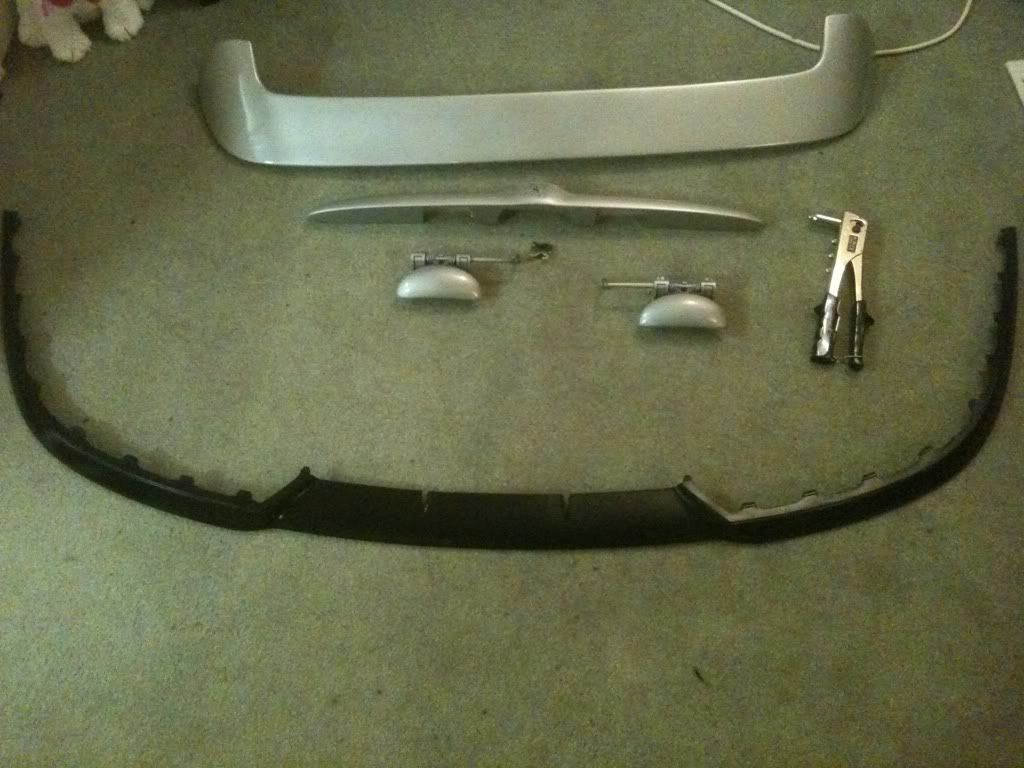
Spoiler
The spoiler was the next piece of bodywork I wanted and eventually one came up a few weeks later (thanks Uz), initially lost in delivery thanks to some backwards post office in the sticks. This was primed in due course.
This was when I decided that I wasn’t really a big fan of the gloss black on the car because it wasn’t very glossy (the gloss guide wasn’t on the site yet, thanks Ste206 lol) so I decided I would have a go at colour coding all of the bump strips around the car. I didn’t want to paint the gloss black phase 2 boot strip (it still owes me £30 lol) so i had to do something else.
Phase 1.5 Boot strip + Exterior Handles
I saw a member on here had smoothed out there phase 1 boot strip and I thought it look pretty good so I had a go myself.
Baring in mind I had never used filler before I was quite happy with the result.

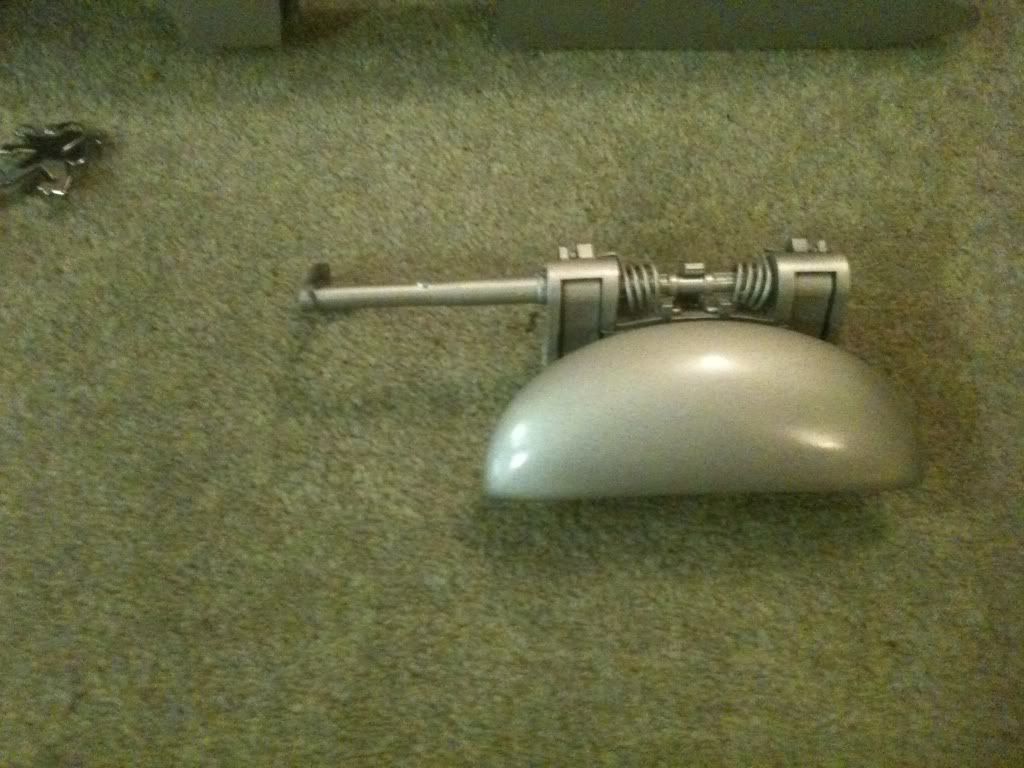
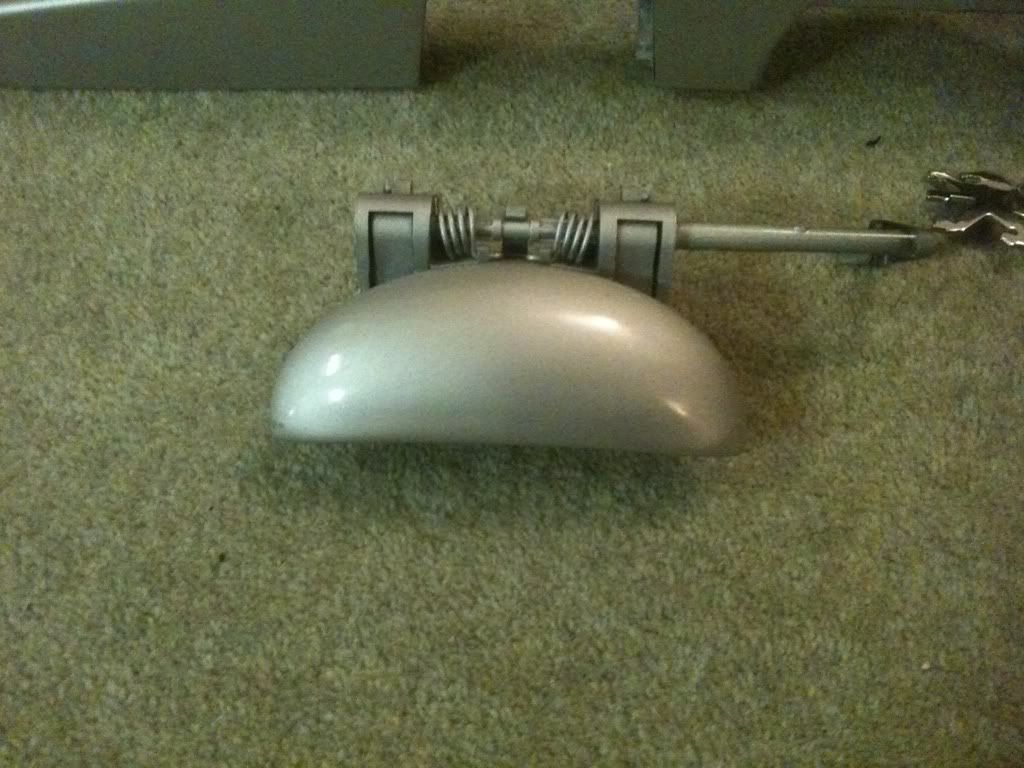
I went down the scrappy (not the robbing one, I found a much better one that was almost my second home at times lol) and drilled out a set of green handles from an old 206, the fella wanted £10 for the pair so I didn’t mind.
Now I had to learn how to rivet, so I borrowed my mates riveter (or rivet gun lol) and got to attaching anything I could find in the garden with some holes in it.

Finished pieces
Final shot with the new splitter I brought from SEAT for £25 I painted in Gloss black
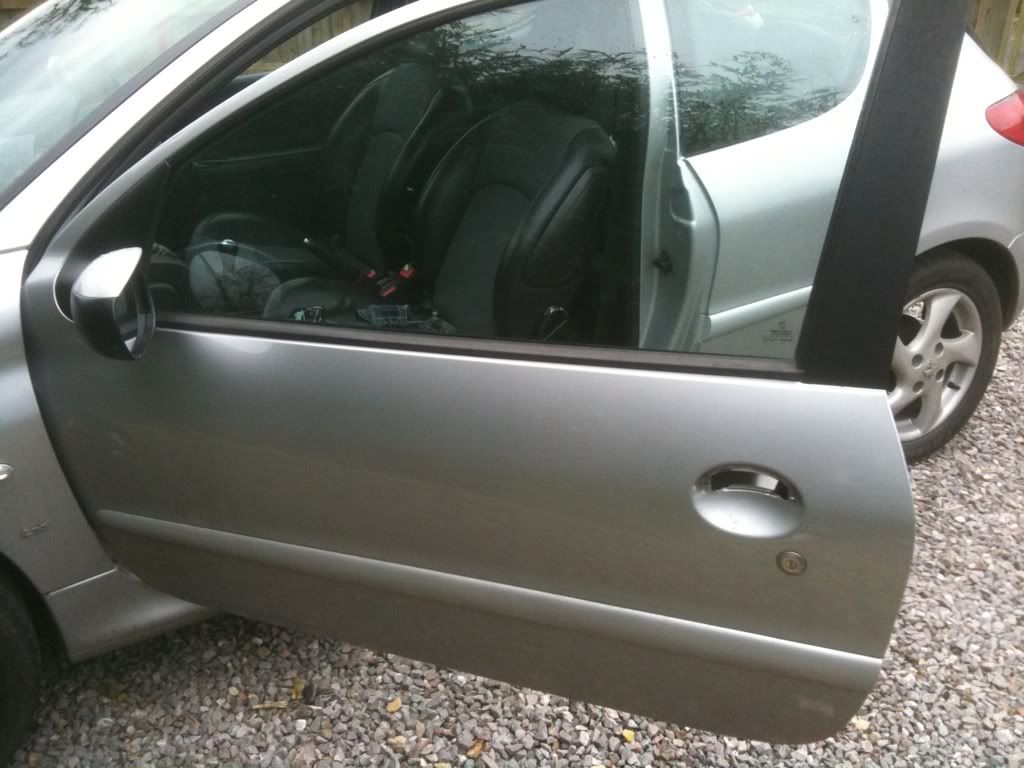
Fitting Door Handles + CC Side Strips + CC Mirror Caps
Over a weekend I did the door handles and the newly colour coded side strips. Fitting the exterior door handles is pretty easy, just a case of drilling the rivets out the old handles, taking the door cards off to unattach the door opening mechanism and then a case of replace and reverse.


Debadging + Fitted Phase 1.5 Boot strip
I used the hair dryer and water bottle method of debadging the rear and the sides and it came out reasonably good for a ten year old car, a little of the lacquer on the rear badges was worn away but polishes up pretty nice.
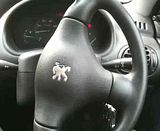
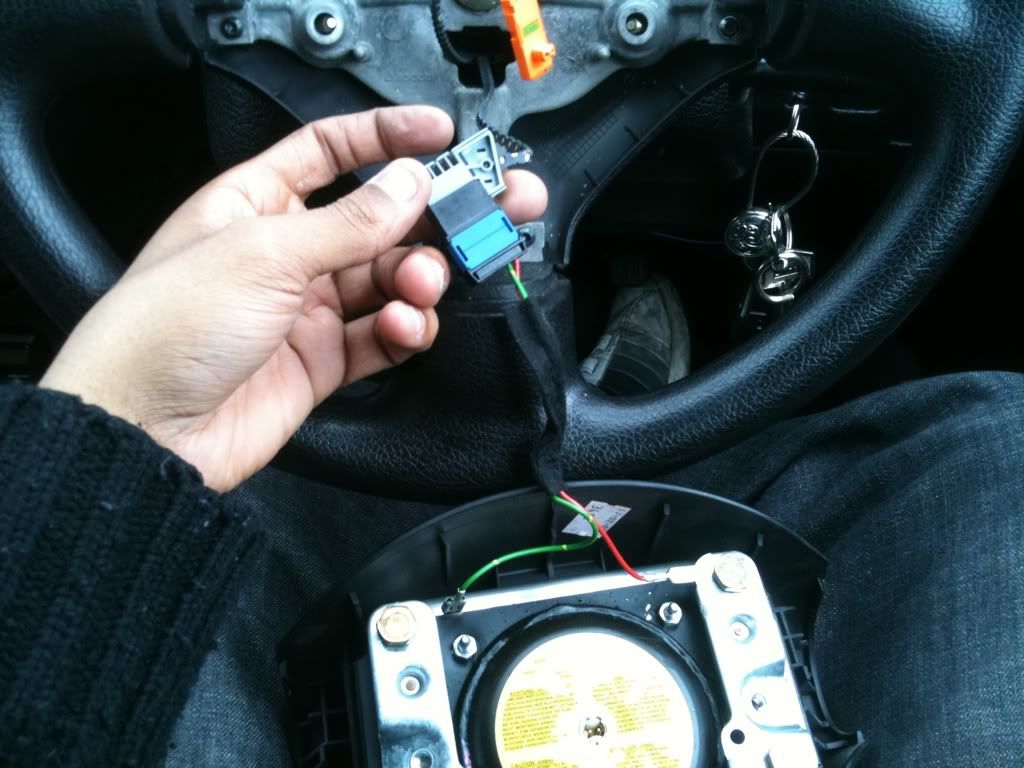
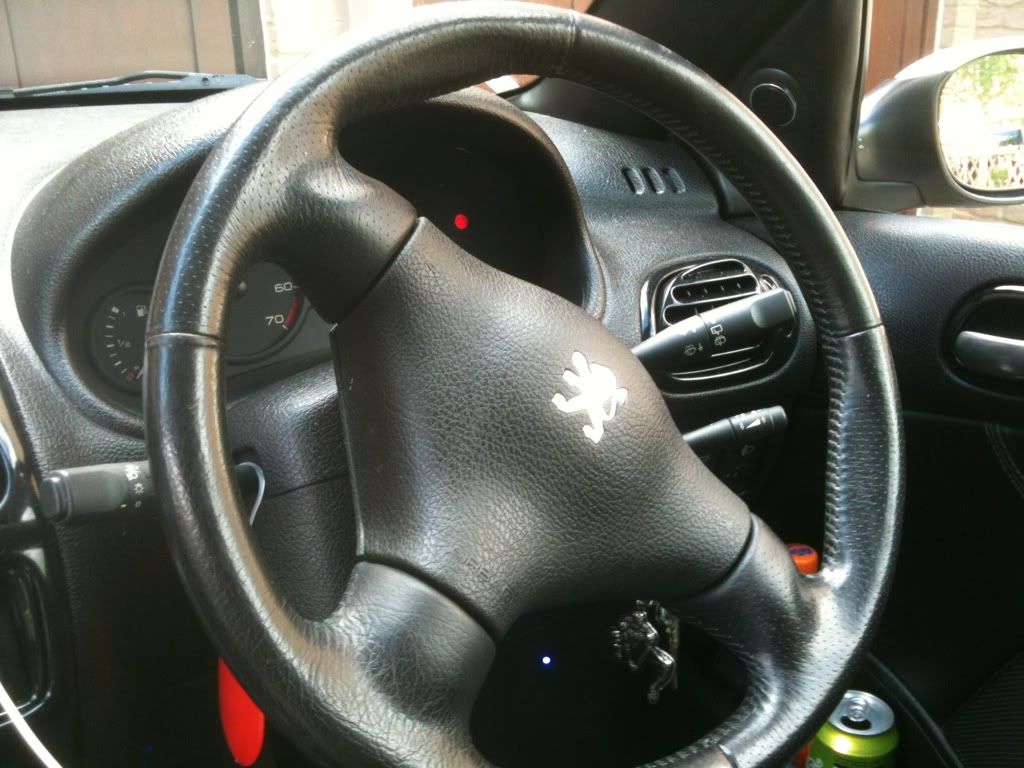
MFD + Leather Steering Wheel
I updated my MFD from the one that had only the time display to the one that had both date and time, many thanks to Lee for the wiring diagrams. With that came a new surround that needed gloss black-ing .
The steering wheel is pretty easy to swap over, just a case of undoing screws, unclipping airbag, releasing the big t50 screw in the wheel and then changing them over.
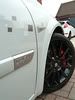
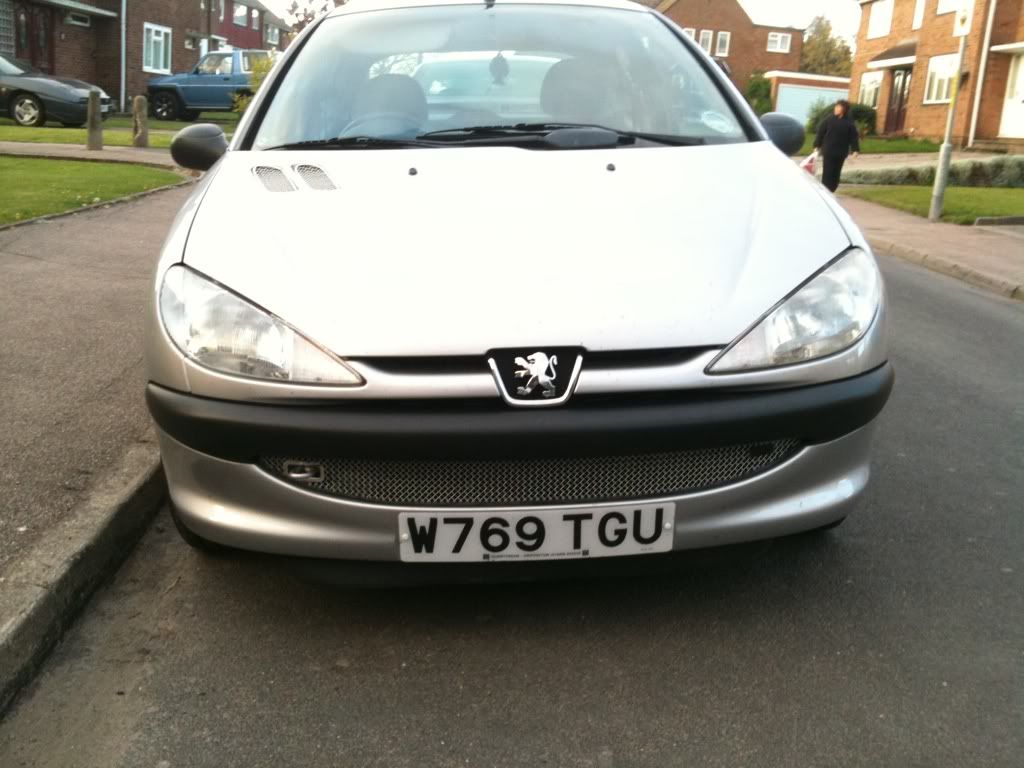
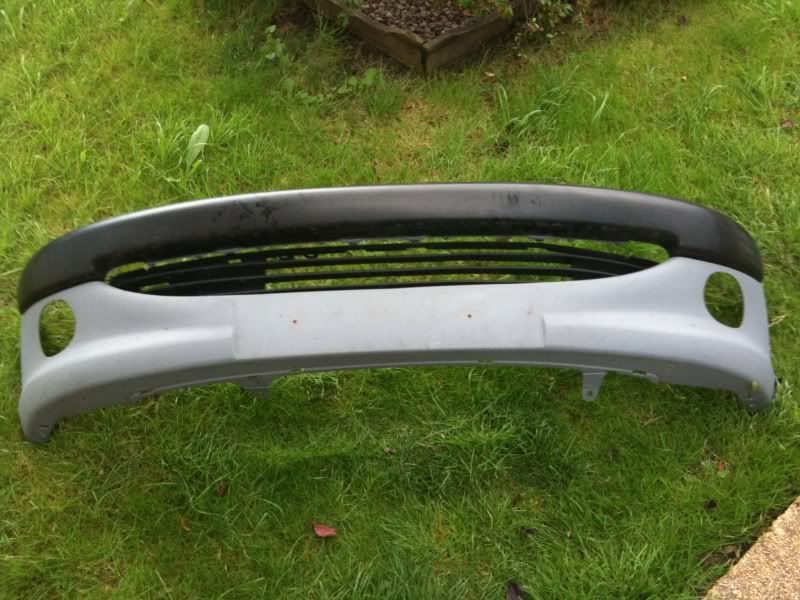
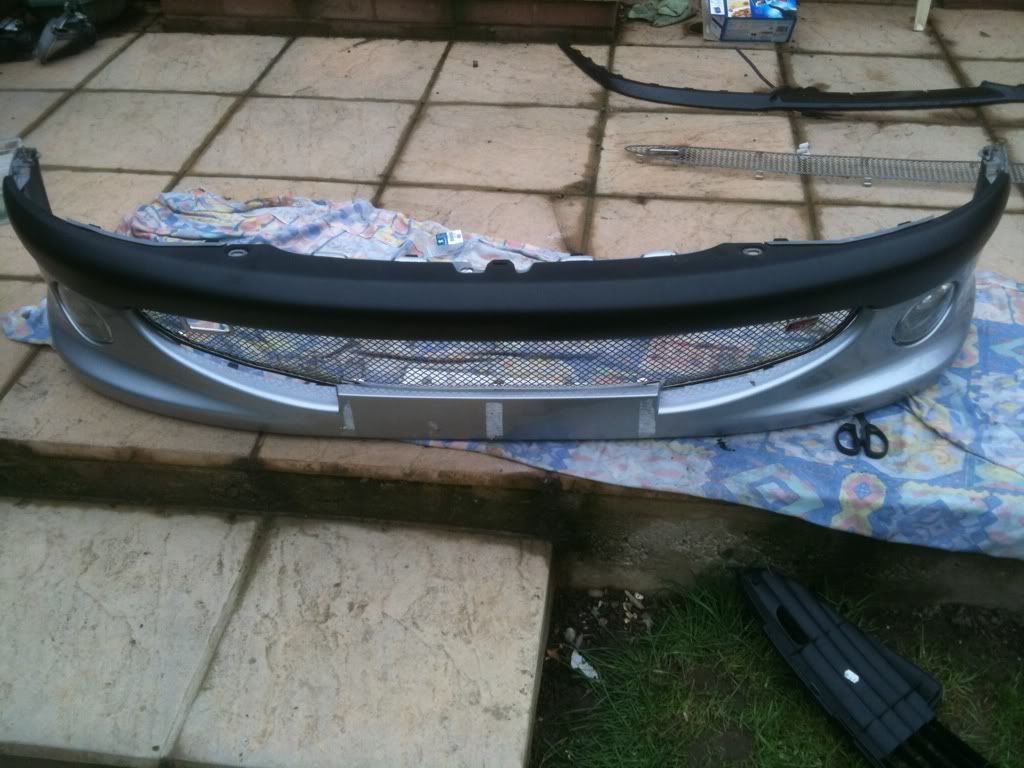
Sports Bumpers
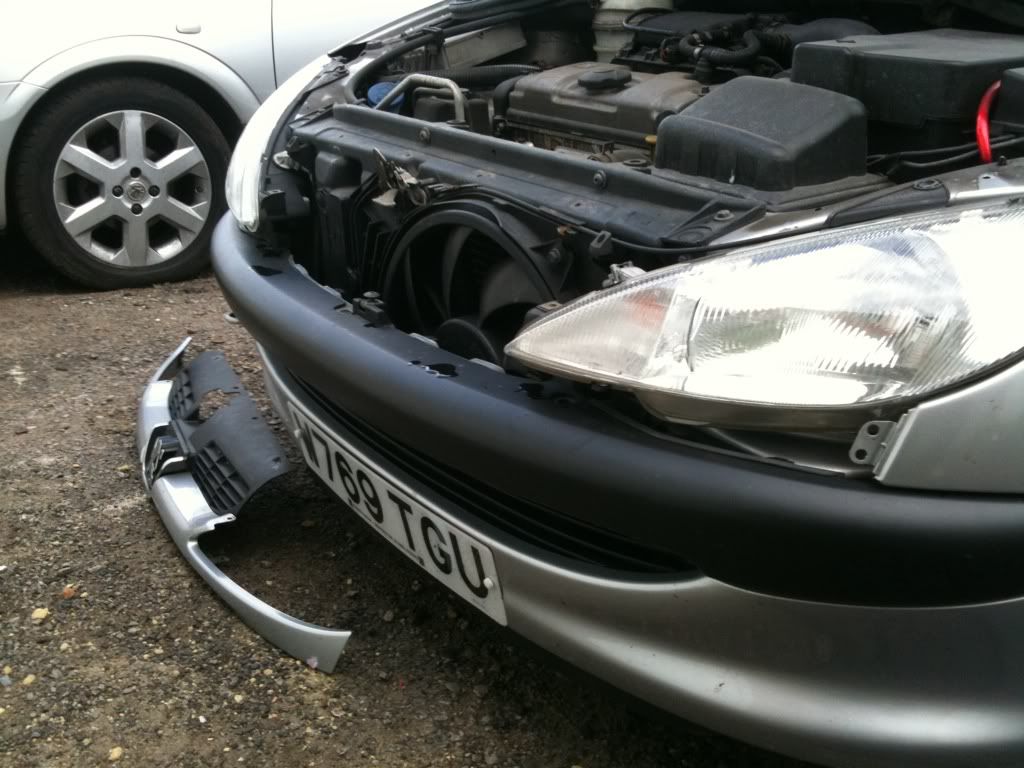
This was one upgrade I wasn’t particularly interested in doing until winter came and as I was parking my car in the car park I went too far forward into a bank of ice that had formed where people had shovelled snow the week before; I was screwing. Great big crack down my own hand painted bumper so now I was after any bumpers I could find in EYC platinum silver; I wasn’t going to pour all those hours in again.
I found a guy on eBay who was selling the front sports bumper from a 206cc in platinum silver and I sped over to Essex to get it, after giving him 40 quid he then pulls a matching rear bumper out for 30 quid so I snapped that up too.
Before going to the effort of swapping them over I decided now was the time to CC the front and back bumper strips. All ill say is I am so happy to have done these because two upgrades because it makes the car so so much fresher looking.
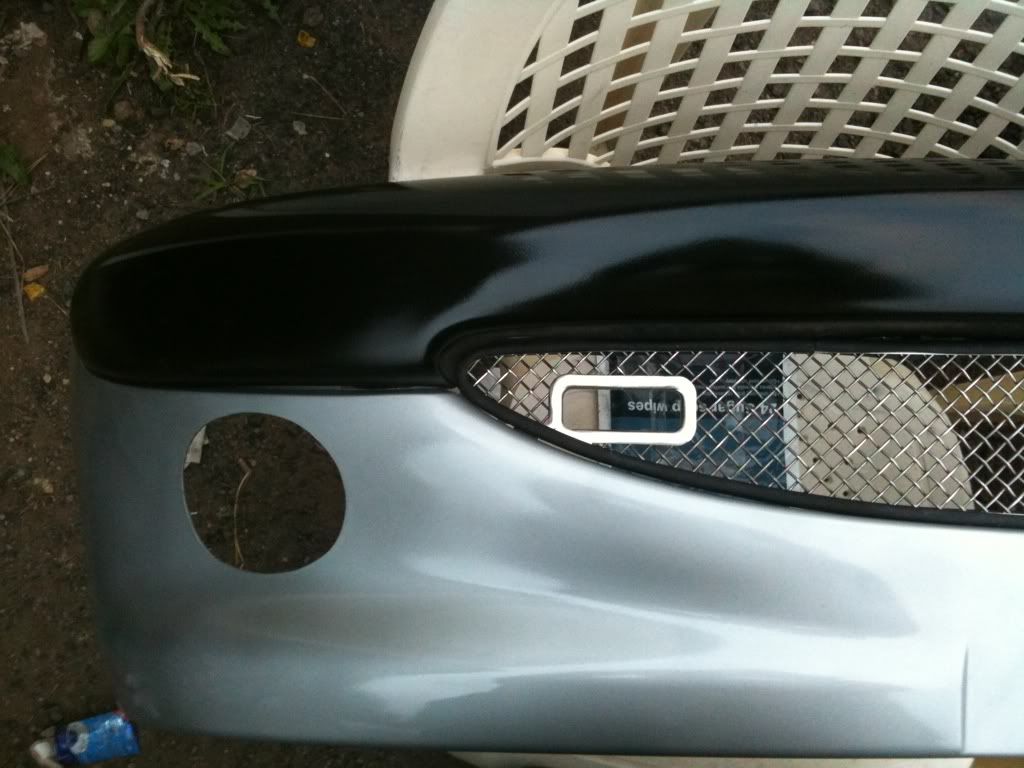
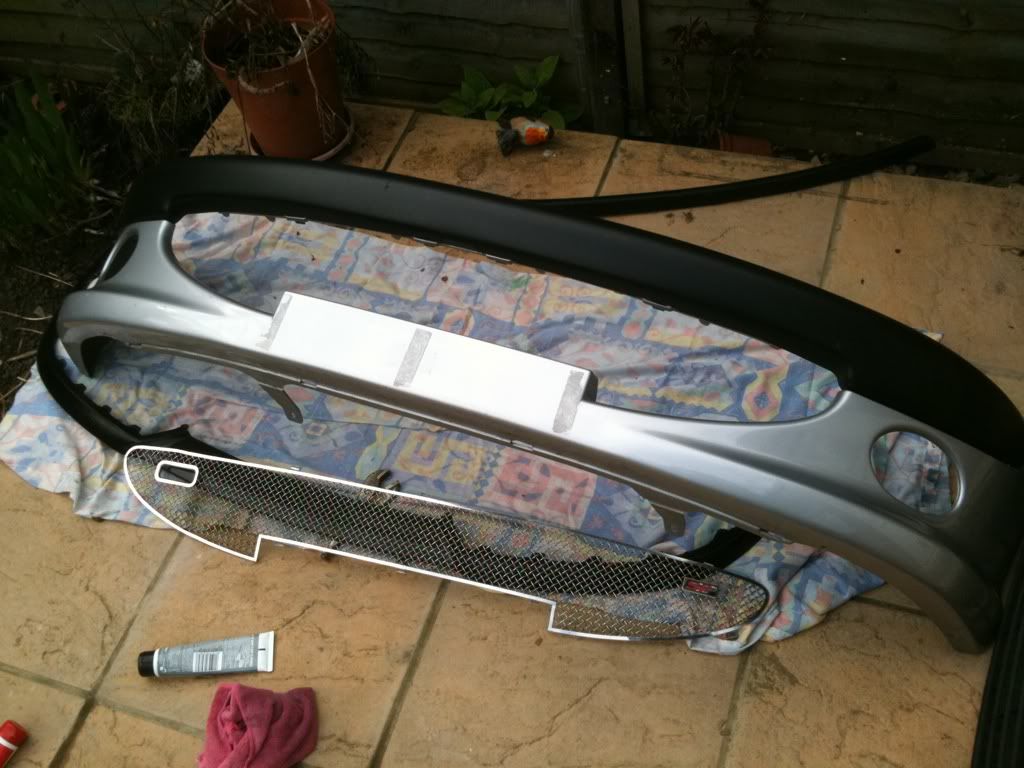
The problem with this is I was now on the hunt for a sports grill and sports fog lights. In Erith (dump I know lol) there is a industrial estate with around 10 scrap yards and workshops on it. I asked at the Mr. Peugeot garage there for info on the best way to fit the spoiler and he sent me over to a body shop across the road.
This was the best piece of luck ever, the guy in the body shop was fitting a body kit to his girlfriends 206cc so he had loads of stuff he didn’t need any more, including both fog lights and a sports sp grill for the grand sum of £20!!!!!!!!!
I attached the splitter with some self tappers and it holds rock solid
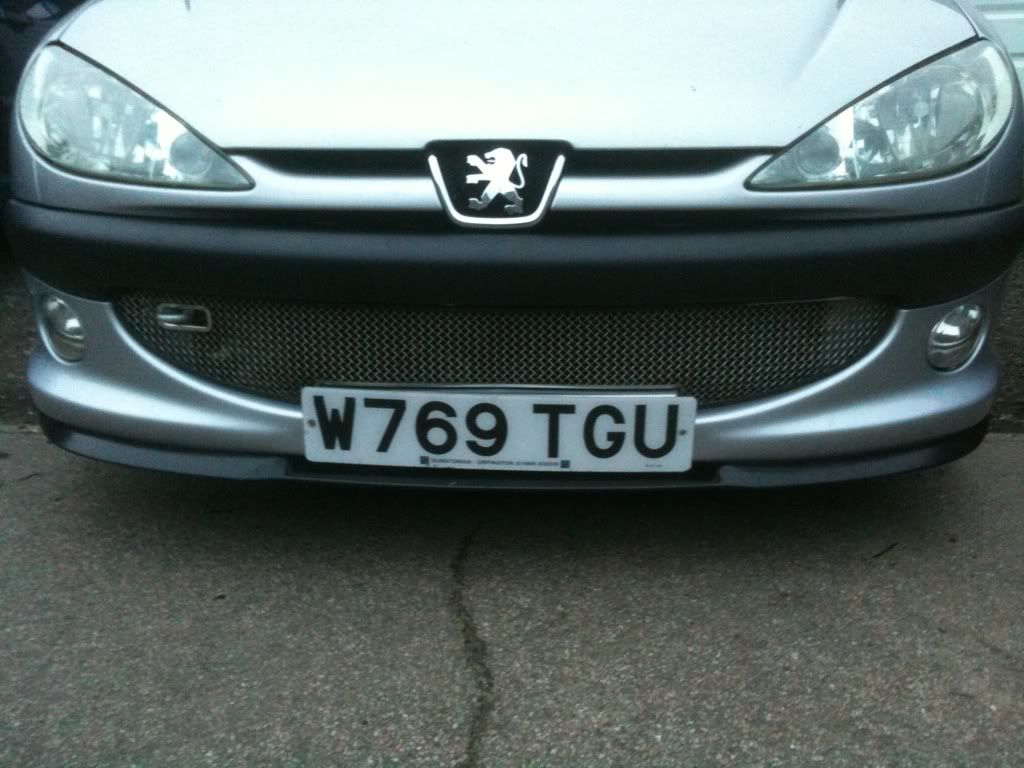
Also got some new license plates from Halfords to complete the look. Think I need to put it a little higher.

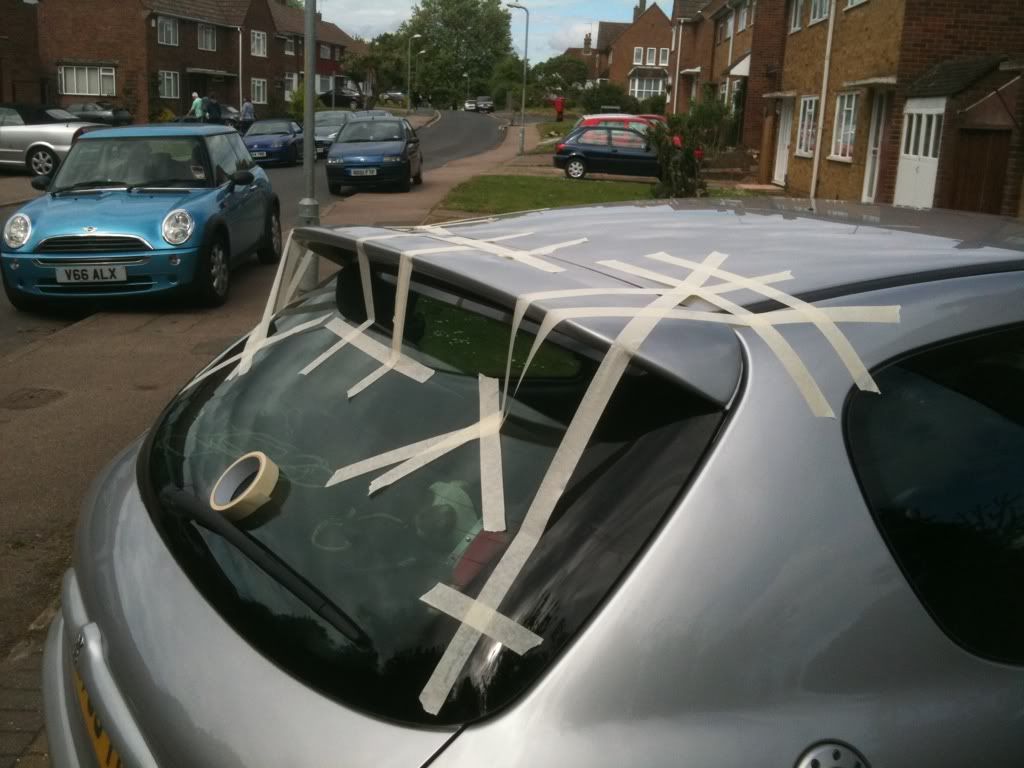
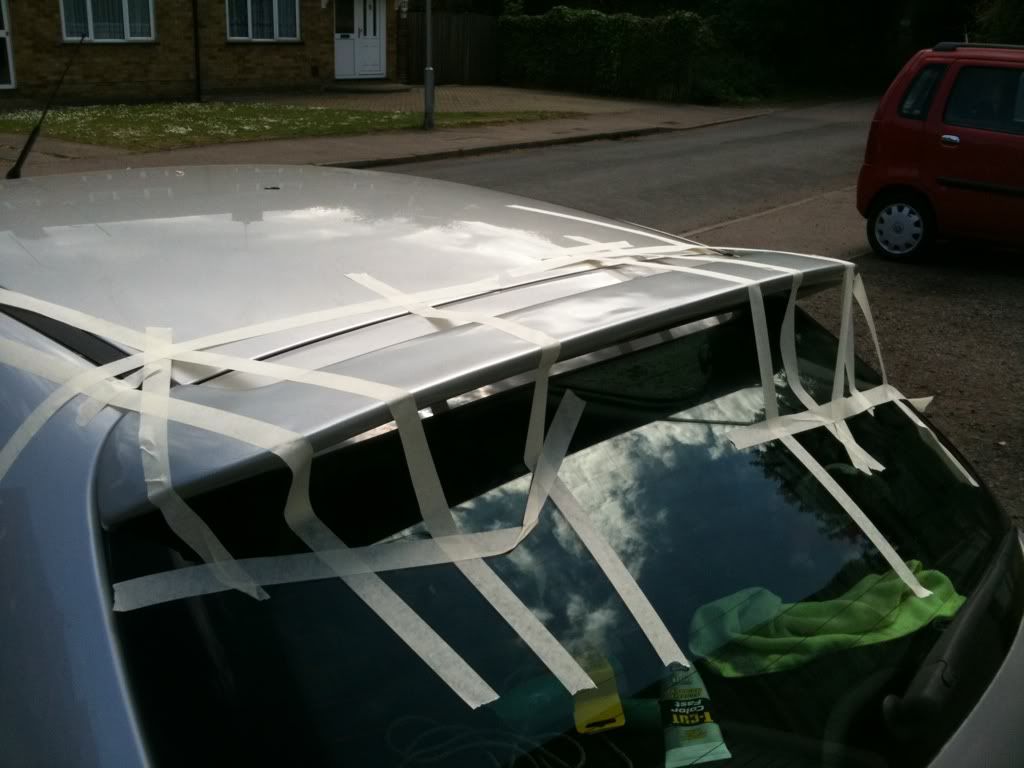
Spoiler
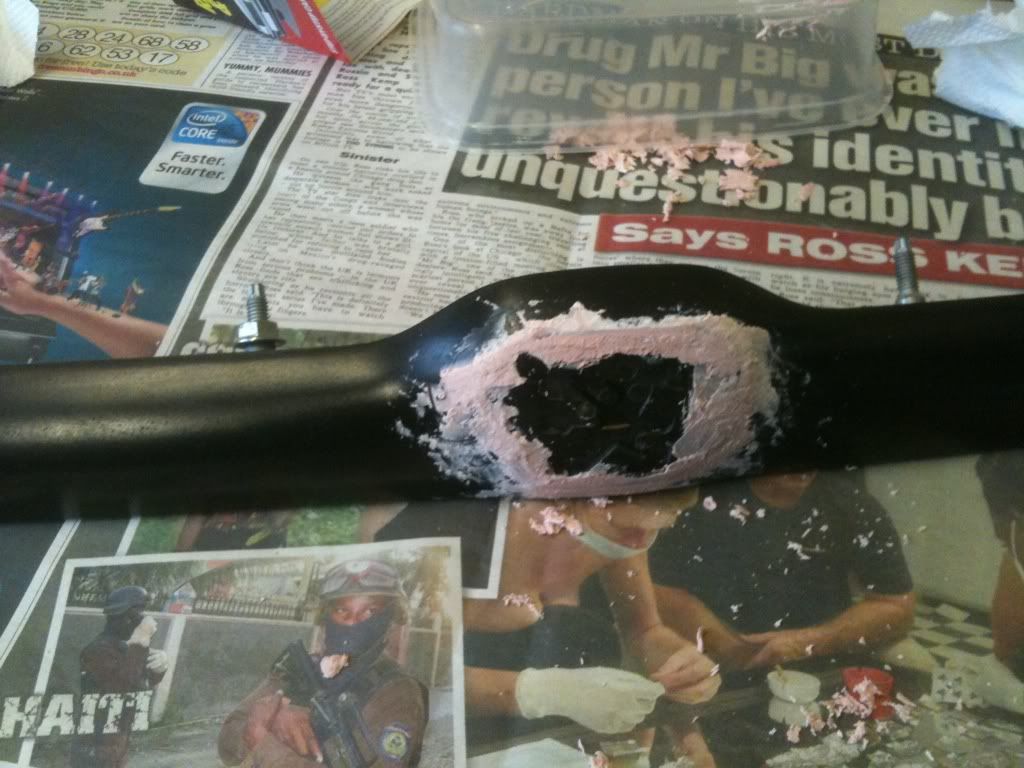
After being completely lost (and scared of ruining it) I decided to just man up and try and fit the spoiler myself, I followed everyone’s advice on here and purchased
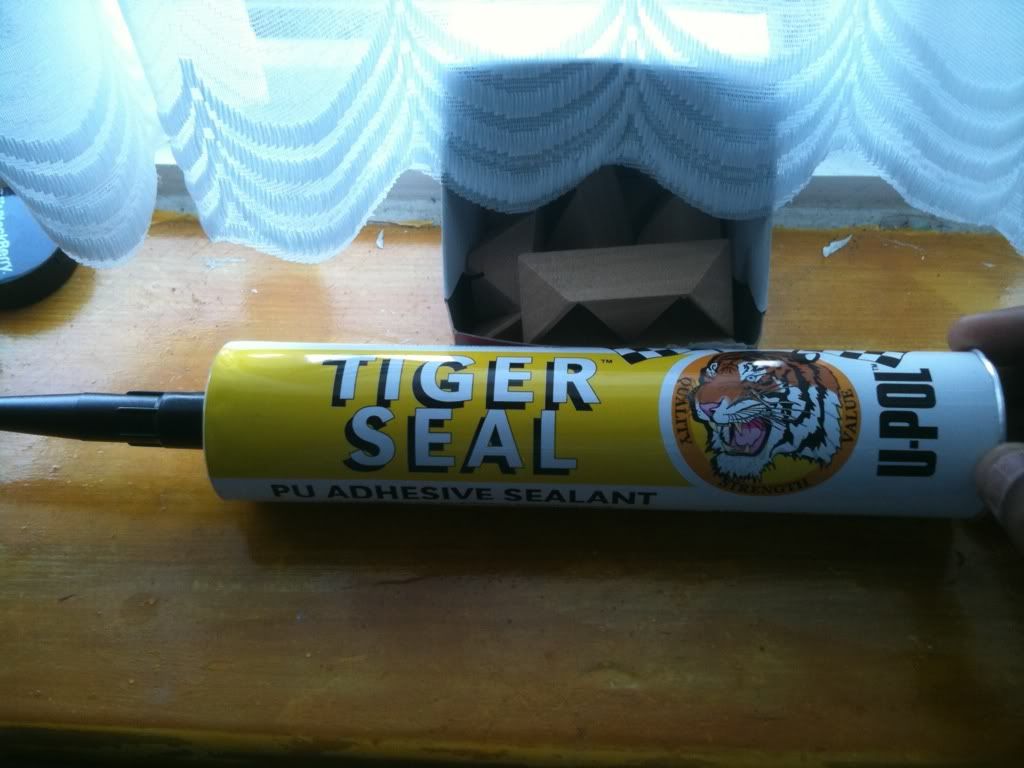
The only advice I can give anyone on here about fitting the spoiler is take your time, keep masking tape at the ready and be sure to prepare the two contact surfaces. Also, don’t come back to the car an hour after tiger sealing it and remove the tape because you think it will leave marks on the paint work; guess what? The tigerseal isn’t set yet, and if the rear wiper wasn’t in the position it was my spoiler would have dropped to the floor and needed major work done on it, another lucky escape.
This is how serious you have to be with the masking tape.
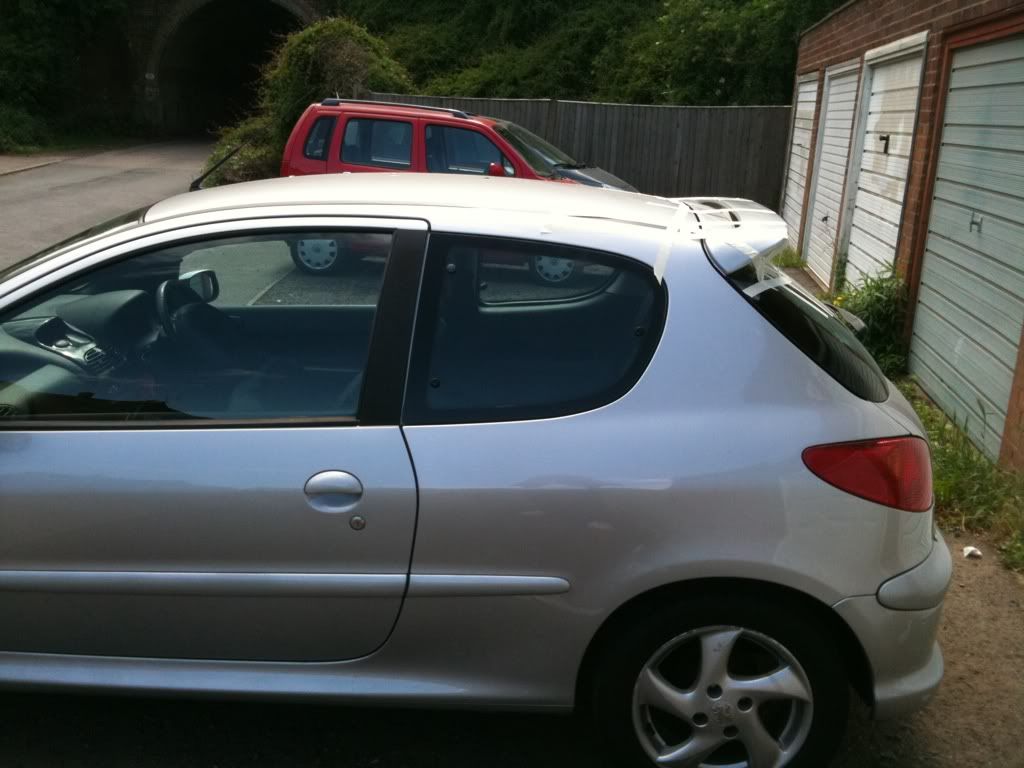
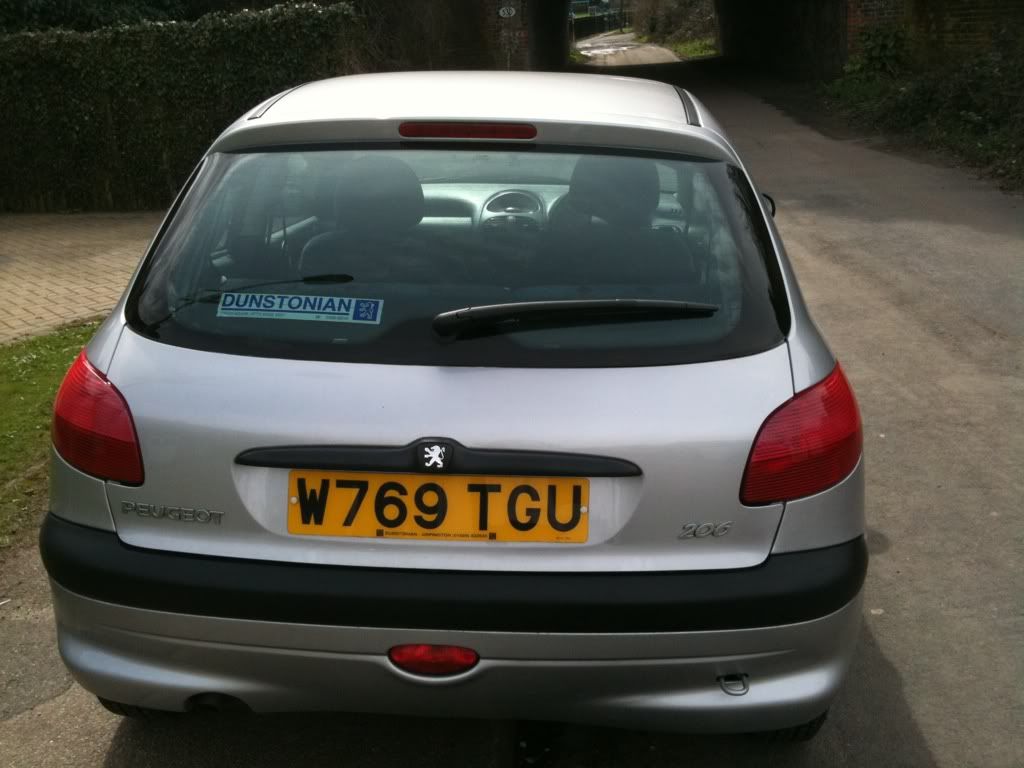
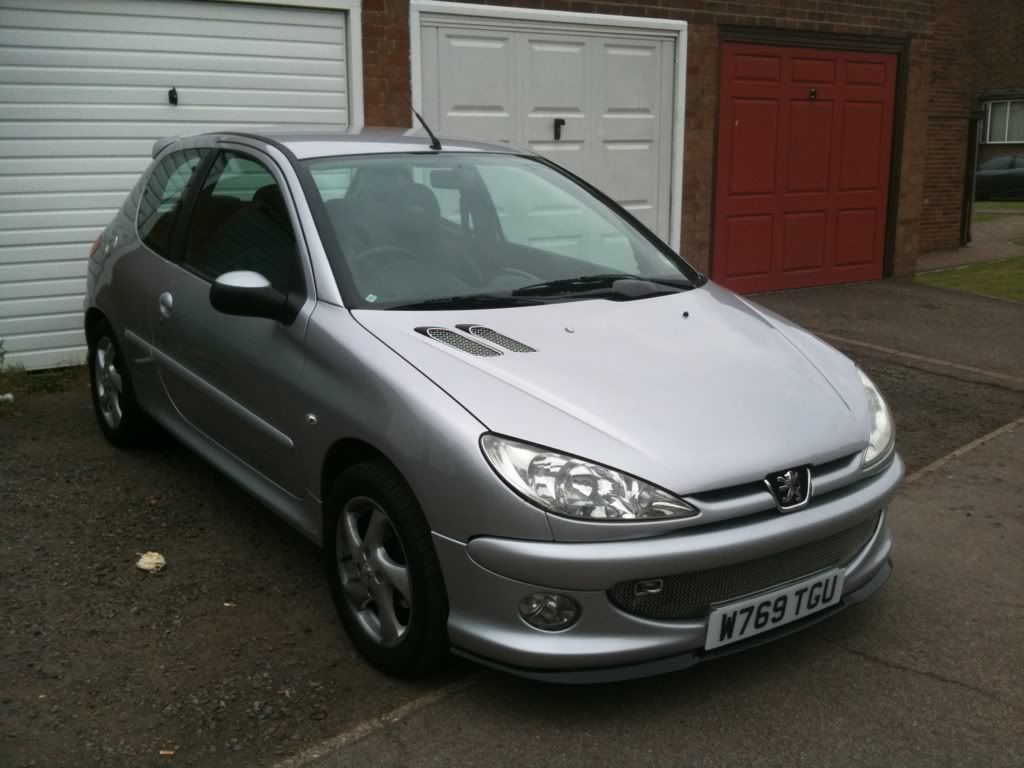
How It Stands
So this is how it stands at the moment:


Jobs to do:
Find and colour code my other phase 2 washer jet, lost it while moving some bits)
Amp front speakers
Light tints on the windows
Mask headlights
Mask fog lights
Sort dials once and for all lol.
That’s it, no doubt there will be some edits along the way but man looking back I have spent plenty time and money on it, I know it’s only a 1.4, hence why I haven’t done anything performance related but there’s no reason it can’t look nicer.
So thats it, brought feb 2010 so 15 months of work right here.
Thanks for reading guys, any nice comments welcome lol.
Please ignore any spelling/ grammatical errors, i gave up after a while.
| |  |
|
|
 |
Last edited by davieboy86 on Fri May 27, 2011 1:04 pm; edited 1 time in total
|
|
|
|
|
|
|
Posted: Wed May 25, 2011 12:07 pm |
|
|
|
|
Joined: Dec 22, 2010
Posts: 486
Trade Rating: +4
Location: East Sussex
|
|
Look good. I test drove a 206 with those blue seats. Remindes me Of old sofas.
| | |
|
|
|
|
 | |  |
| Abs
Peugeot 206 1.6 Sport (55)
Audi A1 2.0 TDi Sport (14) | |
 | |  |
|
|
|
|
|
|
|
Posted: Wed May 25, 2011 12:17 pm |
|
|
|
|
Joined: Feb 08, 2010
Posts: 877
Trade Rating: +13
Location: Hull, East Yorkshire
|
|
sweet! 
| | |
|
|
|
|
|
|
|
|
|
|
Posted: Wed May 25, 2011 12:29 pm |
|
|
|
|
Joined: Aug 01, 2010
Posts: 1741
Trade Rating: +7
Location: Peterborough
|
|
Massive transformation
Looks a lil like mine 
Apart from mine had red on it
| | |
|
|
|
|
| | |
| Peugeot 206 1.4LX - Sold
Peugeot 206 2.0HDI D-Turbo - Dead
Vokswagen Bora 2.0 - Sold
Seat Leon MK2 2.0 TDI - New
| |
| | |
|
|
|
|
|
|
|
Posted: Wed May 25, 2011 12:57 pm |
|
|
|
|
Joined: Feb 08, 2010
Posts: 1407
Trade Rating: +1
Location: Berkshire
|
|
looking really good, done loadsa nice mods to it
| | |
|
|
|
|
| | |
| New car 2011 / Thoruim grey , 207 1.4 Vti 16v Sport 95bhp , tinted rear windows.
Old car 2000/ 206 2.0 hdi. | |
| | |
|
|
|
|
|
|
|
Posted: Wed May 25, 2011 1:37 pm |
|
|
|
|
Joined: Feb 15, 2010
Posts: 1848
Trade Rating: +6
Location: Leamington Spa
|
|
loooool at the tape for the spoiler.... i love it mate, how do they say it..... "bang tidy" lol
| | |
|
|
|
|
|
|
|
|
|
|
Posted: Wed May 25, 2011 3:59 pm |
|
|
|
|
Joined: Feb 07, 2010
Posts: 3978
Trade Rating: +8
Location: Leeds / West Midlands
|
|
Very nice project massive improvement!
Lose the blue footwell lights for me but other than that all very nice!
Oh and a bit lower 
| | |
|
|
|
|
|
|
|
|
|
|
Posted: Thu May 26, 2011 1:53 am |
|
|
|
|
Joined: Apr 26, 2010
Posts: 5489
Trade Rating: +12
Location: Herts/London
|
|
bravo mate! excellent thread and excellent progress!
looking forward to seeing the masked lights then it will be schweeet!
well done mate.
| | |
|
|
|
|
|
|
|
|
|
|
Posted: Thu May 26, 2011 6:18 am |
|
|
|
|
Joined: Mar 15, 2010
Posts: 384
Trade Rating: +9
Location: Kent,
|
|
Cheers for the comments so far guys, still so much to do, well worth the effort though
| | |
|
|
|
|
|
|
|
|
|
|
Posted: Mon Jan 16, 2012 10:46 am |
|
|
|
|
Joined: Mar 29, 2010
Posts: 3977
Trade Rating: +15
Location: Halifax
|
|
Very good mate. Got many better shots of the pillars? Was thinking of doing the same but I painted them in the end as I was not sure about them. The C pillars could be very tricky too especially as the belt comes out of them.
| | |
|
|
|
|
|
|
|
|
|
|
Posted: Mon Jan 16, 2012 11:21 am |
|
|
|
|
Joined: Feb 07, 2010
Posts: 852
Trade Rating: +1
Location: Tamworth
|
|
Cracking improvements dude, oh and your a fellow United supporter. So double thumbs up from me!!
| | |
|
|
|
|
|
|
|
|
|
|
Posted: Mon Jan 16, 2012 11:23 am |
|
|
|
|
Joined: Feb 07, 2010
Posts: 762
Trade Rating: +13
Location: Margate, Kent
|
|
Very nice, massive inprovement.
| | |
|
|
|
|
|
|
|
|
|
|
Posted: Tue Jan 17, 2012 10:37 am |
|
|
|
|
Joined: Jun 20, 2011
Posts: 10
Trade Rating: 0
Location: Felixstowe
|
|
Love the f*ck it ill give it a go mentality, wish i was brave enough !!
looking good man, keep the thread updated
| | |
|
|
|
|
|
|
|
|
|
|
Posted: Tue Jan 17, 2012 10:49 am |
|
|
|
|
Joined: Feb 07, 2010
Posts: 5120
Trade Rating: +19
Location: Raunds, Northamptonshire
|
|
very nicely done, love the boot strip and foot well lights, nice little touches. 
keep it up
| | |
|
|
|
|
|
|
|
|
|  |
| |
| |
You cannot post new topics in this forum
You cannot reply to topics in this forum
You cannot edit your posts in this forum
You cannot delete your posts in this forum
You cannot vote in polls in this forum
You cannot attach files in this forum
You can download files in this forum
|
|
|
| |
|