 |
 General General Info Goodies Info Goodies Search Search Web Stats Web Stats Members Members
 Donations Donations
|
|
|
|
|
 |
|
Forums › Tuning, Modification & Legal › Project Cars › My old Gti from start to finish |
|
 |
 |
 |
 |
|
Author
|
Message |
|
|
 Posted: Fri Sep 10, 2010 6:38 am Posted: Fri Sep 10, 2010 6:38 am |

|
|
|
|
Joined: Sep 05, 2010
Posts: 71
Trade Rating: 0
Location: Hampshire
|
 |
Ok guys and gals, as I had this thread up before the site went down I've decided to re-do it. Enjoy 
I've missed out various mechanical jobs which I really should have taking pictures of but I tend to get carried away and just get on with things.
The Basket Case
If you knew of a little French ‘hot hatch’ that had failed it’s MOT on soo many things the owner had decided not to fix it, sat for 6 months not moving and been vandalised in the process wouldn’t you feel sorry for it?
Well I did, and it cost me 
A friend of the family was telling me about her Peugeot 206 that had failed it’s MOT in spectacular fashion, no surprise there I thought. She then told me how it had sat on a driveway for a few months where some children had vandalised it; keying a few panels and kicking in the front wing. Apart from wanting to dismember such children I was feigning interest in the story until she asked me if I wanted to go and have a look at it.
She had visited some dealers who said they would have ‘taken it off her hands’ in part exchange and probably scrapped it so it was worth going to look at it before it went. This is when I started to find out some interesting facts about it; as it turned out, the car had low mileage, a very good service history and was actually a GTi. It looked very sorry for itself but it had potential for sure! 
I decided to take it as a bit of a project (my Mazda was tediously reliable and I needed something to sink my teeth into)


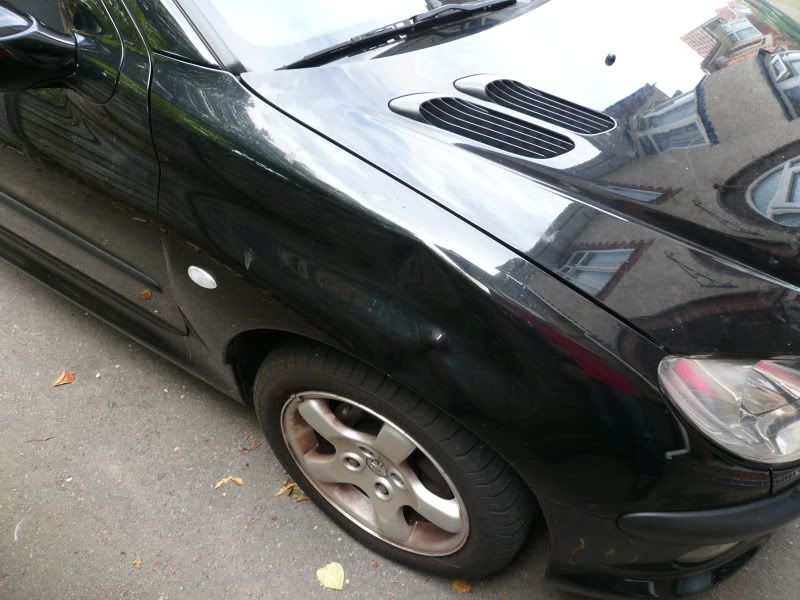
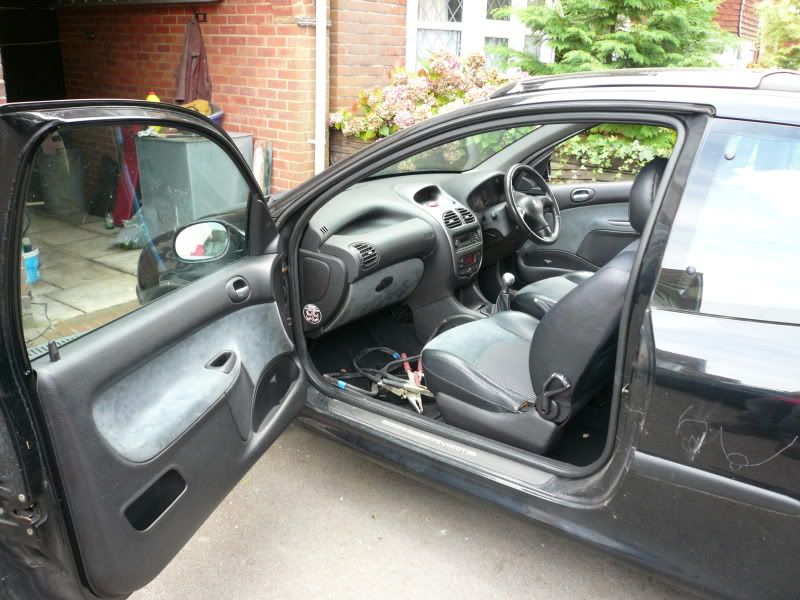
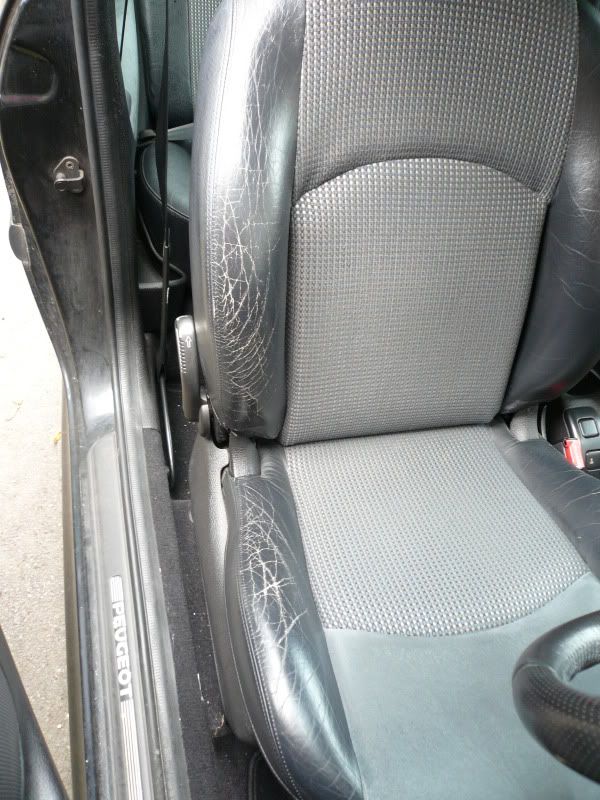
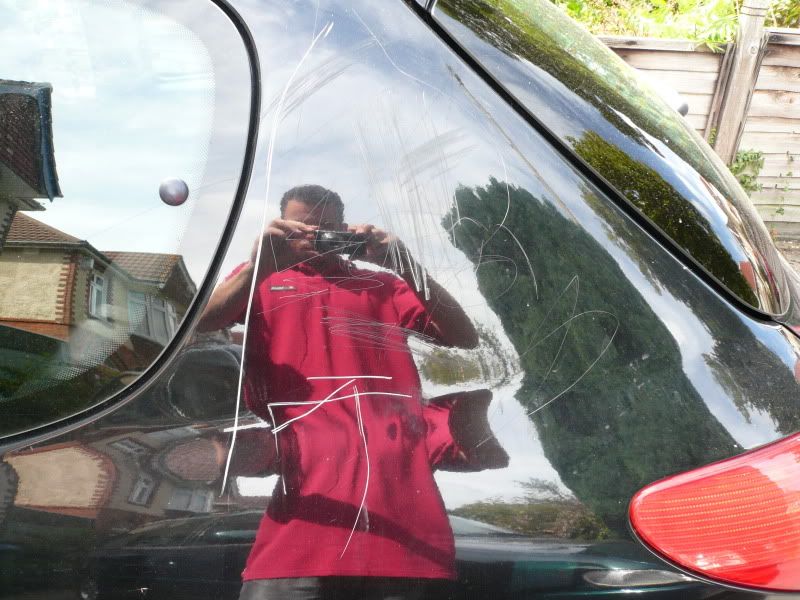
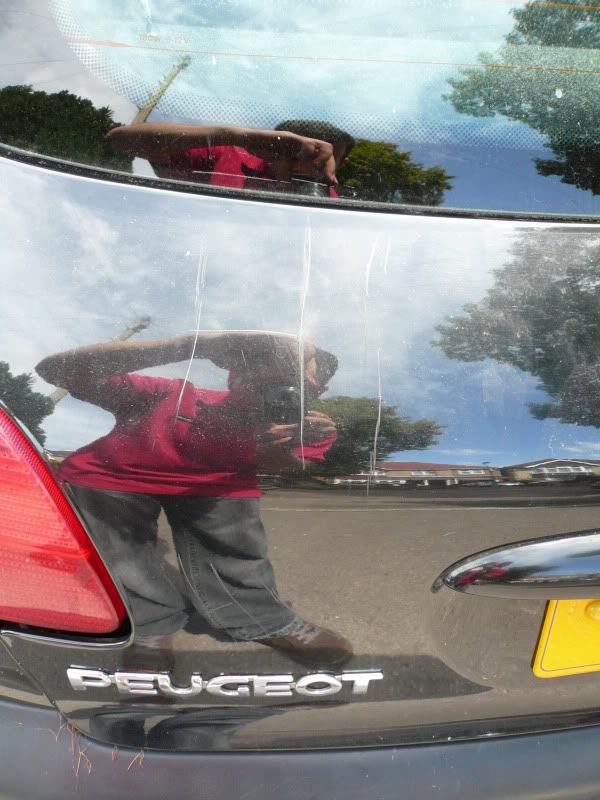
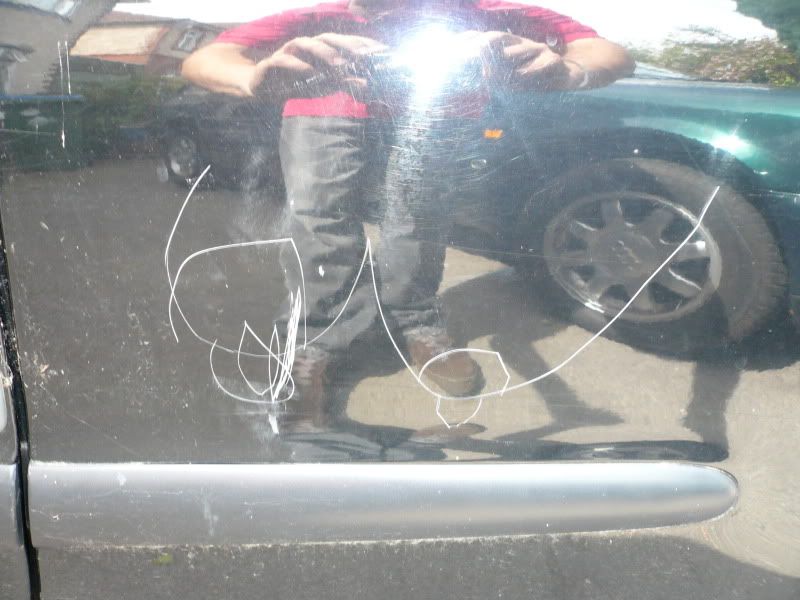
This picture would be funny if it wasn’t equally tragic.
The first job was give the car a clean and see where I stood; although it looked OK at a glance, the damage was clearly visible. After my diagnosis I went to tuck the car back in the corner of the drive…but couldn’t as the battery had died, so that was the first part to buy.


With the car at least clean I set about getting it road worthy. The MOT failure sheet wasn’t as long as I suspected but the items were costly, it had failed on:
- All the brake discs and pads being worn/pitted
- Both front lower arms were worn
- Worst of all the rear axle had play in the radius arm bearing
Along with some other smaller failures and some advisories.
While I looked into how to solve the problem with the rear axle I did the simpler jobs, though being a Peugeot means even those aren’t a walk in the park. The age of the car was right on the crossover date of several changes meaning there were several possible combinations of discs and pads. I therefore had to measure them all before I could order the replacements.
While I was doing this I took the opportunity to scrub off the callipers and give them a quick coat of paint.
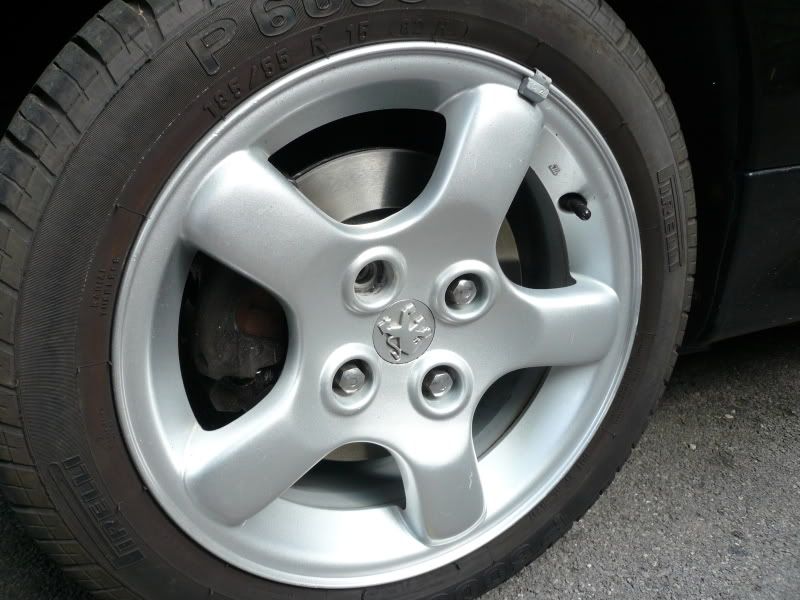
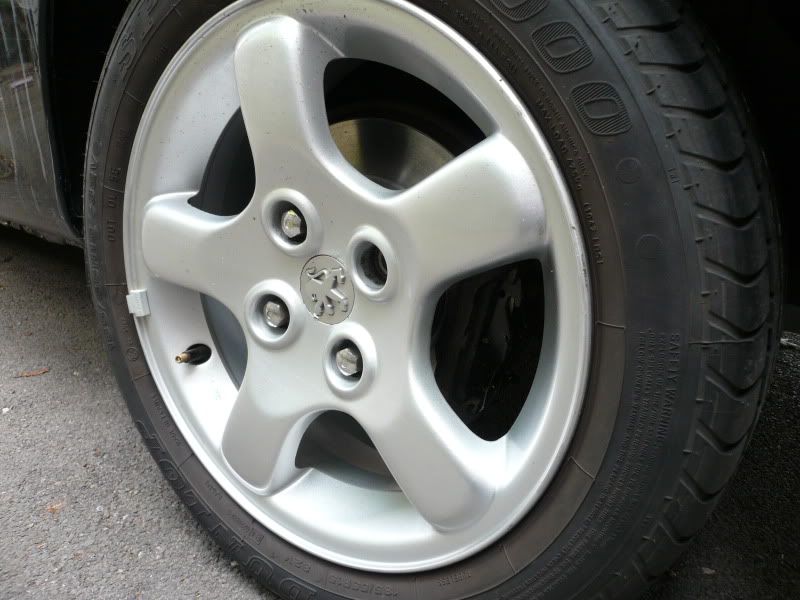
The lower arms were also interesting as it transpired the GTi had slightly different items with stronger bushes. Many parts suppliers did not recognise this and would have merrily supplied the wrong parts, although they would have physically fit, they wouldn’t have been correct. Eventually I found the correct items and replaced them. To do this, you need to manoeuvre the upright and driveshaft away from the gearbox slightly; as there is no circlip holding this in place, the CV joint slides out slightly and leaks gearbox fluid which you then have to top back up.
After reading up on this very forum, I found out that the rear axle failure is not uncommon but is still expensive to fix. What happens is the bearings around the rear radius arm stub pin tend to collect water, corrode and fail. This usually results in such a failure that the wheel makes contact with the inner arch.
I jacked the rear of the car up and pulled the wheels around to see if I could feel any movement. All I could detect was a very very small, minute in fact, amount of movement in one rear radius arm. No tell tale signs of scrubbing inside the arch or uneven tyre wear.
Before going any further I took the car to the same garage I would later book it’s MOT at and spoke to the owner. He carried out the same test as I did and we both agreed that due to the extremely minimal amount of movement, it hadn’t failed catastrophically and the bearing could just be replaced. As the bearings need to be pressed in place with hydraulic equipment (which I don’t own) I would let the garage do this job.
For peace of mind I also wanted to fit a new cambelt and waterpump but after reading some horror stories on how difficult the job was, I decided against doing this for the first time myself.
I booked the car into the garage for this work to be done and then an MOT test. Sadly I had a call a few days later telling me to come and have a look at the axle.
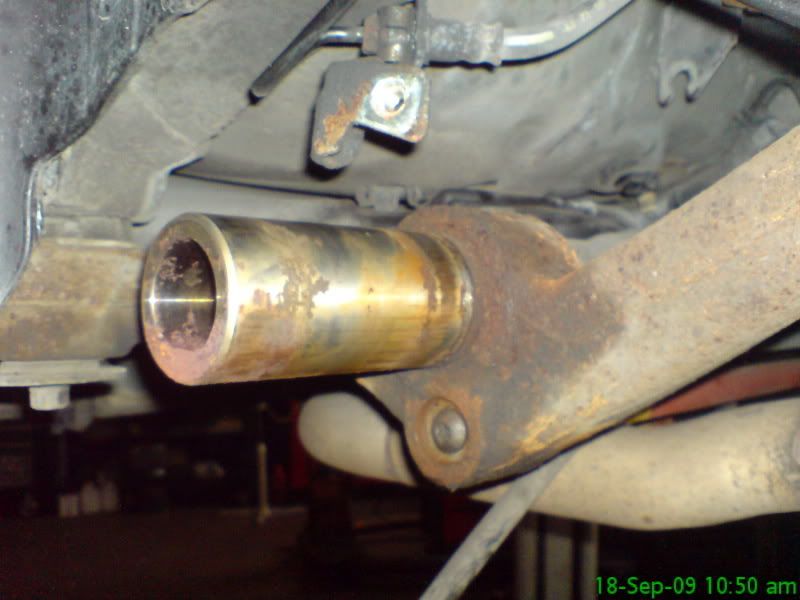
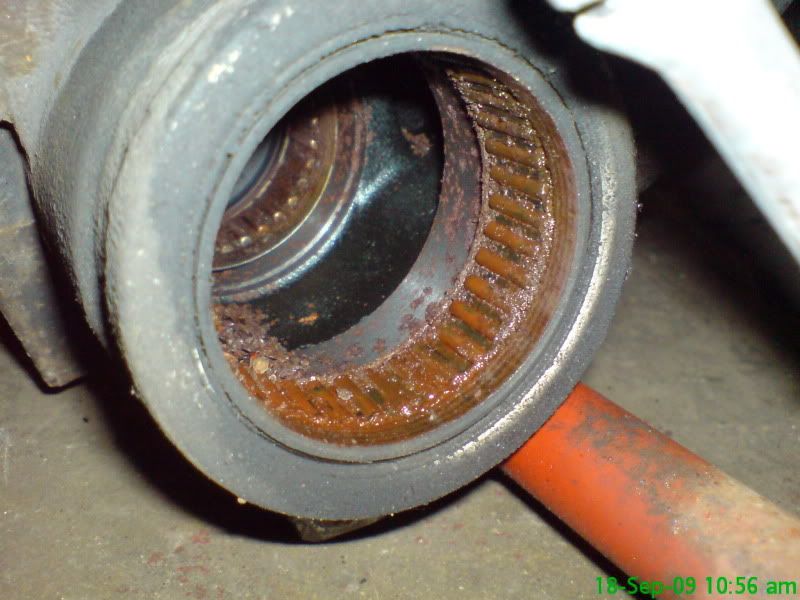
The mechanic had removed the radius arm only to discover the stub pin was severely corroded and damaged. It would be therefore pointless to fit a new bearing to it and the only course of action was to remove the axle and send it off for refurbishment.
This is where hindsight is a brilliant thing; if I’d have known the rear axle had to be removed and set off, I could have done that myself. No special tools required, just a bit of patience and brute force. However because the car was already in the garage with one arm off (and impossible to put back on) I had to fork out the labour bill for the garage to remove the axle.
I then collected it, brought it home and prepared it ready for refurbishment.
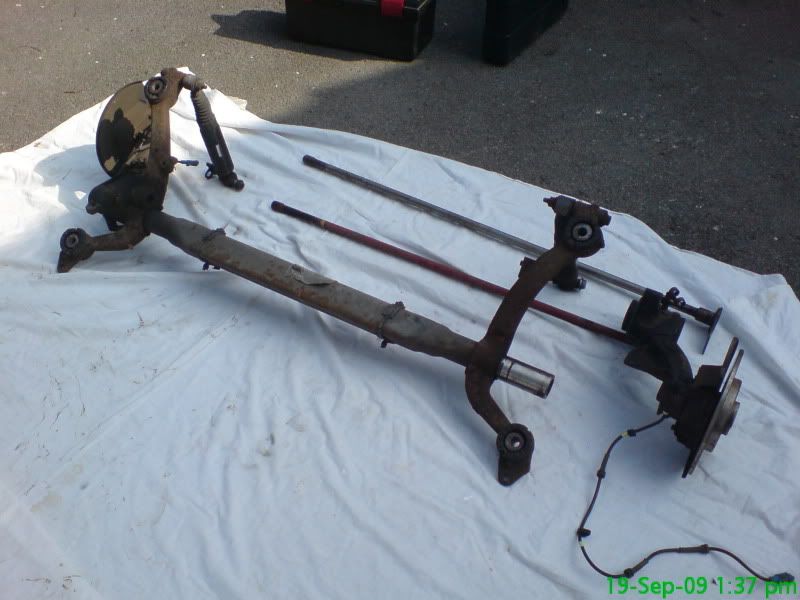
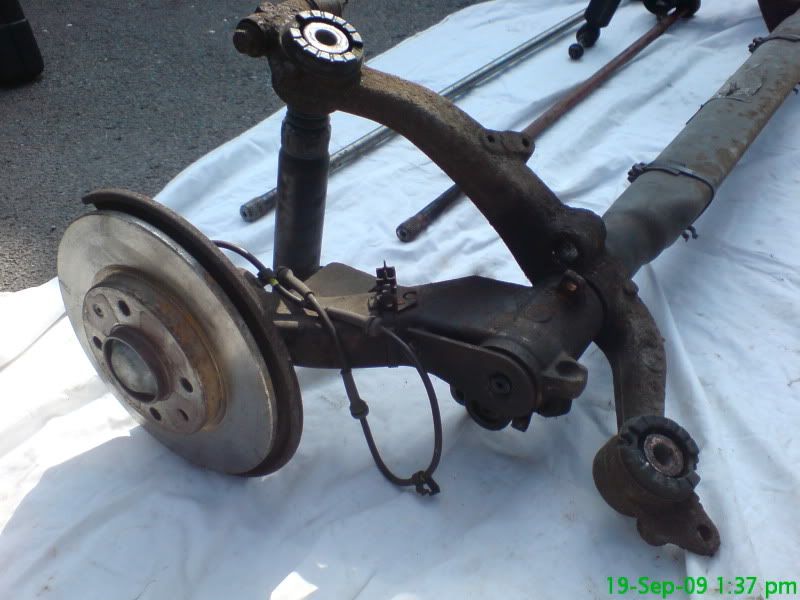
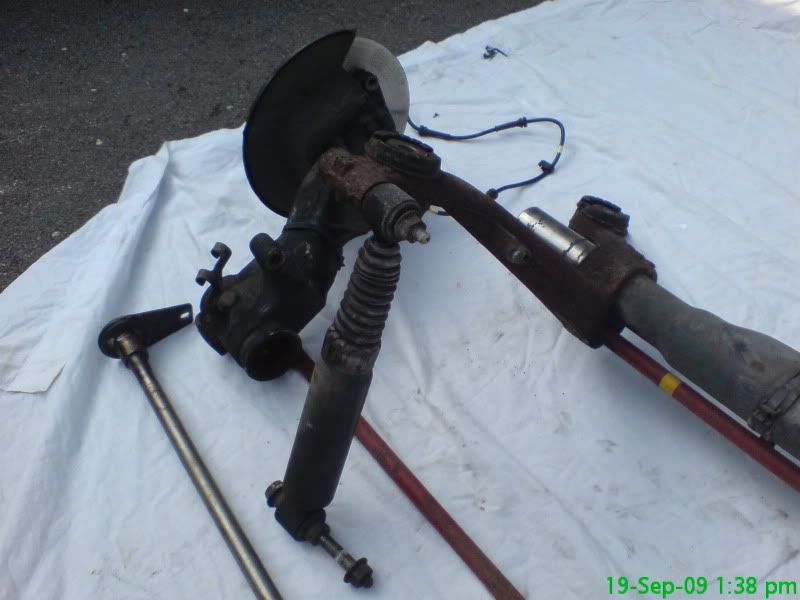
It had to be sent off half way up the country to be done and would spent 5 days there. With the axle back, I took it back to the garage where they could re-fit it.
A few days later I received a call from the garage saying the car was done but the mechanic had his suspicions about how the torsion bars had been set up. It was a bitter sweet moment when I picked the car up as although it was now fully road worthy and mechanically sorted, the rear end was sat about 40mm higher than it should have been.
Even though the refurbishment was guaranteed, it would have meant taking the whole axle back off the car and sending it off again, something I didn’t want to waste my time doing, so I set up the torsion bars correctly myself. The only saving grace here was that because it had already been taken apart once, nothing was seized or stuck in place and I was able to do the job in about an hour.
Next up was to sort out the bodywork and my plan was to search the local breakers yards to try and find the panels I needed, I even resorted to filling in online parts search engines. It will only make my blood boil to go into detail but suffice it to say that I was ripped off by a certain breakers yard in Blackburn so I had to resort to plan B.
Finding a GOOD bodyshop who don’t charge an extortionate amount is a very hard thing to do. The problem is that if you use somewhere you’ve not used before, by the time the job is done, if you’re not happy with it, it’s already been done.
I needed some PDR done on the car and through a company I’ve used before, I was recommended a local specialist who came round and did a great job. While he was here I asked him is he could recommend any good local bodyshops; he got straight on his phone and called his friend to get a quote. The next day I popped down there to show them the car and discuss exactly what was needed and we agreed that I would strip various parts of the car in order to keep the labour costs down. A few days later I dropped the car off confident that it would come back looking great again. Having my eye for detail really is a curse because I can’t say I was 100% happy but I was 98% and the car was looking fantastic.
The rear quarter panel and bootlid had been re-sprayed:
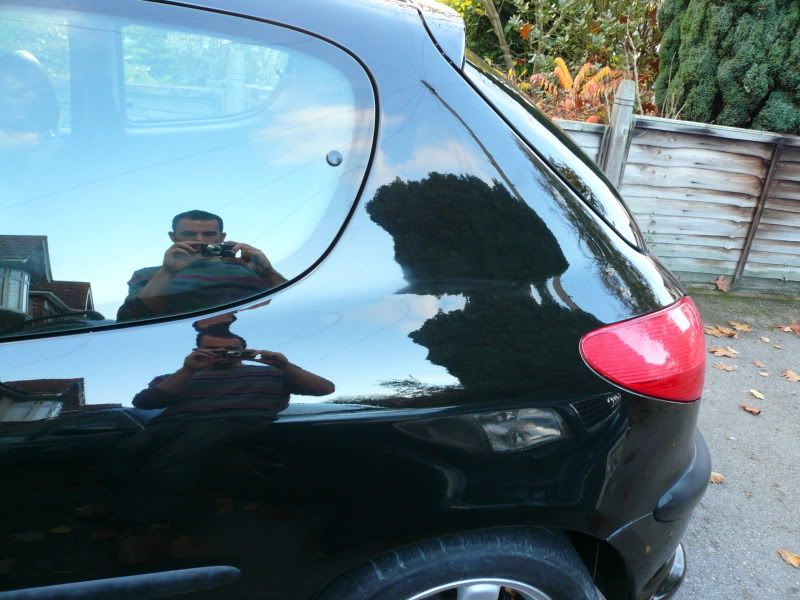
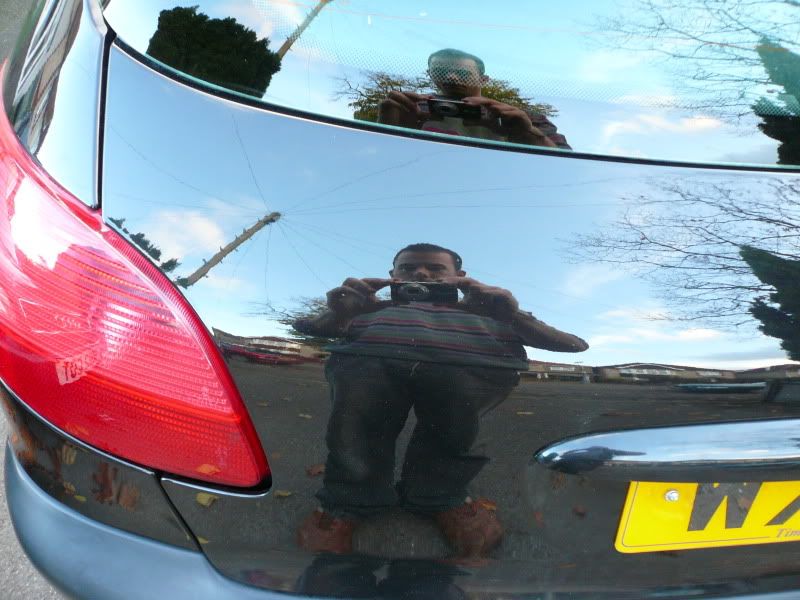
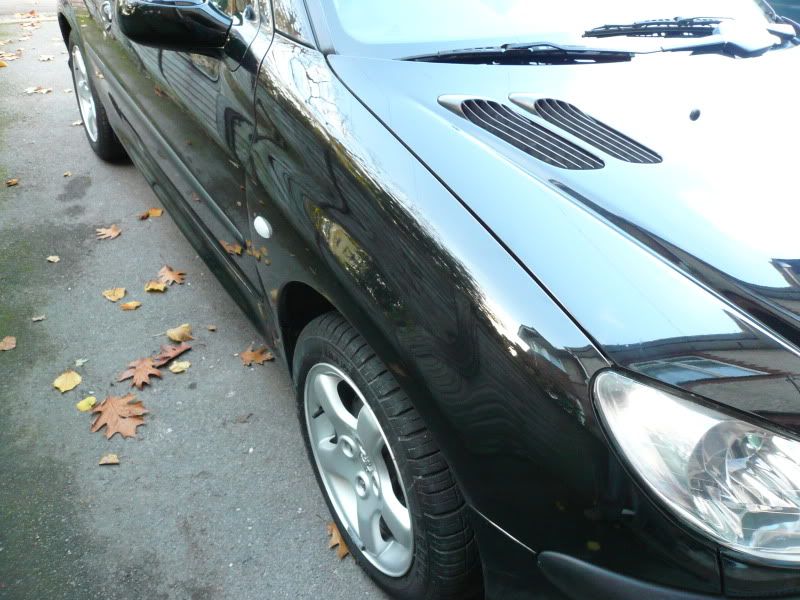
The wing was repaired and then re-sprayed, with the arch lining off I felt up inside the wing and the panel beater had done a great job of getting 99% of the dent out before using only a tiny amount of filler to finish it:
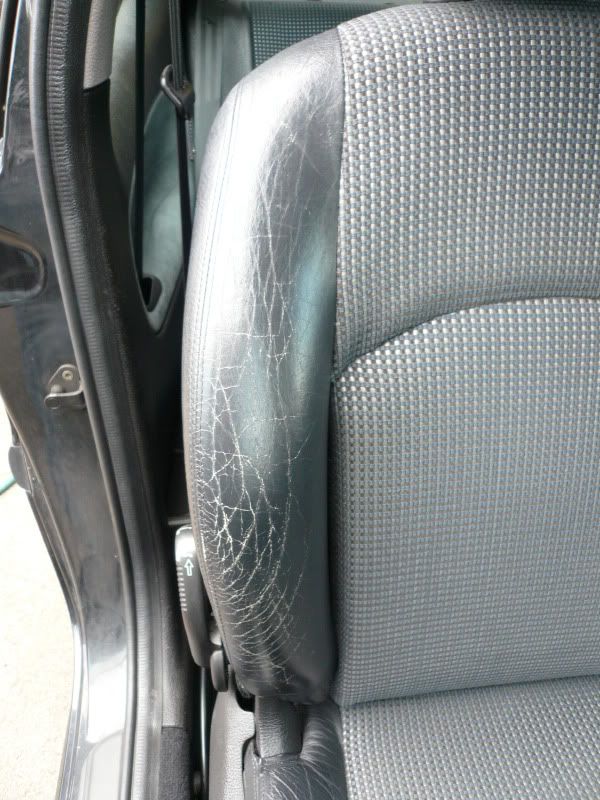
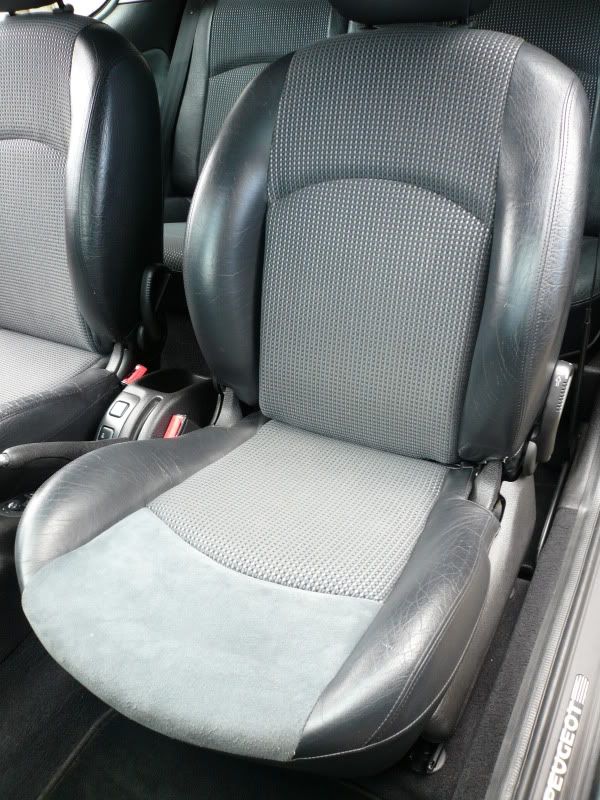
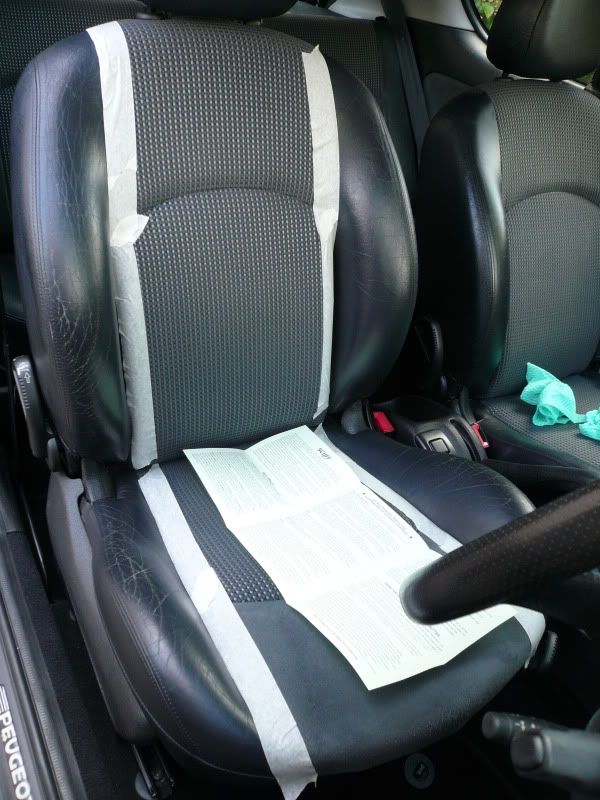
With the mileage of the car being as low as it was, the interior had worn rather badly considering. Again, a common issue on these cars but something I wasn’t happy about. After replacing countless plastic clips and screws etc I used a Liquid Leather product to restore the cracked half leather seats.
Drivers seat before:
Passenger seat before:
During:
After:
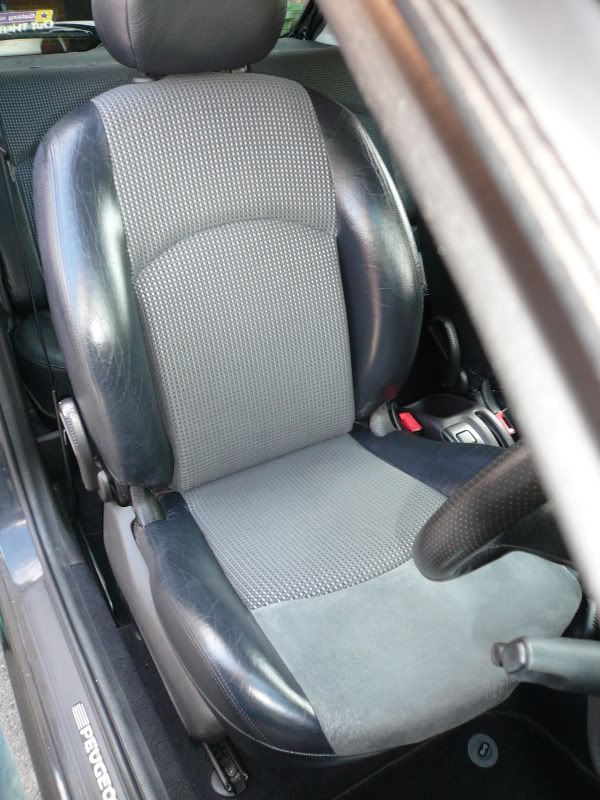
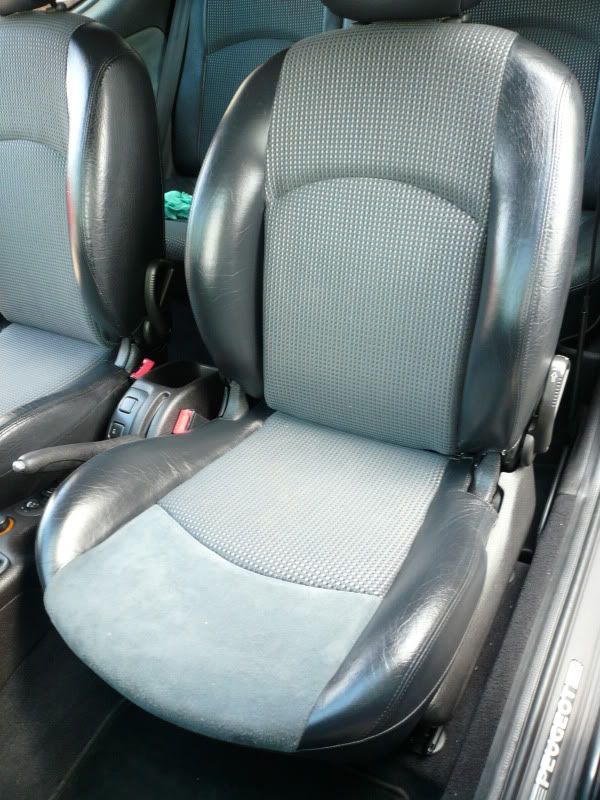
It was my first time using this product but I was pleased with the results and the car was finally ‘finished’.
I had every intention of keeping this car as I thought it was about time I owned something in keeping with my age and not 4 door family saloons, but it just wasn’t me. It was a very fun car to drive and had all the creature comforts to keep my happy but the sloppy gear change and long clutch travel stopped it from being a very capable little hot hatch in my opinion.


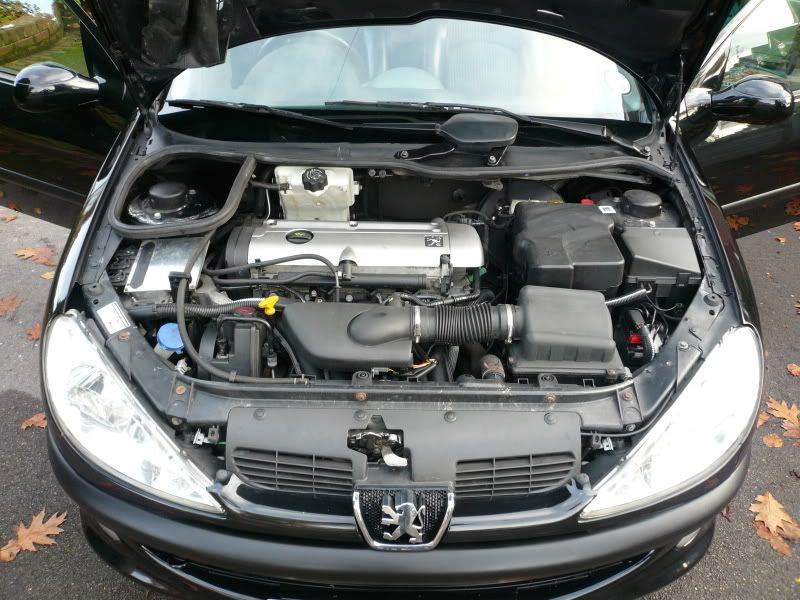


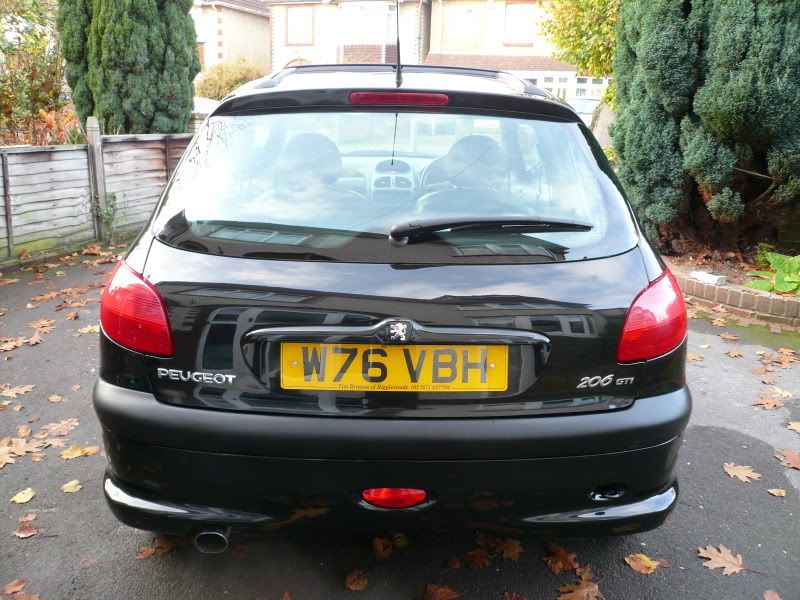


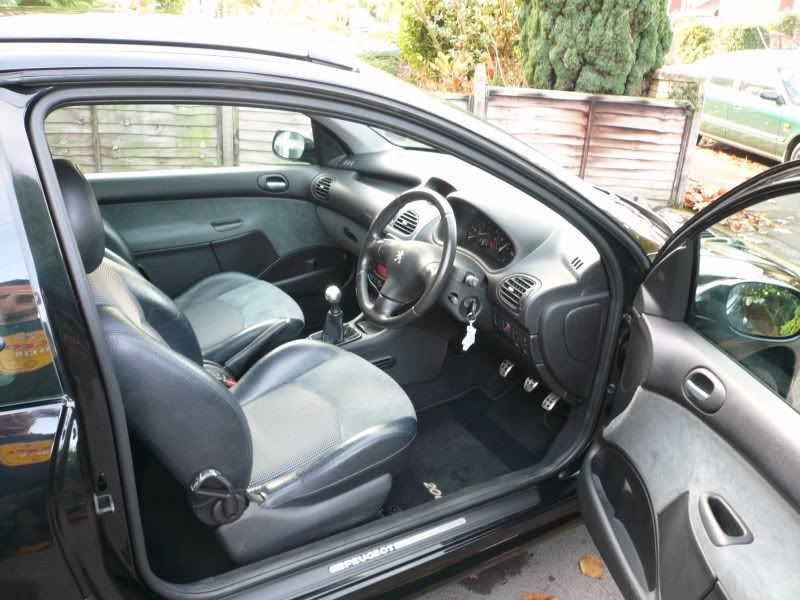
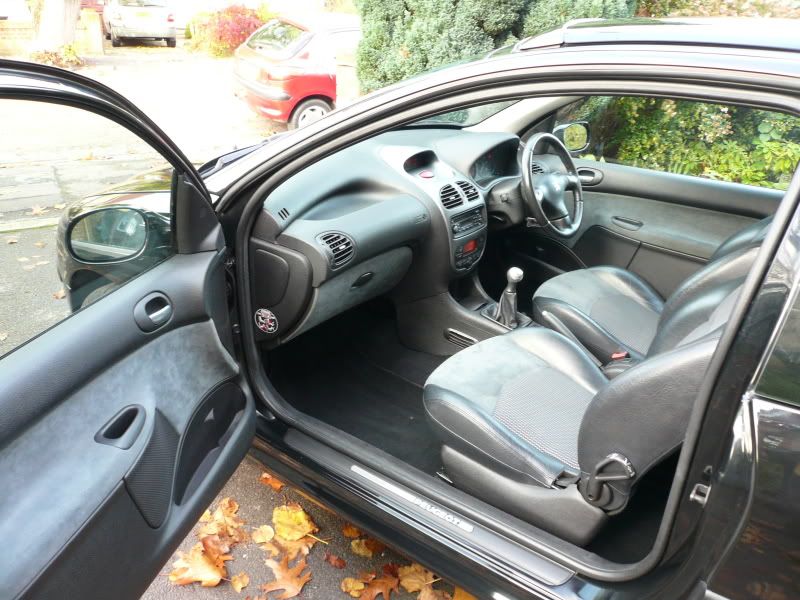
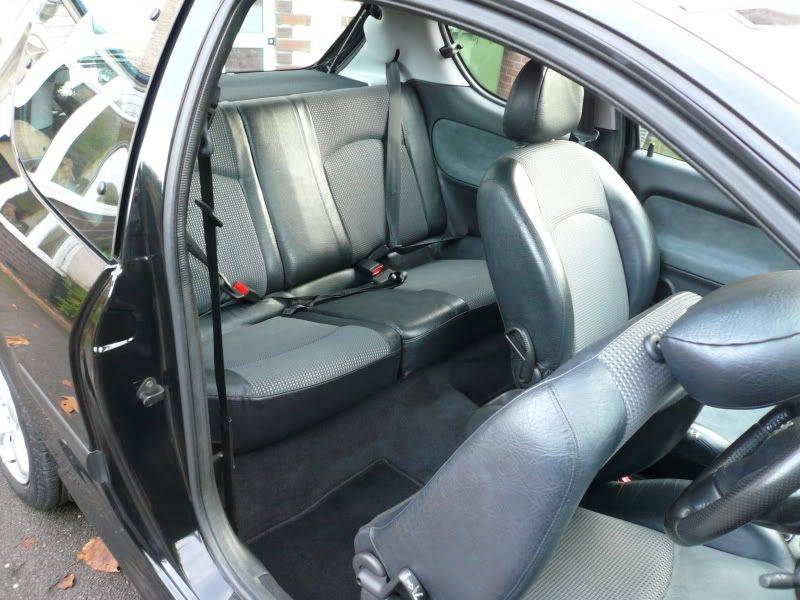
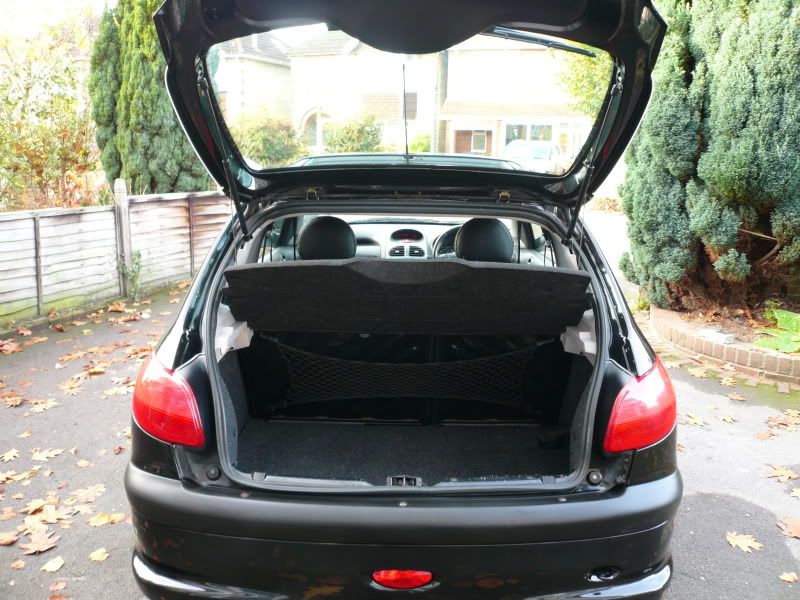

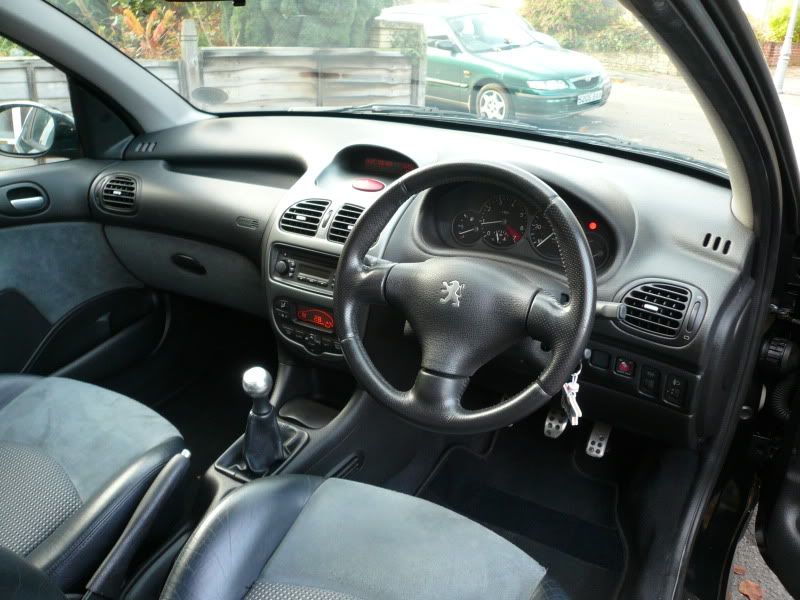
By this point I had spent a fair chunk of money on this car BUT it was completely sorted. A host of new parts and a going over a fine toothed comb had made it one of the best 138bhp GTi’s I think you could want. That was evident when the first person who came to see it bought it.
| |  |
|
|
 |
Last edited by Sphinx on Fri Sep 10, 2010 7:03 am; edited 1 time in total
|
|
|
 |
|
|
 Posted: Fri Sep 10, 2010 7:00 am Posted: Fri Sep 10, 2010 7:00 am |

|
|
|
|
Joined: Aug 25, 2010
Posts: 786
Trade Rating: +2
Location: East london
|
 |
that was a great read,
i liked the outcome of using the leather liquid 
| |  |
|
|
 |
|
WARNING: This User Has Had Bad Trade Feedback In The Past
|
|
|
 |
|
|
 Posted: Fri Sep 10, 2010 7:06 am Posted: Fri Sep 10, 2010 7:06 am |

|
|
|
|
Joined: Mar 29, 2010
Posts: 3977
Trade Rating: +15
Location: Halifax
|
 |
That was a good read. Fantastic job. the seats came up fantastic i thought you were going to replace them! good to see a car like that back on the road.
| |  |
|
|
 |
|
|
 |
|
|
 Posted: Fri Sep 10, 2010 8:20 am Posted: Fri Sep 10, 2010 8:20 am |

|
|
|
|
Joined: Feb 21, 2010
Posts: 3945
Trade Rating: +45
Location: basingstoke
|
 |
bloody hell that leather stuff is amazing, wouldnt of thought they would come up that good, looks like you did a really good job on that car, what car are you driving know
| |  |
|
|
 |
 | |  |
| PAST -2008 Vauxhall Astra VXR / 2002 pug 206 GTI
PRESENT - VW Golf GTI Semi - Auto
Now have my 106 GTI track car 
TEAM - I HATE FACEBOOK  | |
 | |  |
|
|
|
 |
|
|
 Posted: Fri Sep 10, 2010 8:31 am Posted: Fri Sep 10, 2010 8:31 am |

|
|
|
|
Joined: Mar 31, 2010
Posts: 78
Trade Rating: 0
Location: Leicester
|
 |
What liquid leather product did you use? That interior looks fantastic! 
| |  |
|
|
 |
|
|
 |
|
|
 Posted: Fri Sep 10, 2010 9:32 am Posted: Fri Sep 10, 2010 9:32 am |

|
|
|
|
Joined: Sep 05, 2010
Posts: 71
Trade Rating: 0
Location: Hampshire
|
 |
Blimey you all like your interiors don't you lol
It was the liquid leather scuffmaster kit and I've got to say, that was the first time I used it but I've used it since and got even better results.
As for my current car, it's an e36 325i coupe, manual with an LSD and sports interior  again used the kit on that too and bought it back from the brink. again used the kit on that too and bought it back from the brink.
| |  |
|
|
 |
|
|
 |
|
|
 Posted: Fri Sep 10, 2010 9:39 am Posted: Fri Sep 10, 2010 9:39 am |

|
|
|
|
Joined: Feb 07, 2010
Posts: 557
Trade Rating: +18
Location: Newport
|
 |
can i please have exact name and where i can get the leather magic cream, my seats will love me if i treat them to this!
| |  |
|
|
 |
 | |  |
| Before:
1.4L Verve, Diablo Red, wolfrace alloys, ICE, Tints
Now: 1.1L  LX, EYC silver, ICE, GTI Alloys LX, EYC silver, ICE, GTI Alloys
Name: Adam Occupation: Self-Employed - Timber sales | |
 | |  |
|
|
|
 |
|
|
 Posted: Fri Sep 10, 2010 9:44 am Posted: Fri Sep 10, 2010 9:44 am |

|
|
|
|
Joined: Sep 05, 2010
Posts: 71
Trade Rating: 0
Location: Hampshire
|
 |
|
 |
|
|
 |
|
|
 Posted: Fri Sep 10, 2010 10:28 am Posted: Fri Sep 10, 2010 10:28 am |

|
|
|
|
Joined: Feb 07, 2010
Posts: 557
Trade Rating: +18
Location: Newport
|
 |
thankyou
| |  |
|
|
 |
 | |  |
| Before:
1.4L Verve, Diablo Red, wolfrace alloys, ICE, Tints
Now: 1.1L  LX, EYC silver, ICE, GTI Alloys LX, EYC silver, ICE, GTI Alloys
Name: Adam Occupation: Self-Employed - Timber sales | |
 | |  |
|
|
|
 |
|
|
 Posted: Wed Sep 15, 2010 9:34 am Posted: Wed Sep 15, 2010 9:34 am |

|
|
|
|
Joined: Sep 05, 2010
Posts: 71
Trade Rating: 0
Location: Hampshire
|
 |
|
 |
|
|
 |
 |
|  |
| |
| |
You cannot post new topics in this forum
You cannot reply to topics in this forum
You cannot edit your posts in this forum
You cannot delete your posts in this forum
You cannot vote in polls in this forum
You cannot attach files in this forum
You can download files in this forum
|
|
|
| |
|